 #Art I made with #Midjourney V3 #AI
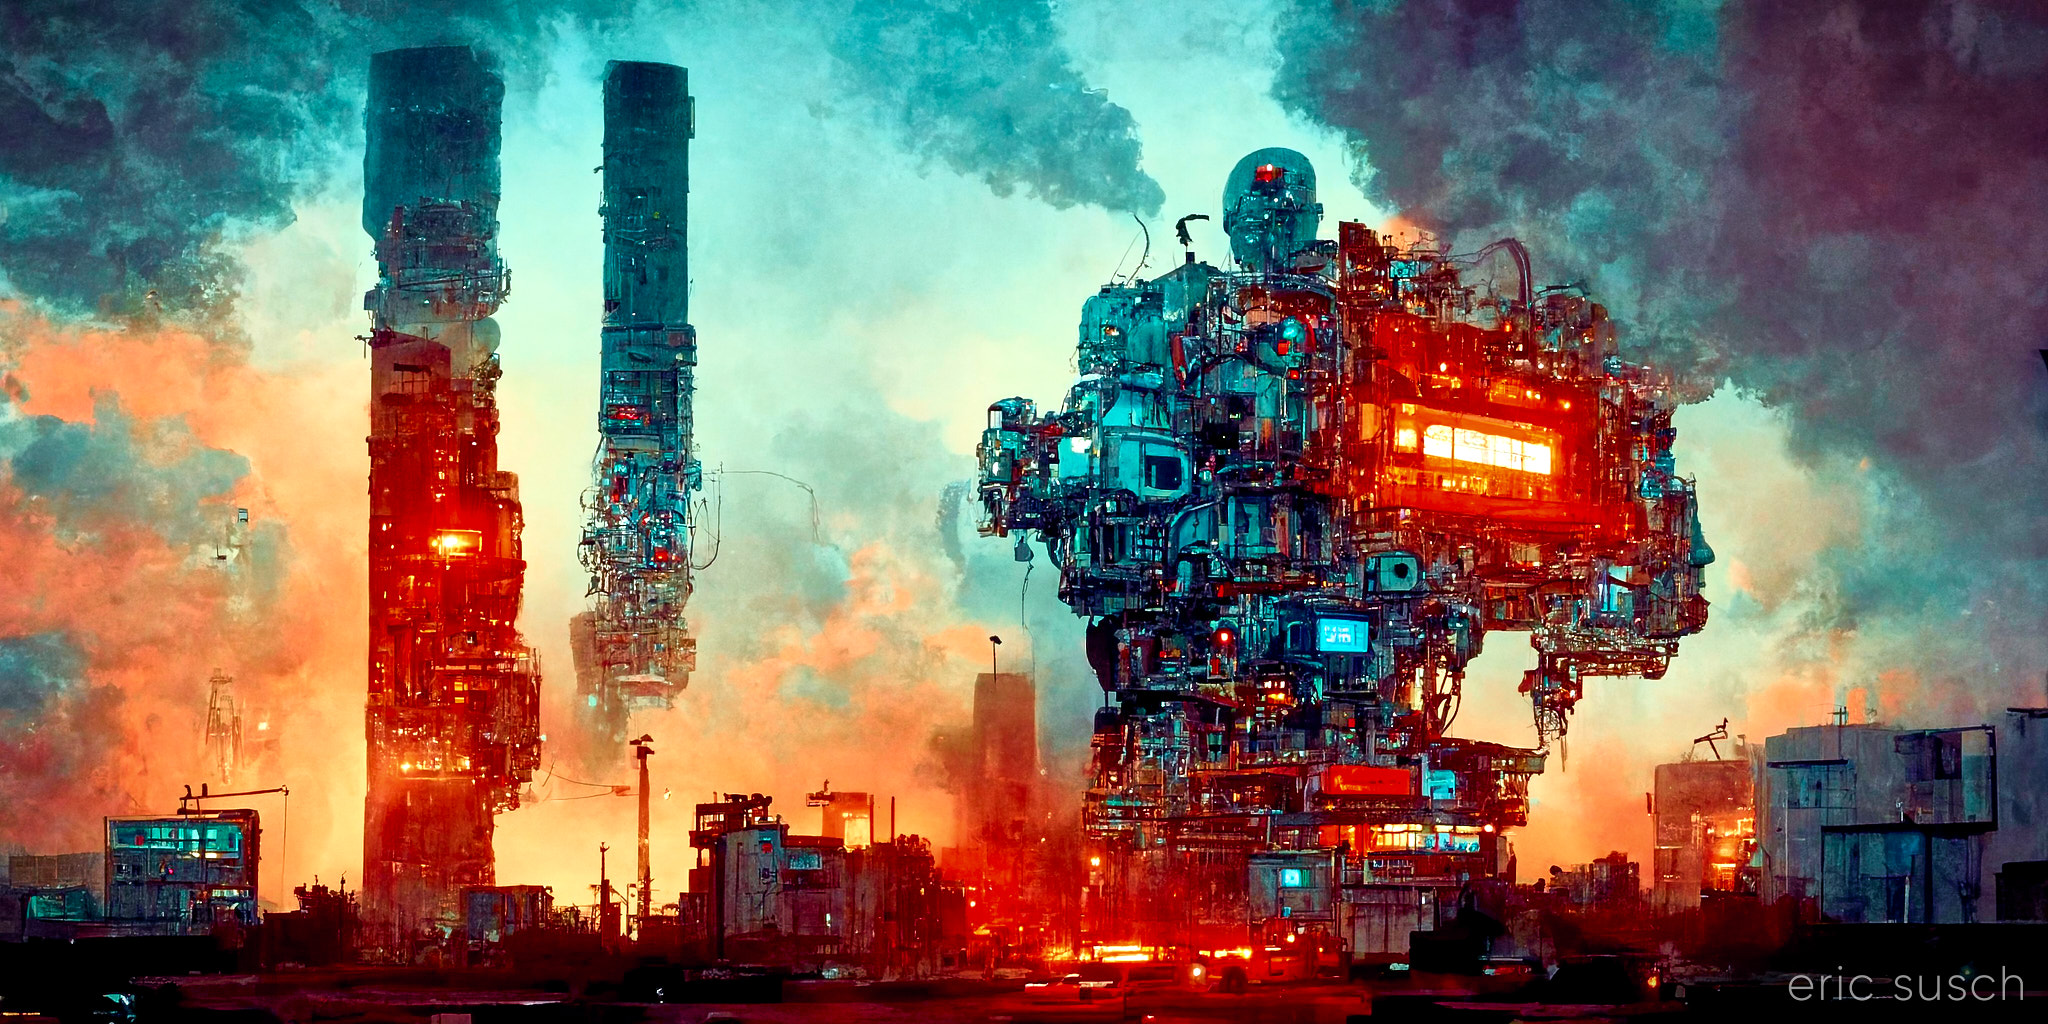
Industry is Progress!
Leave a reply
#Art I made with #Midjourney V3 #AI
 I’m still trying to make some of my CGI art look like it’s from a motion picture. What makes something look cinematic? Color? Framing? I’m still not sure. That’s what I was experimenting with in this portrait – a real person, in a real location, in a movie… A simple moment from a larger scene.
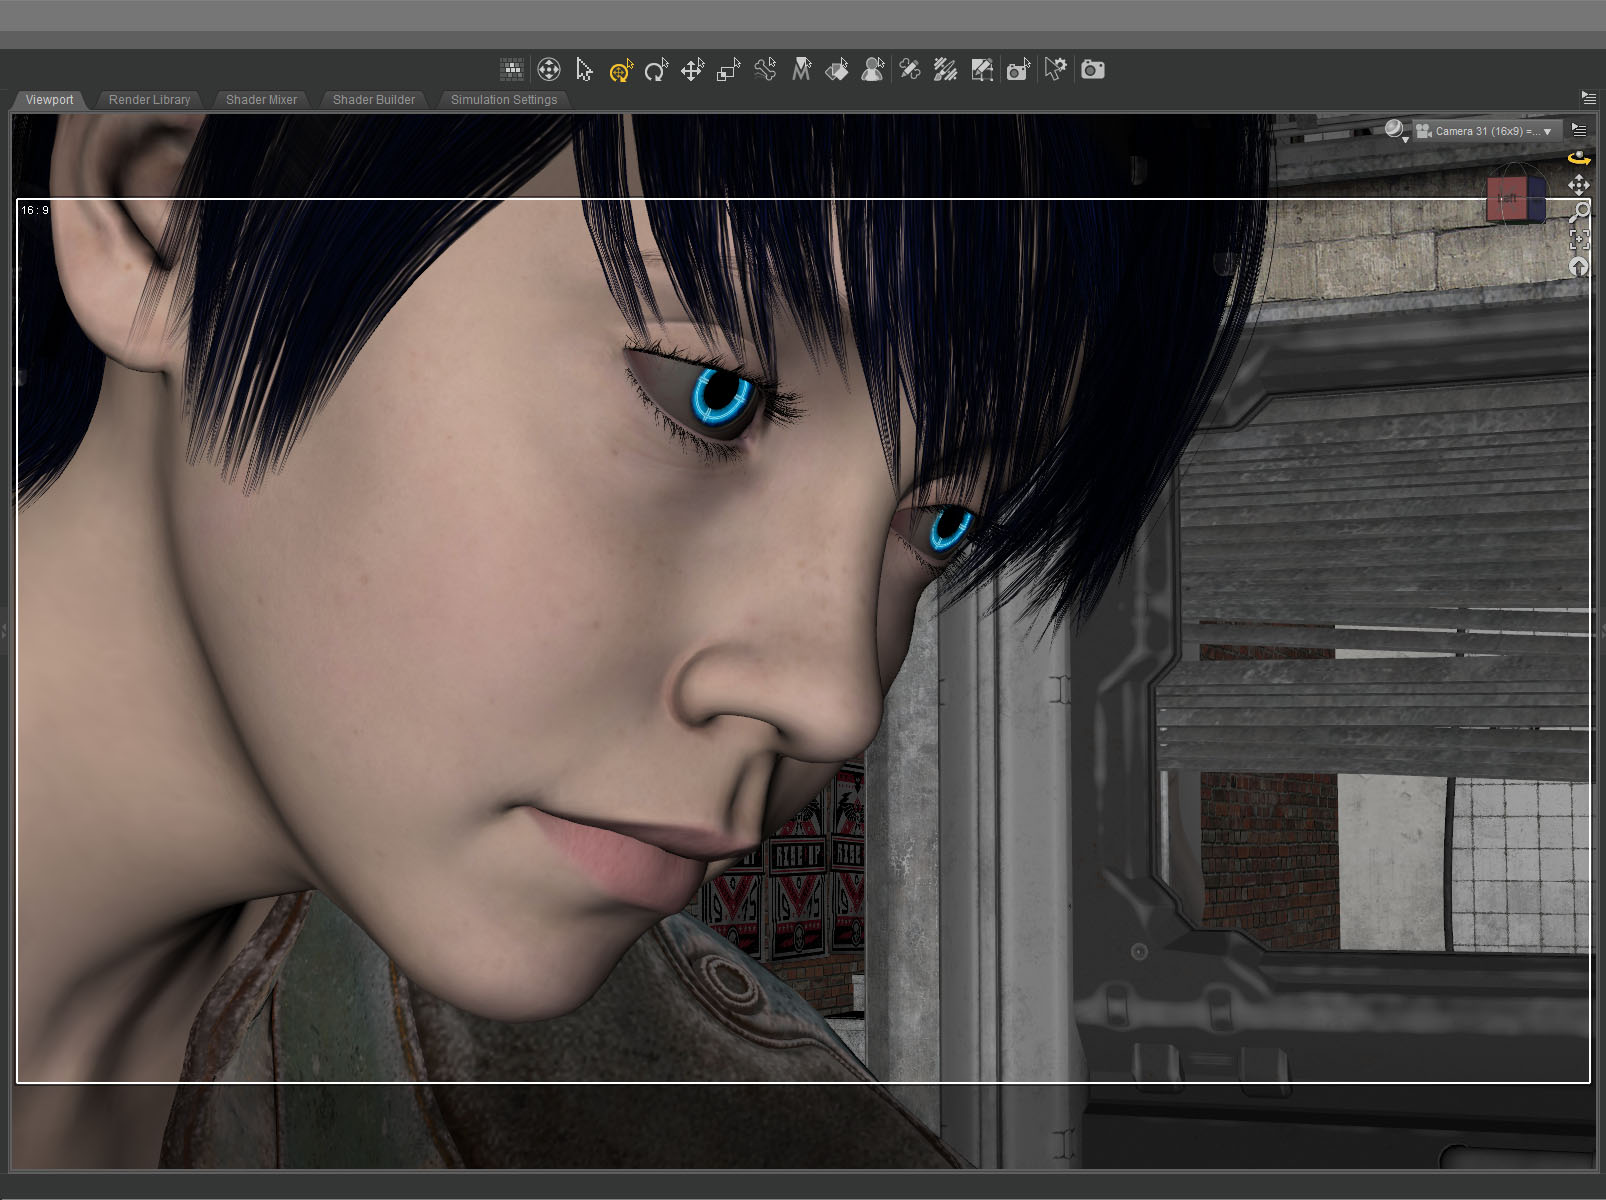
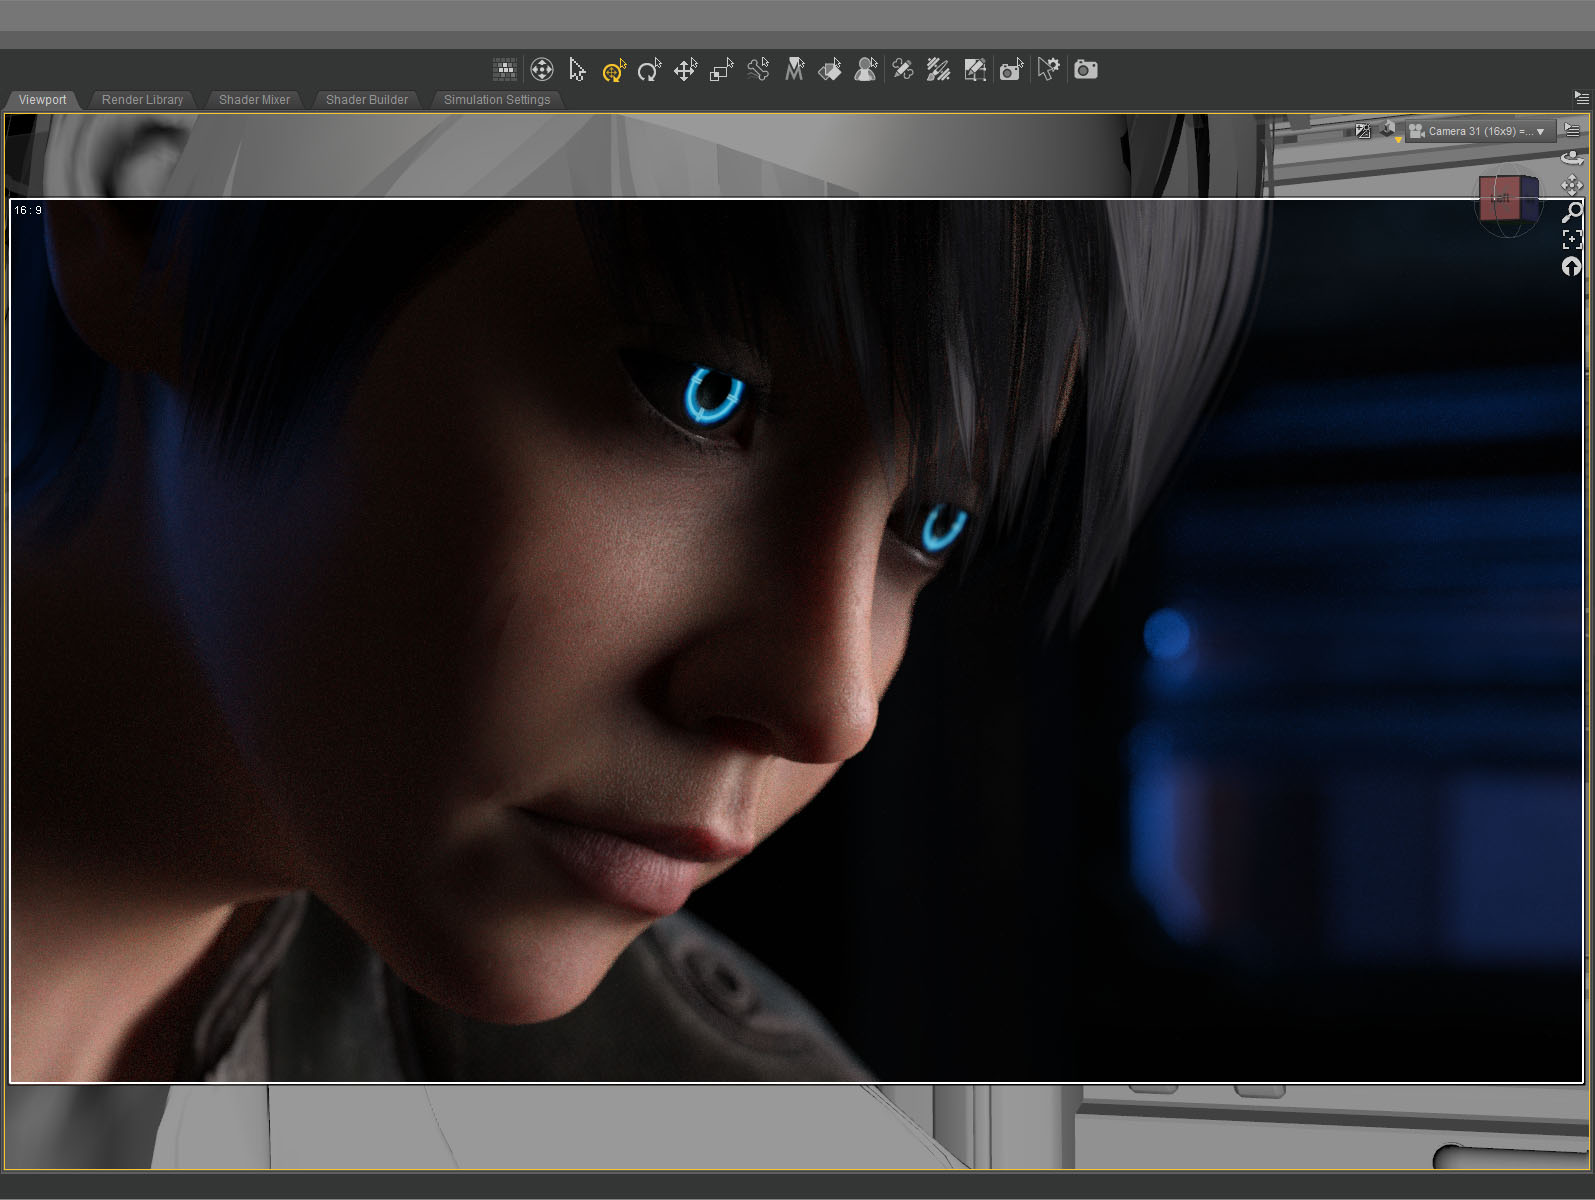
The setup was simple: face, hair, jacket, background. I set the camera lens at 100mm, 16×9 aspect ratio and found a good closeup. I messed with the depth of field quite a bit to get the background soft but not too soft (this isn’t a DSLR movie.)
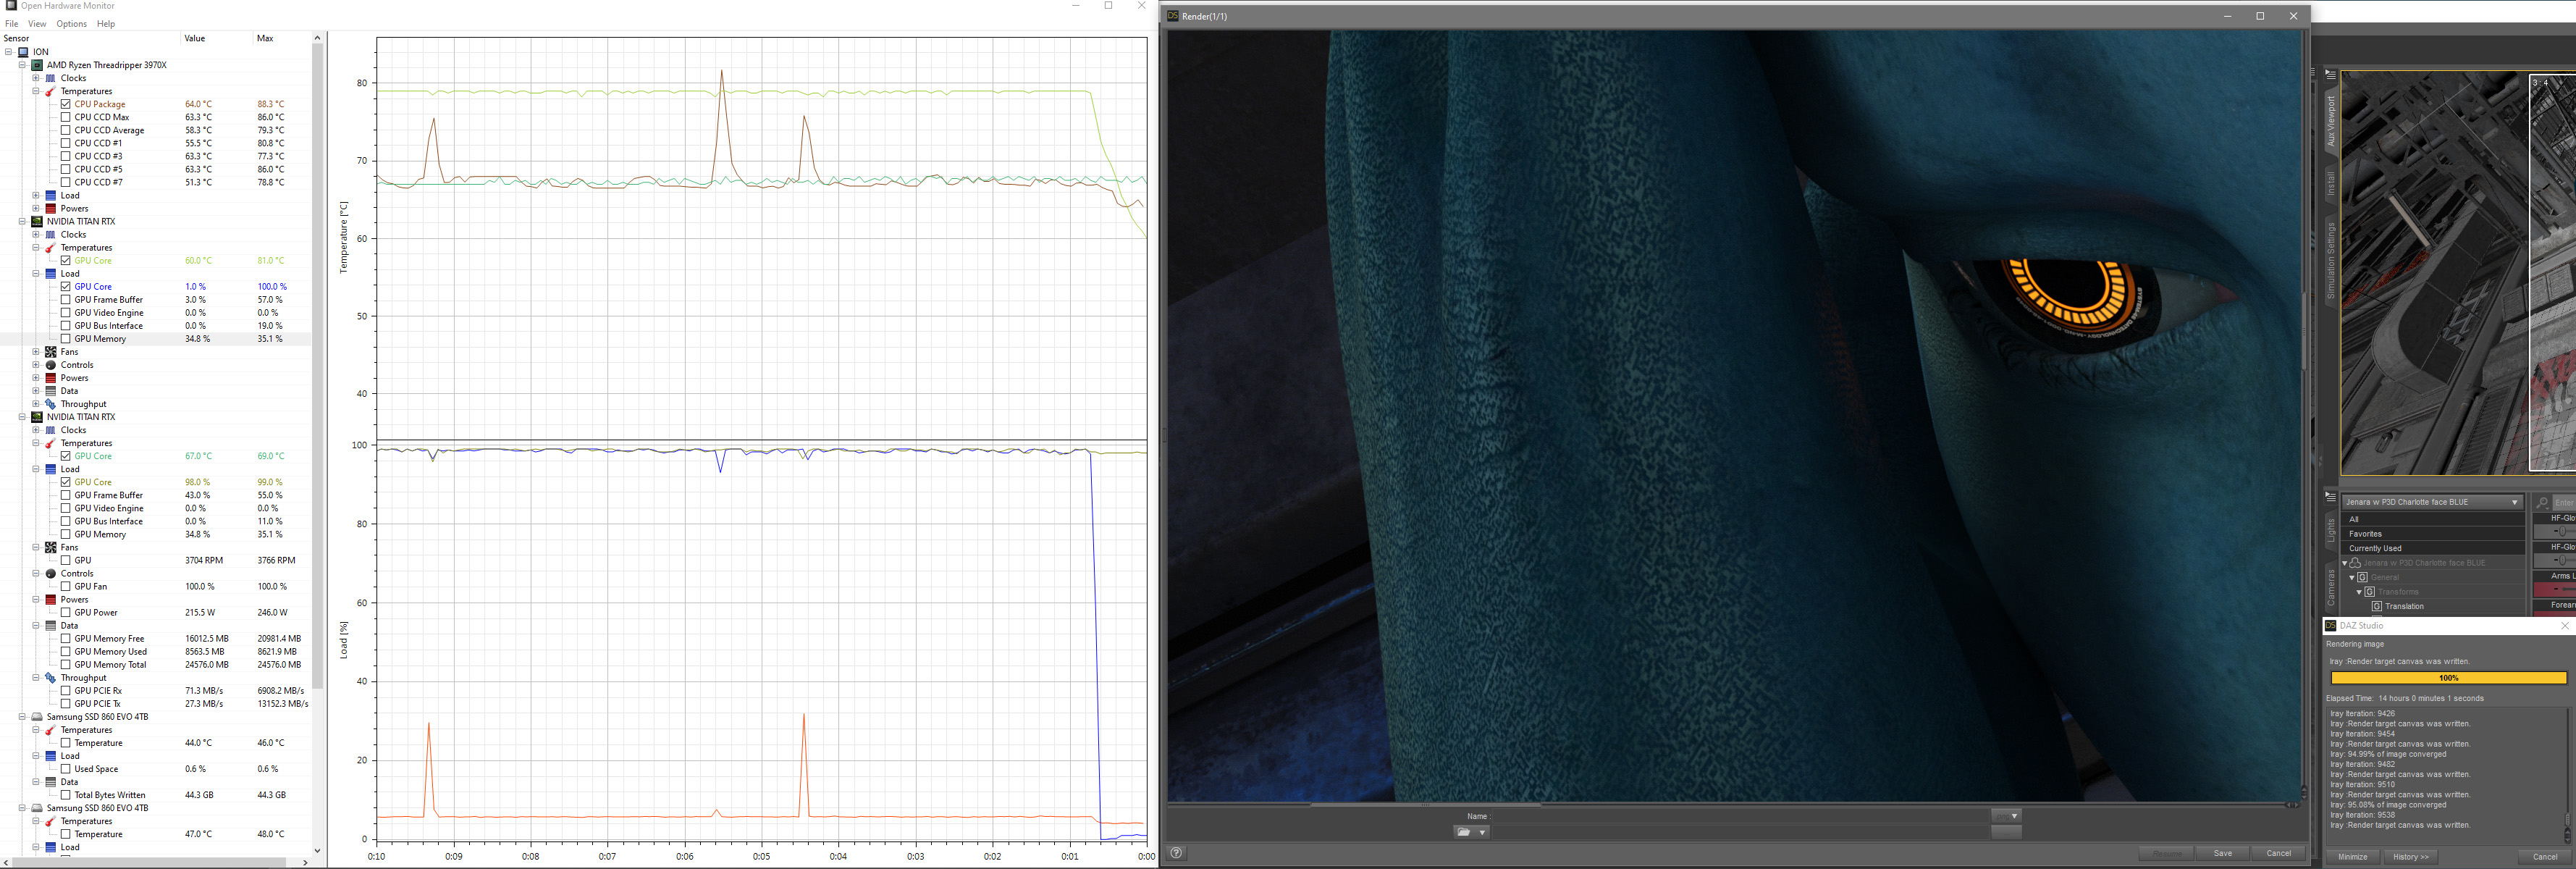
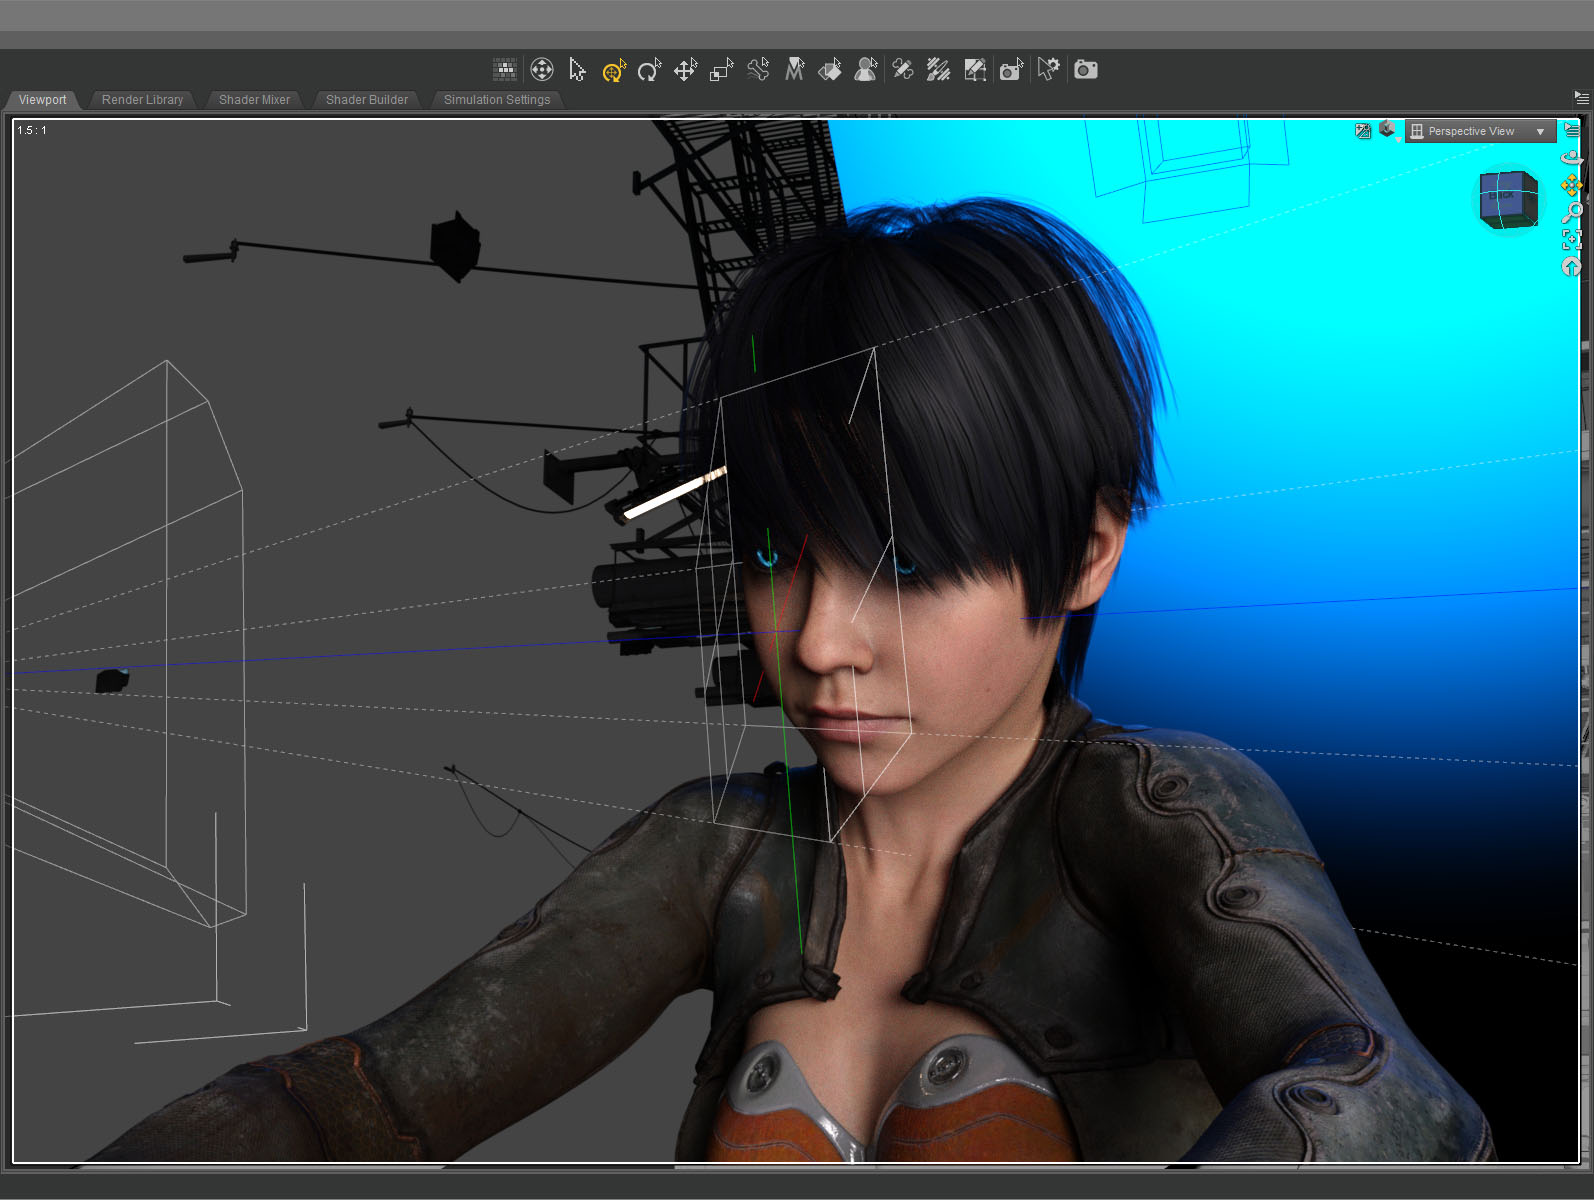 The green line in this screenshot shows how the camera (on the left) is focused precisely on the nearest eye and the two planes show the narrow depth of field on the face. The other eye is slightly out f focus.
The blue in the background is the soft blue backlight. I used only three lights, a key light on the face, the back light, and a light in the window. (And the eyes light up too.) No fill light.
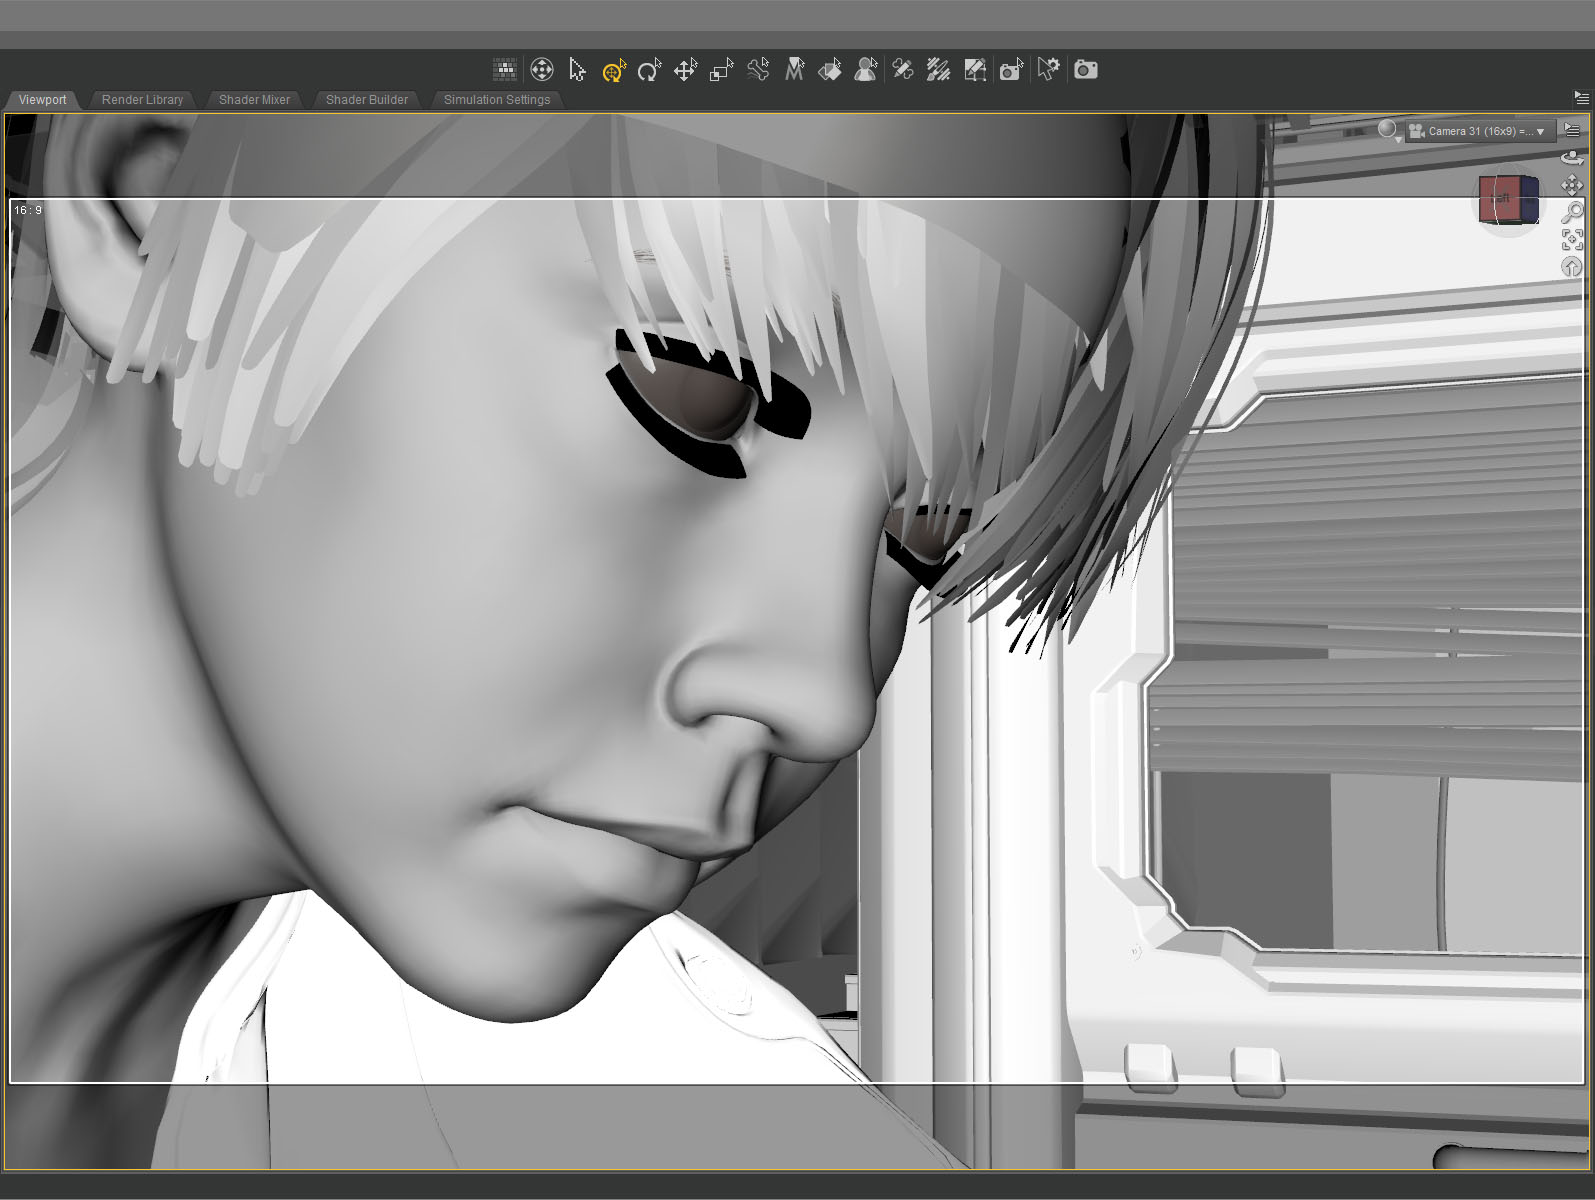
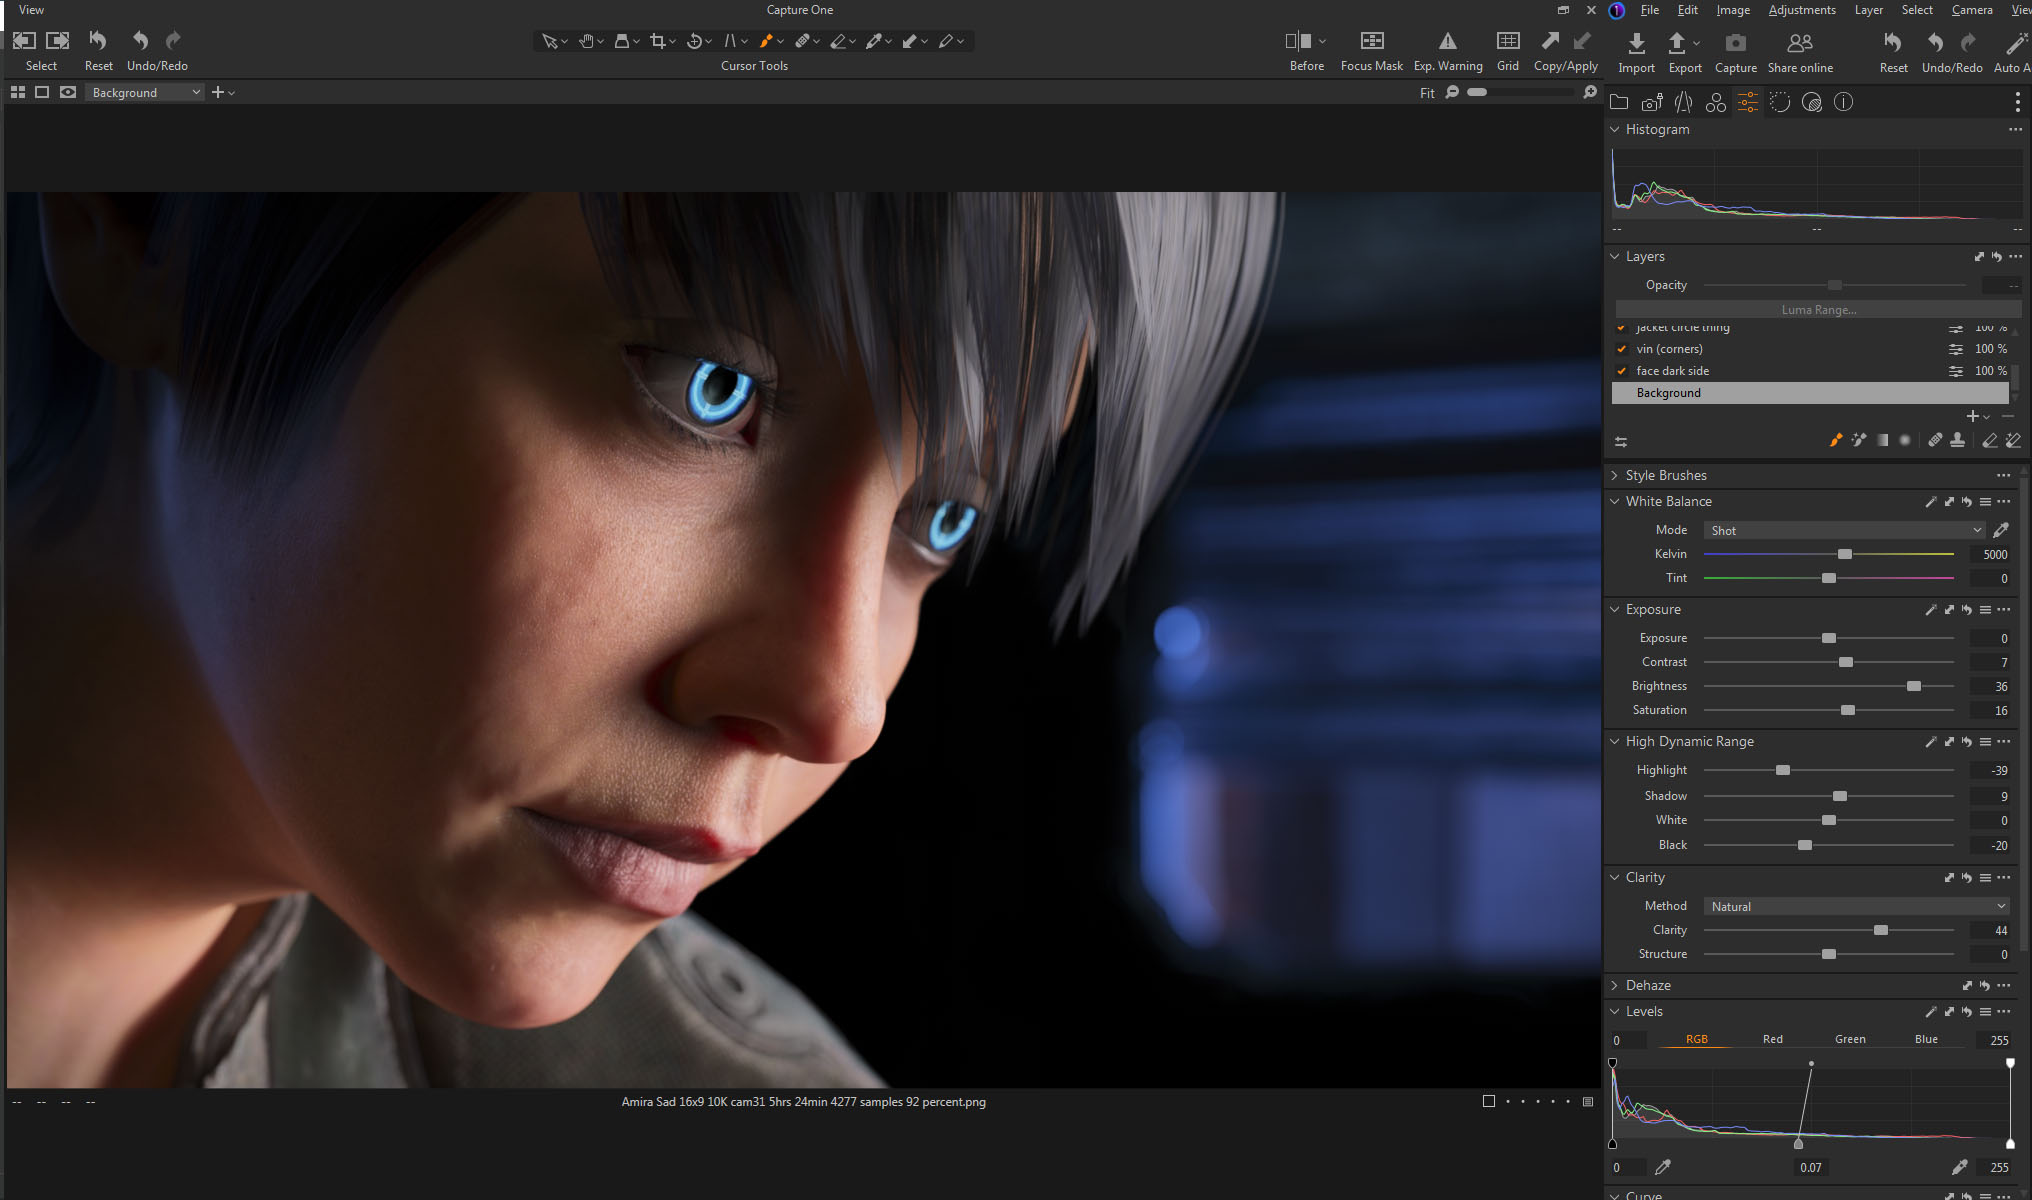
 This screenshot shows how the initial render looked before color correction. It’s quite dark which means it takes longer to render but I liked the quality of light so I went for it. It took about five and a half hours to render the final file at 10800 x 6075. I stopped it at 4277 samples and 92 percent convergence even though my minimum is usually 95 percent and/or 5000 samples. It didn’t look like baking it any more would make a difference.
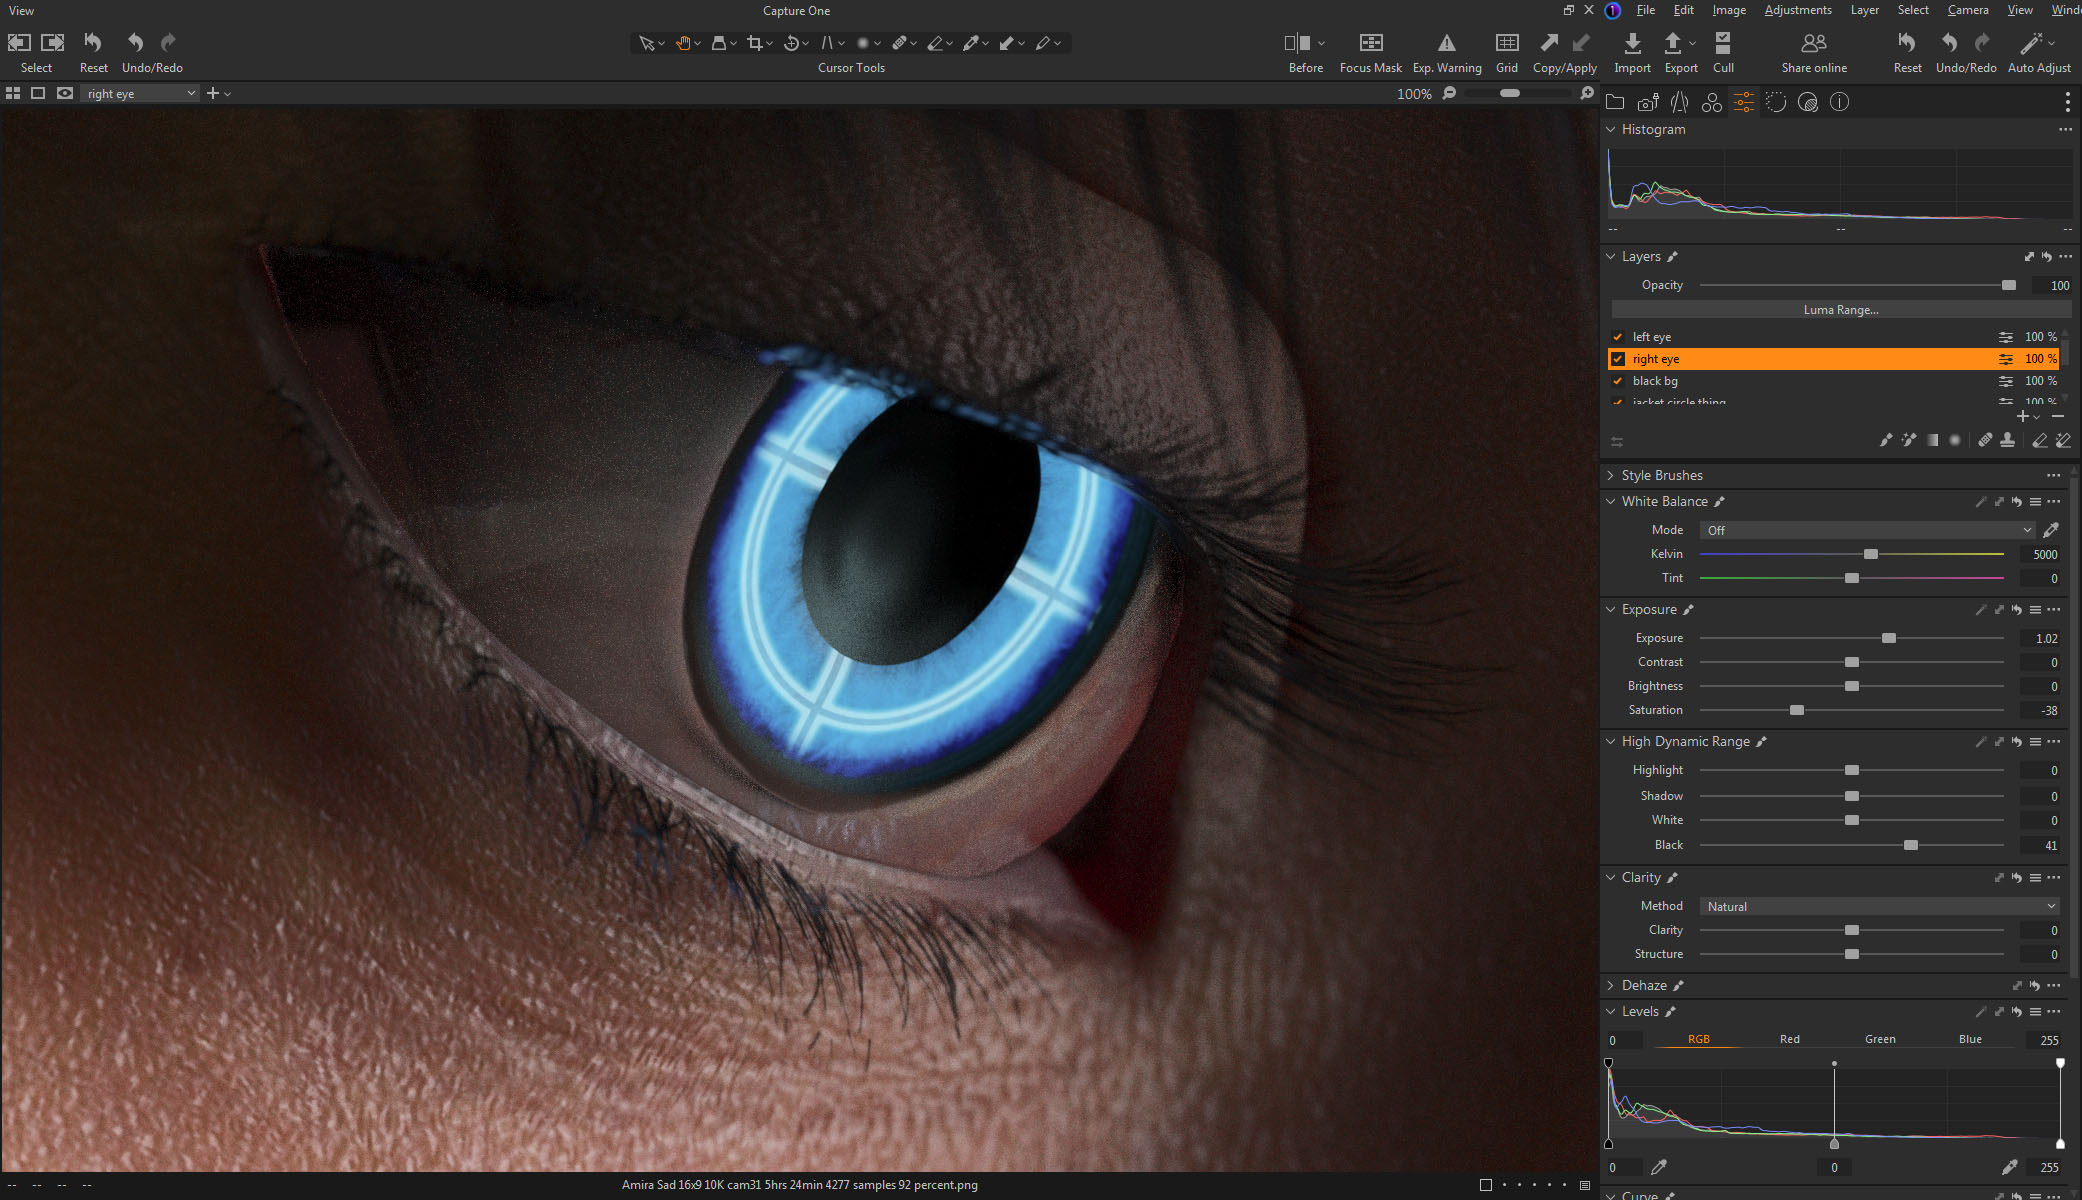 The whites of the eyes ended up quite dark in the render so I brightened them up in post. The eyes are a really old product and I don’t think I updated the reflectivity on the sclera quite right to render properly in iray.
 I also pulled the background completely black because I thought the muddy dark shapes distracted from the face.
This is the part of the post that I feel I really should evaluate the final result… then I decide not to say anything because I can only see the mistakes. After a few months not looking at it, I’m sure I’ll be able to figure out if I love it or hate it, but not now…
Created in DAZ Studio 4.21
Rendered with Iray
Color Correction in Capture One
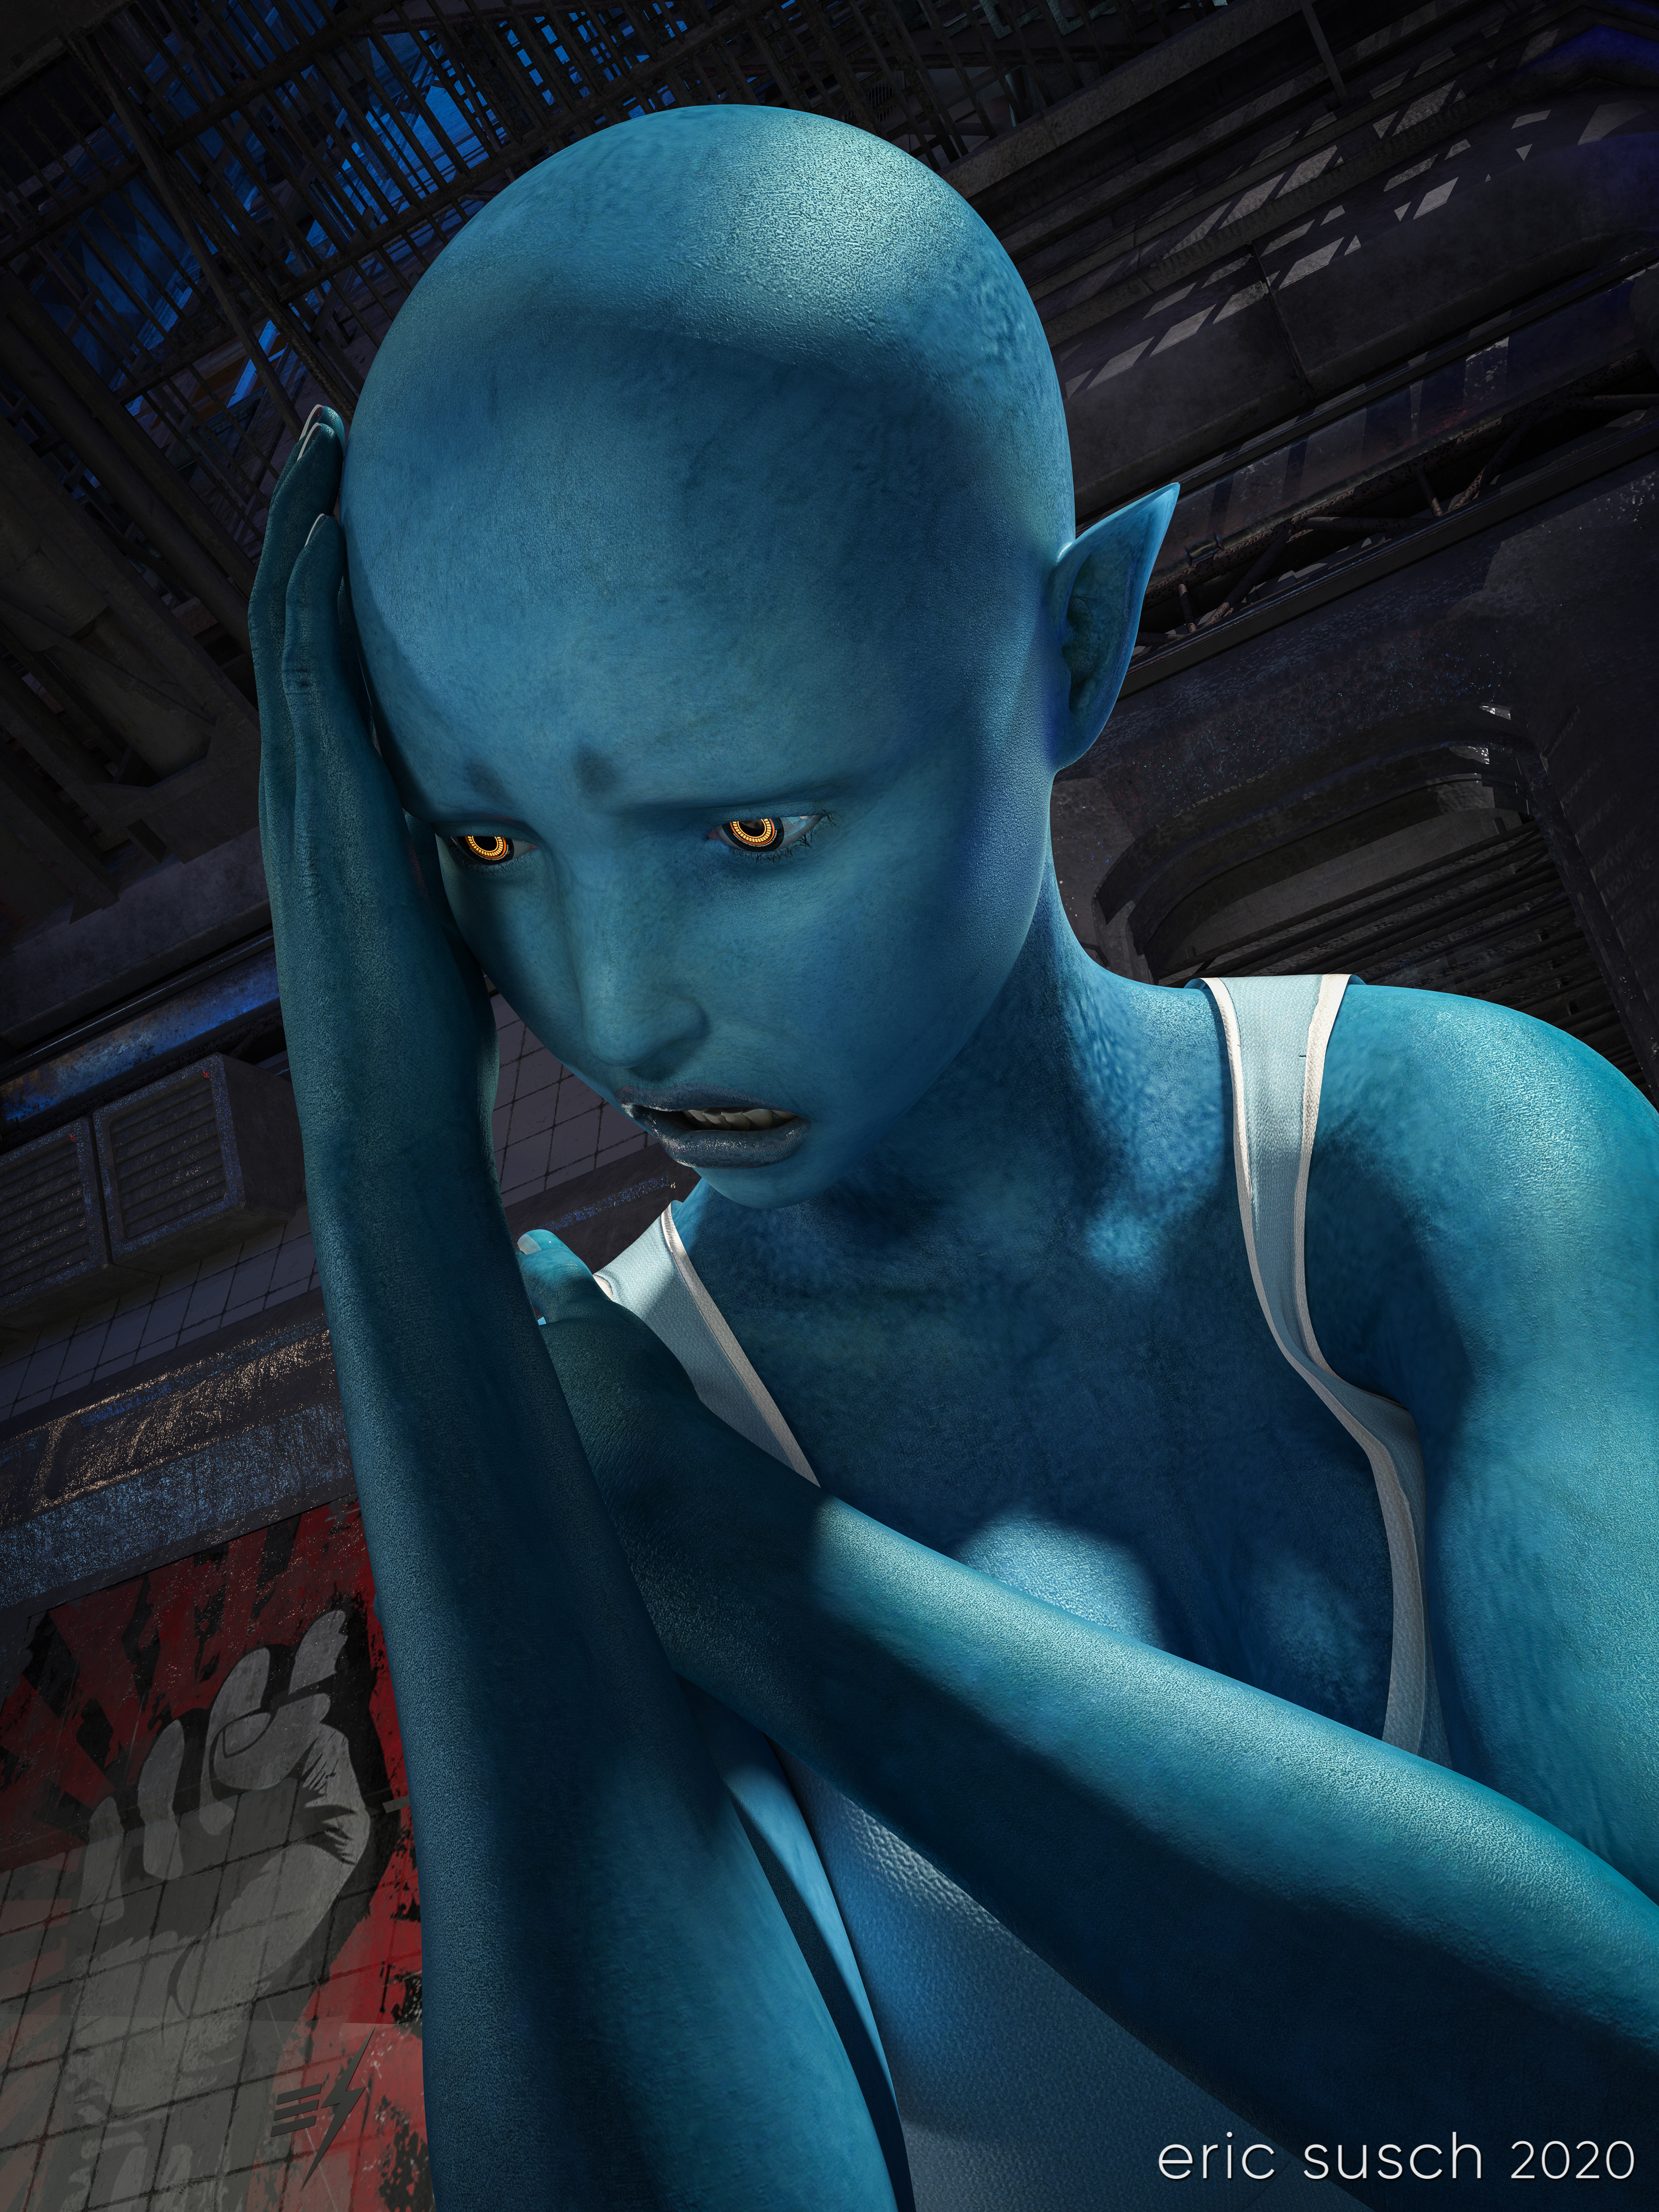
 I think my CGI images tend to look better when I have something in closeup. It avoids the “medium shot of a character just standing there” that I struggle with. For this piece I started with an extreme close up and added cool robot eyes and dramatic flowing hair.
I also wanted a graphic background, something flat, technical. I have an ongoing issue with backgrounds. I get creatively stuck and I don’t know what to put back there. I end up trying scores of different things and nothing works.
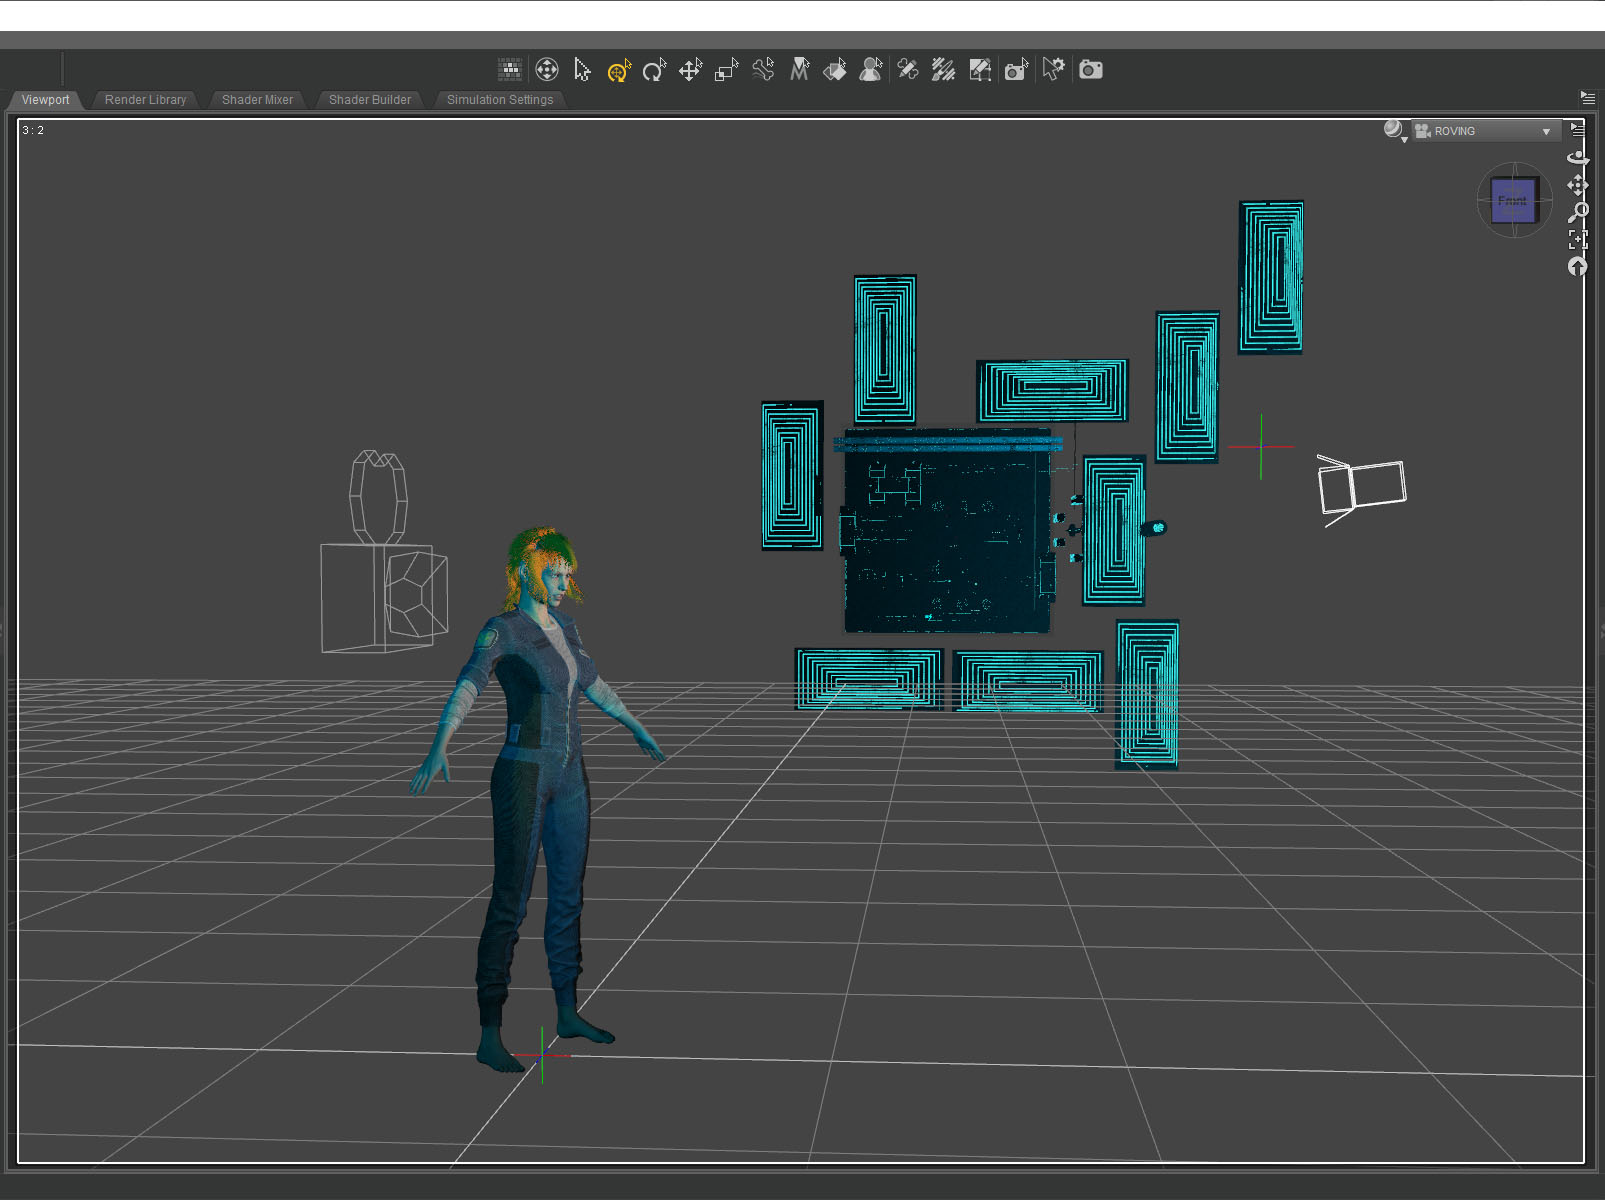
What I ended up using here was actually a huge Tron like cityscape. The shapes and lines are actually building size structures seen from the top. This is what the cityscape looks like normally.
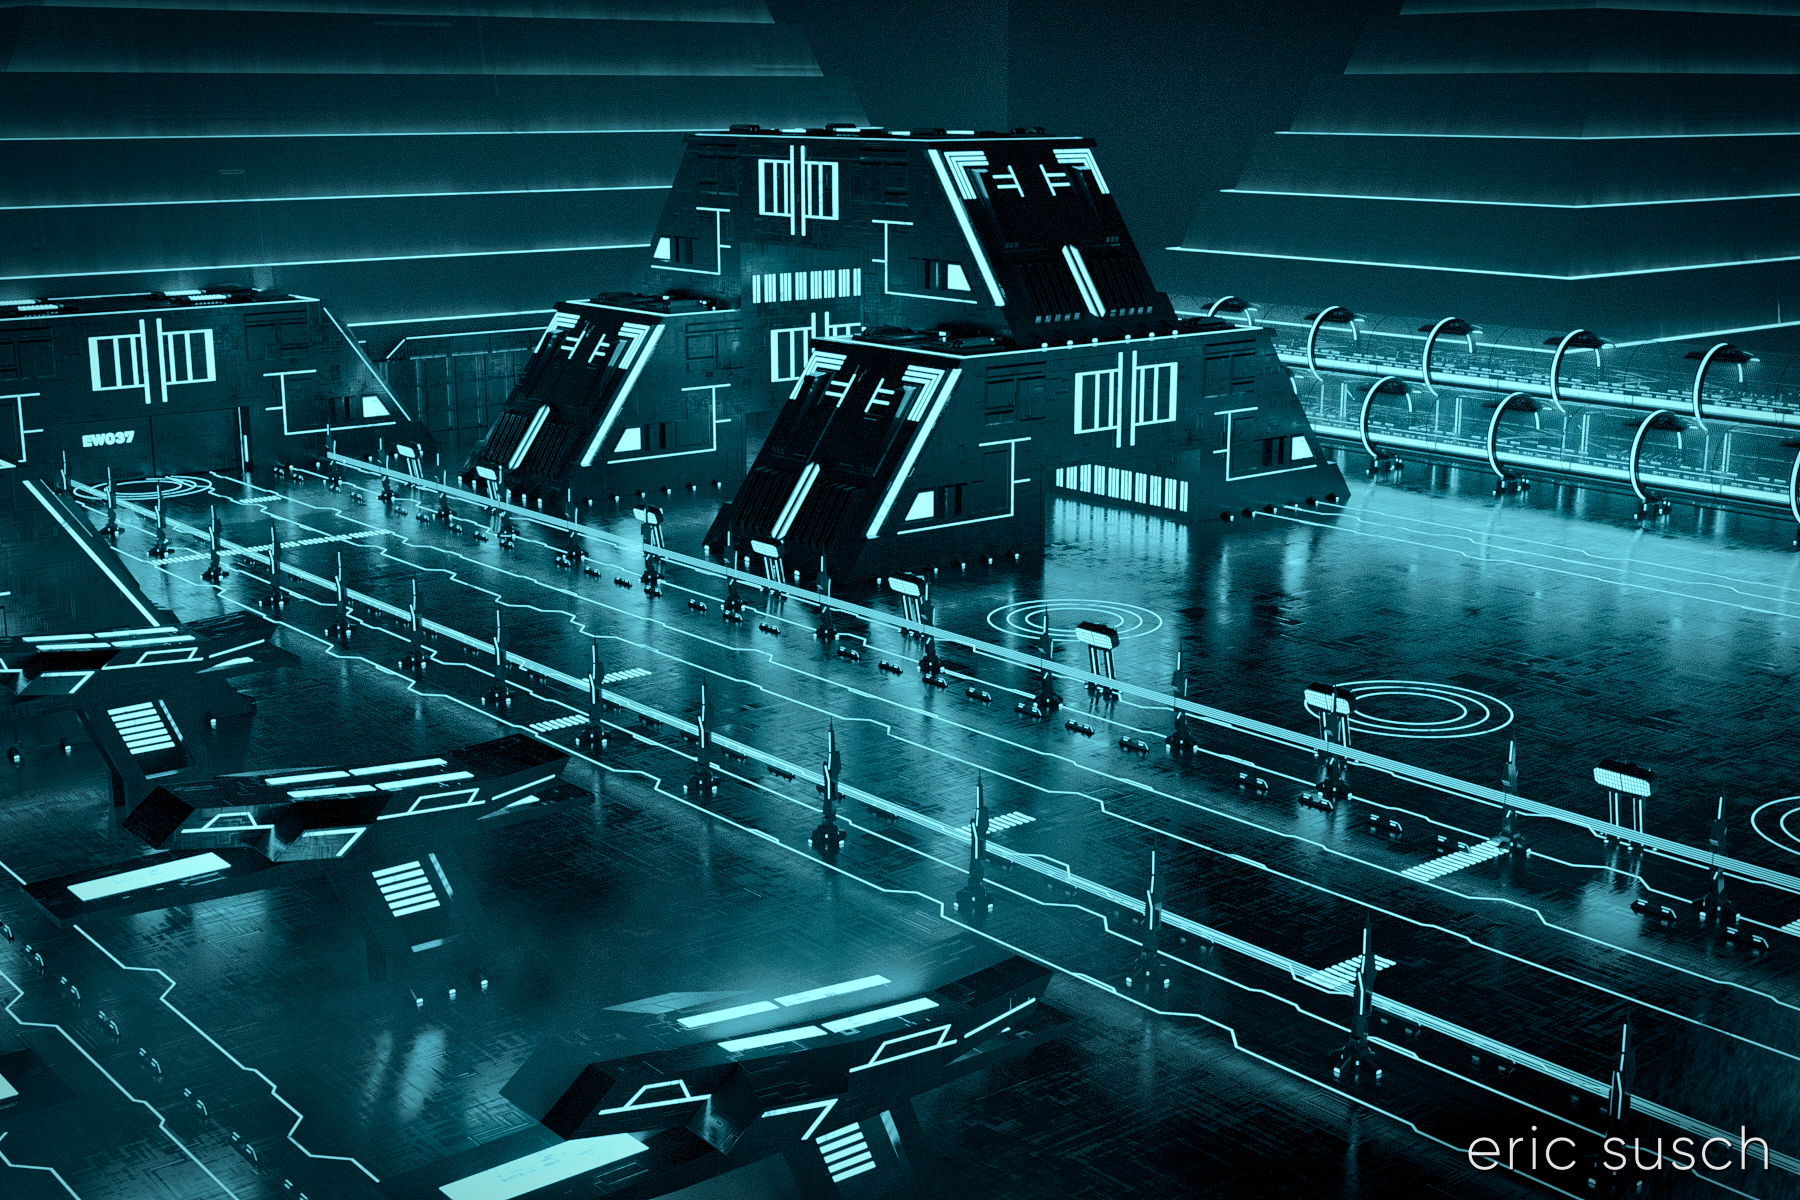 The entire environment is standing on it’s side waaaaaay far away. I turned on and off different elements depending on what looked good. It ended up being a real hassle having the background so far away though. Making adjustments took a long time. (I went back and figured it out. it’s 1.8 miles away! …or 3 kilometers) I should have scaled down the whole thing and moved it closer.
 I named it Music in the Metaverse because the graphic lines in the background ended up looking similar to a music staff.
Created in DAZ Studio 4.20
Rendered with Iray
Color Correction in Capture One
 #Art I made with #Midjourney #AI
 #Art I made with #Midjourney #AI
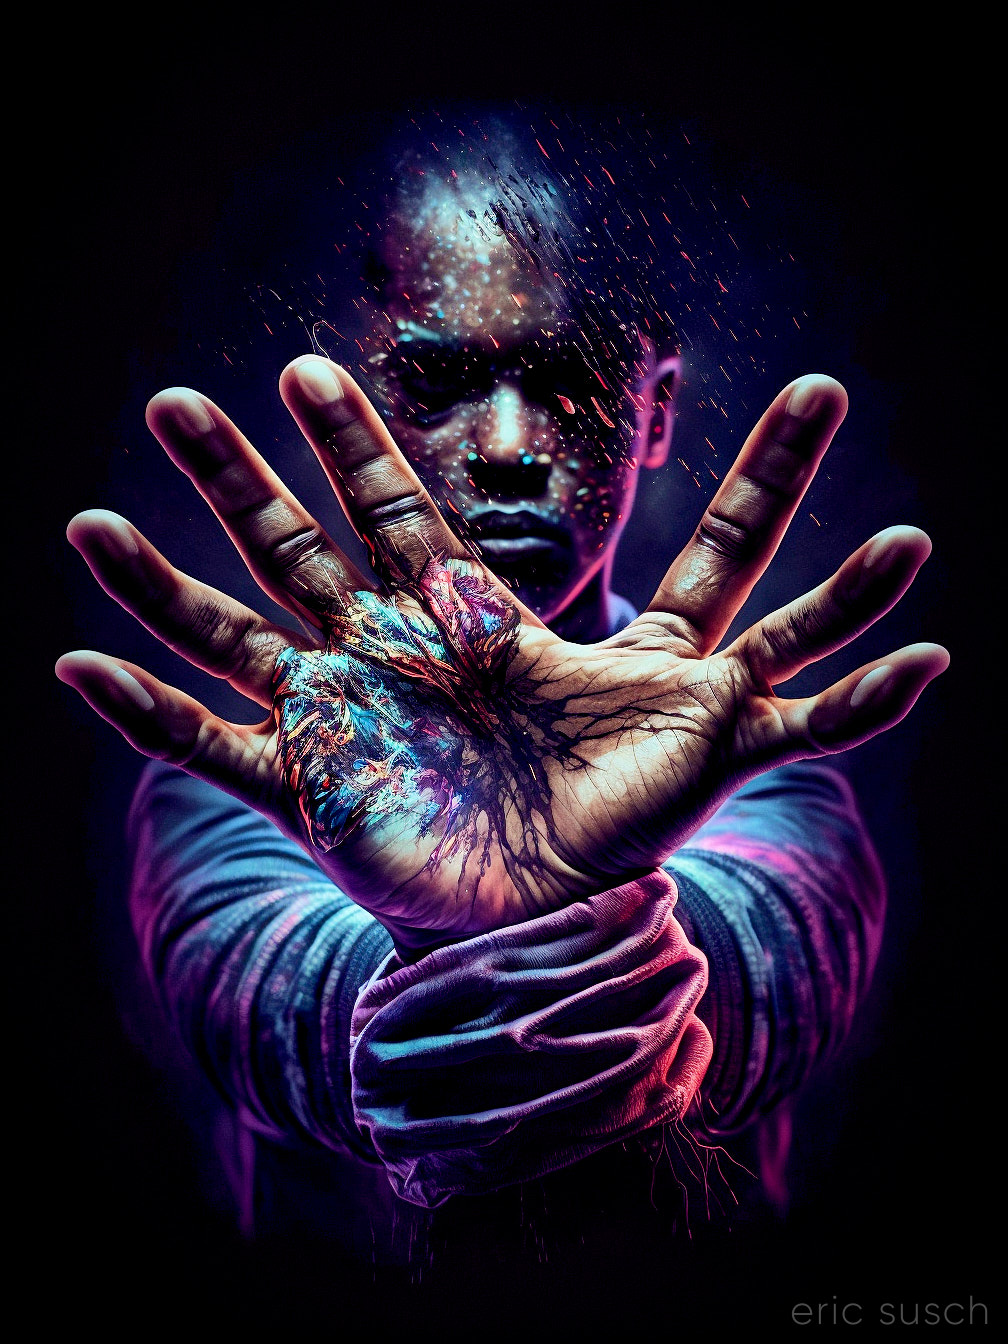
 After George Floyd was killed and a week of protesting around the world, this was how I felt. I created a TikTok video where the camera cranes down from a fire escape and eventually tilts up on this character. You can see the video here: Despair on TikTok
After a bit of re-adjusting in DAZ Studio I came up with this high rez still version of the final frame. I rendered it at 10000 x 7500 pixels so I could print it out big and hang it on the wall.
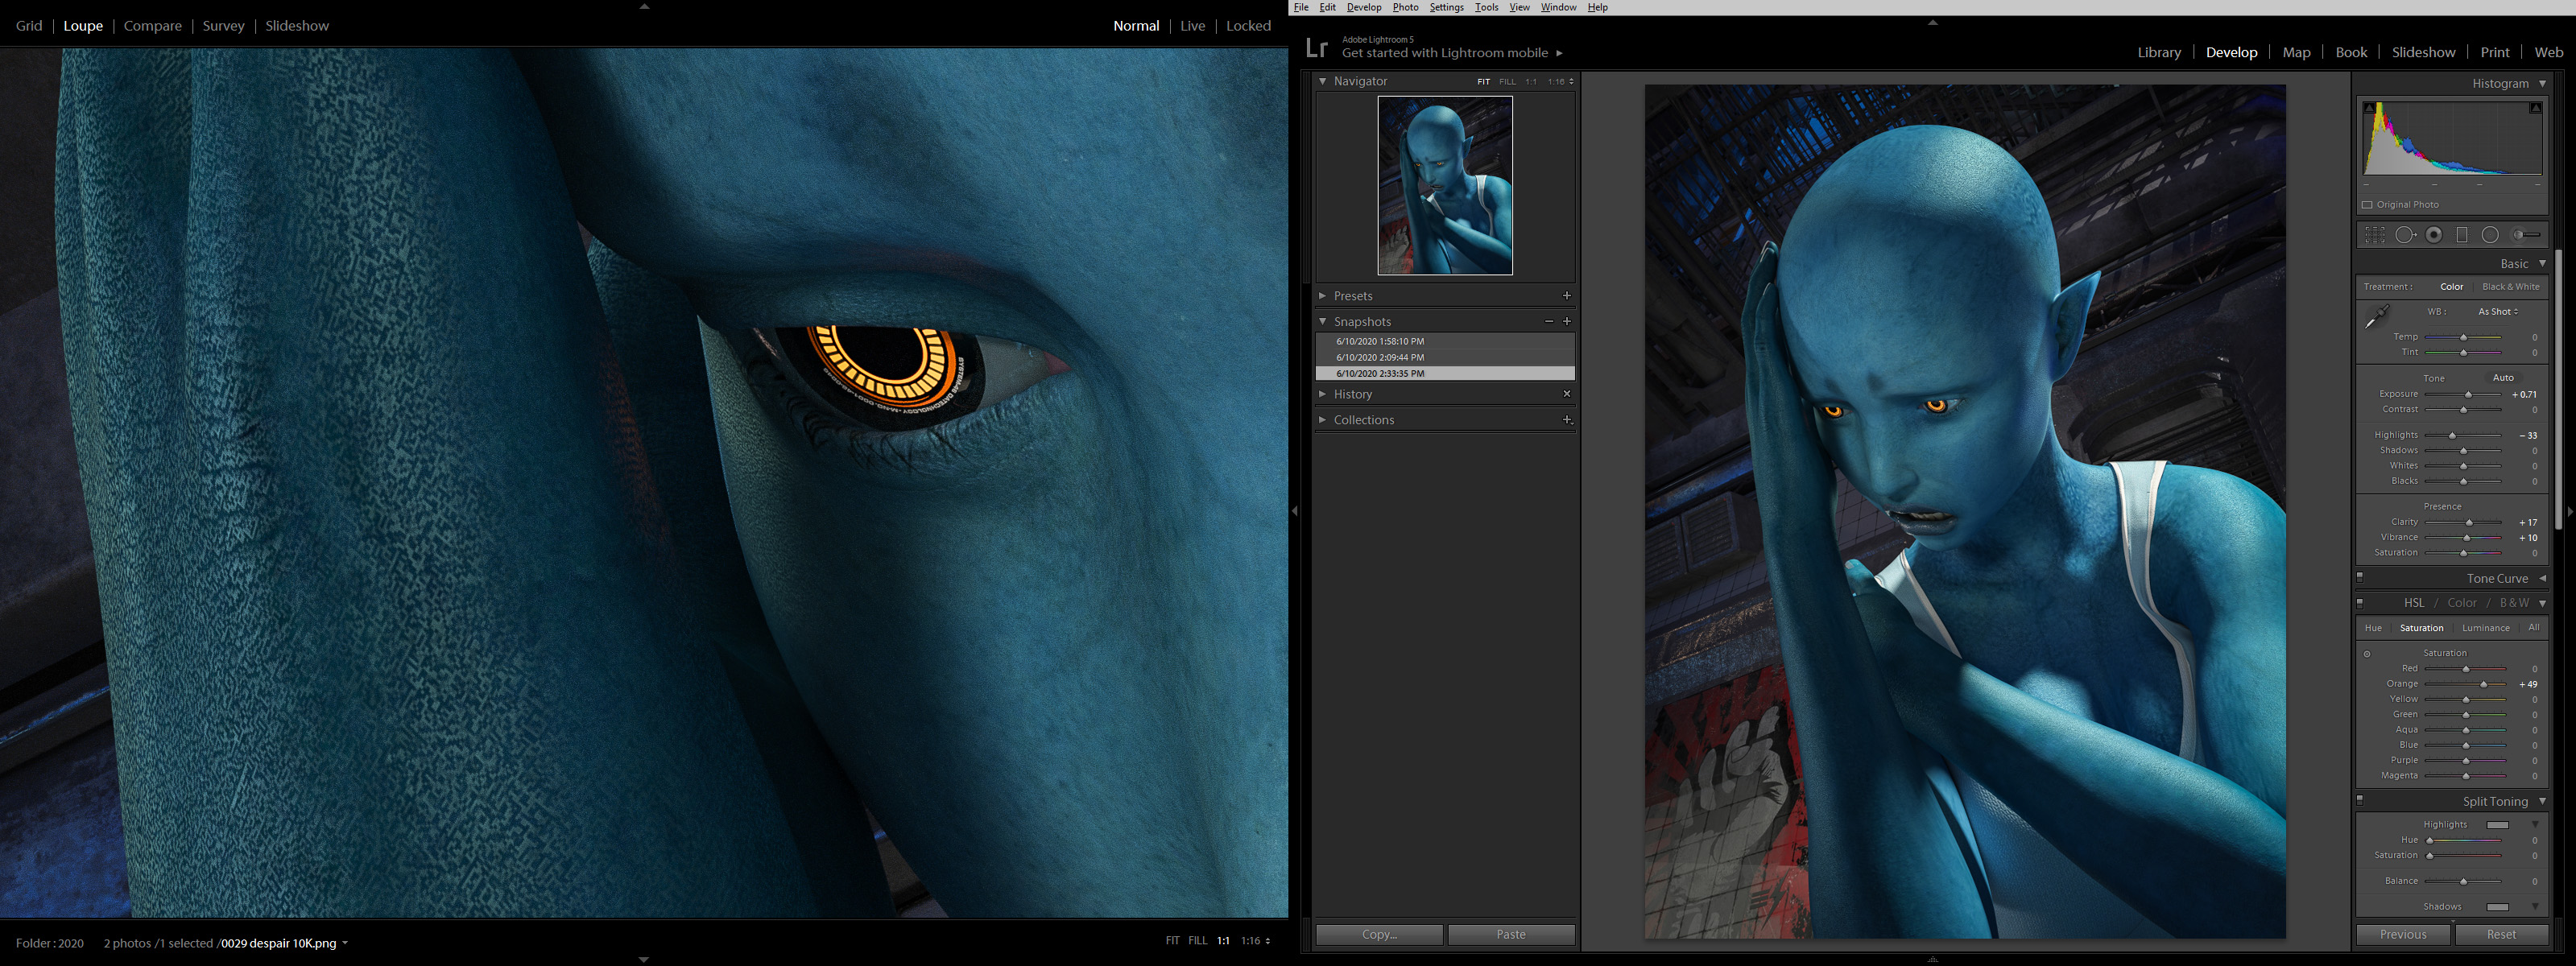
Shadow areas take a long time to render in Iray, especially if the canvas is large. With two Titan RTX graphic cards continuously screaming at 79 degrees Celsius, this image took fourteen hours to render. Not the longest render I’ve ever done (that would be 48 hours) but still a good exercise for my new computer workstation.
 Color correction in lightroom was relatively simple, essentially just brightening up everything so it pops and so all the shadow areas don’t print out too dark.
 Created in DAZ Studio 4.12
Rendered with Iray
Color Correction in Lightroom
 My eternal quest for the perfect CGI avatar continues. I’ve grown tired of my current avatar artwork. People think it’s a picture of me and I have to explain that it’s CGI. I need something that doesn’t look human. Perhaps something creepy…
Mannequins and faceless people have always freaked me out ever since I was young. I attribute that to this scene from Star Trek…
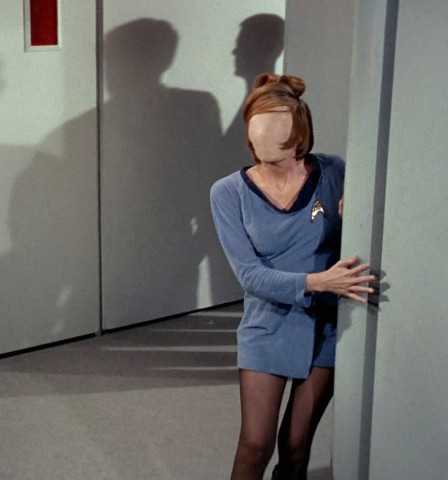 …and the Anything People on Sesame Street.
A freaky “no face” avatar would be cool and no one would think it was supposed to be me. Perfect!
I started with a faceless character model I had and I replaced the skin like surface with a different shader. I experimented with many, many different surfaces trying to find something cool.
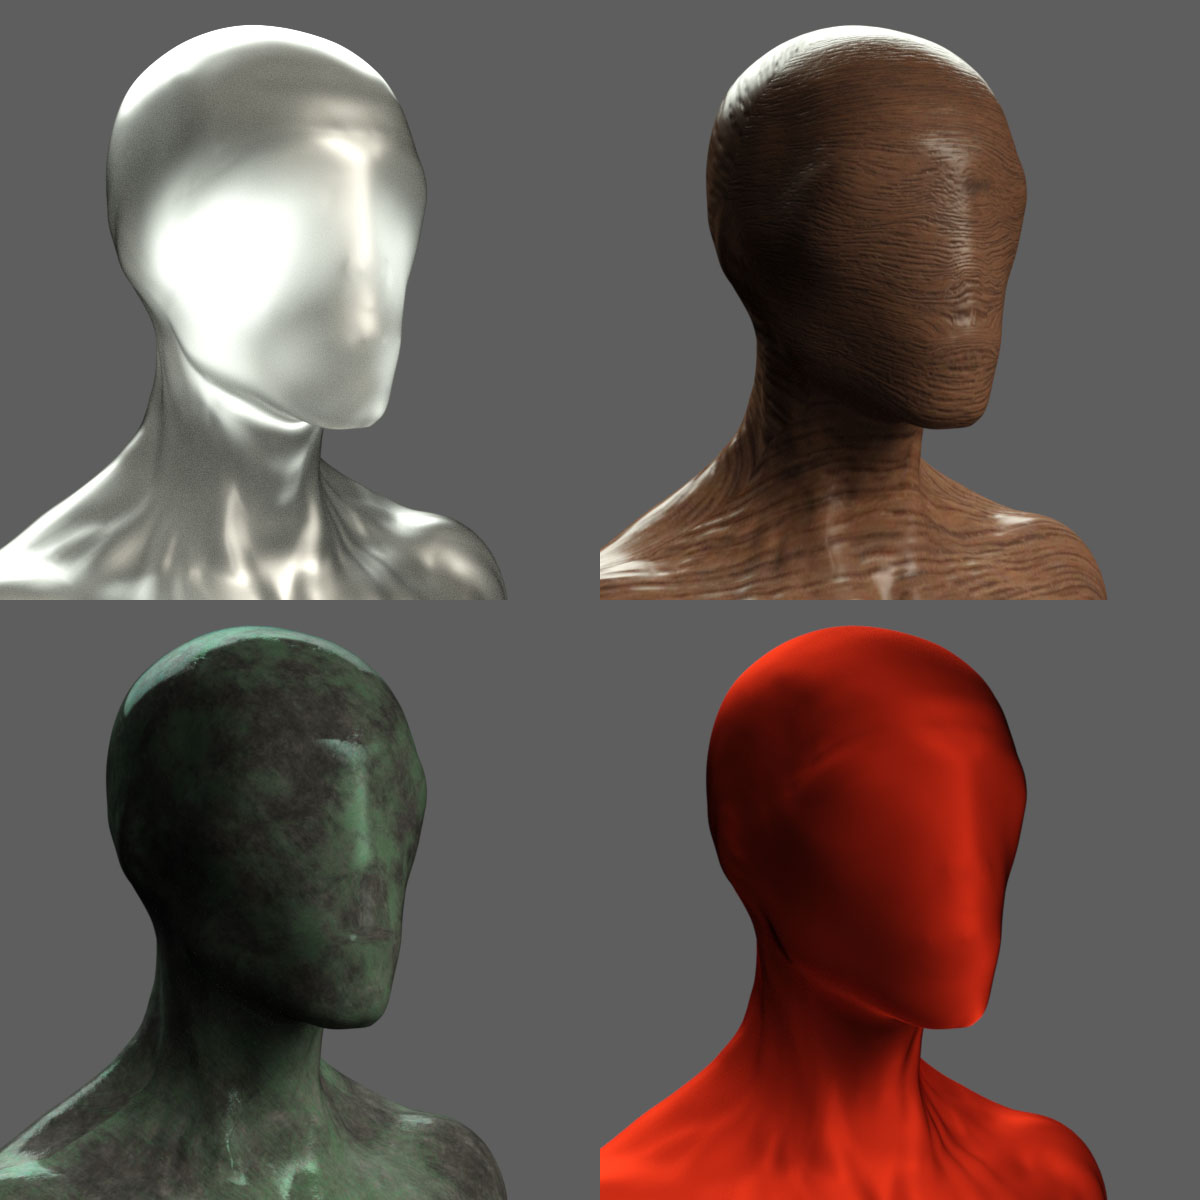 I tried cloth, wood, metal, rock, plastic, glass, grunge, paint, rubber, wax, anything I could think of.
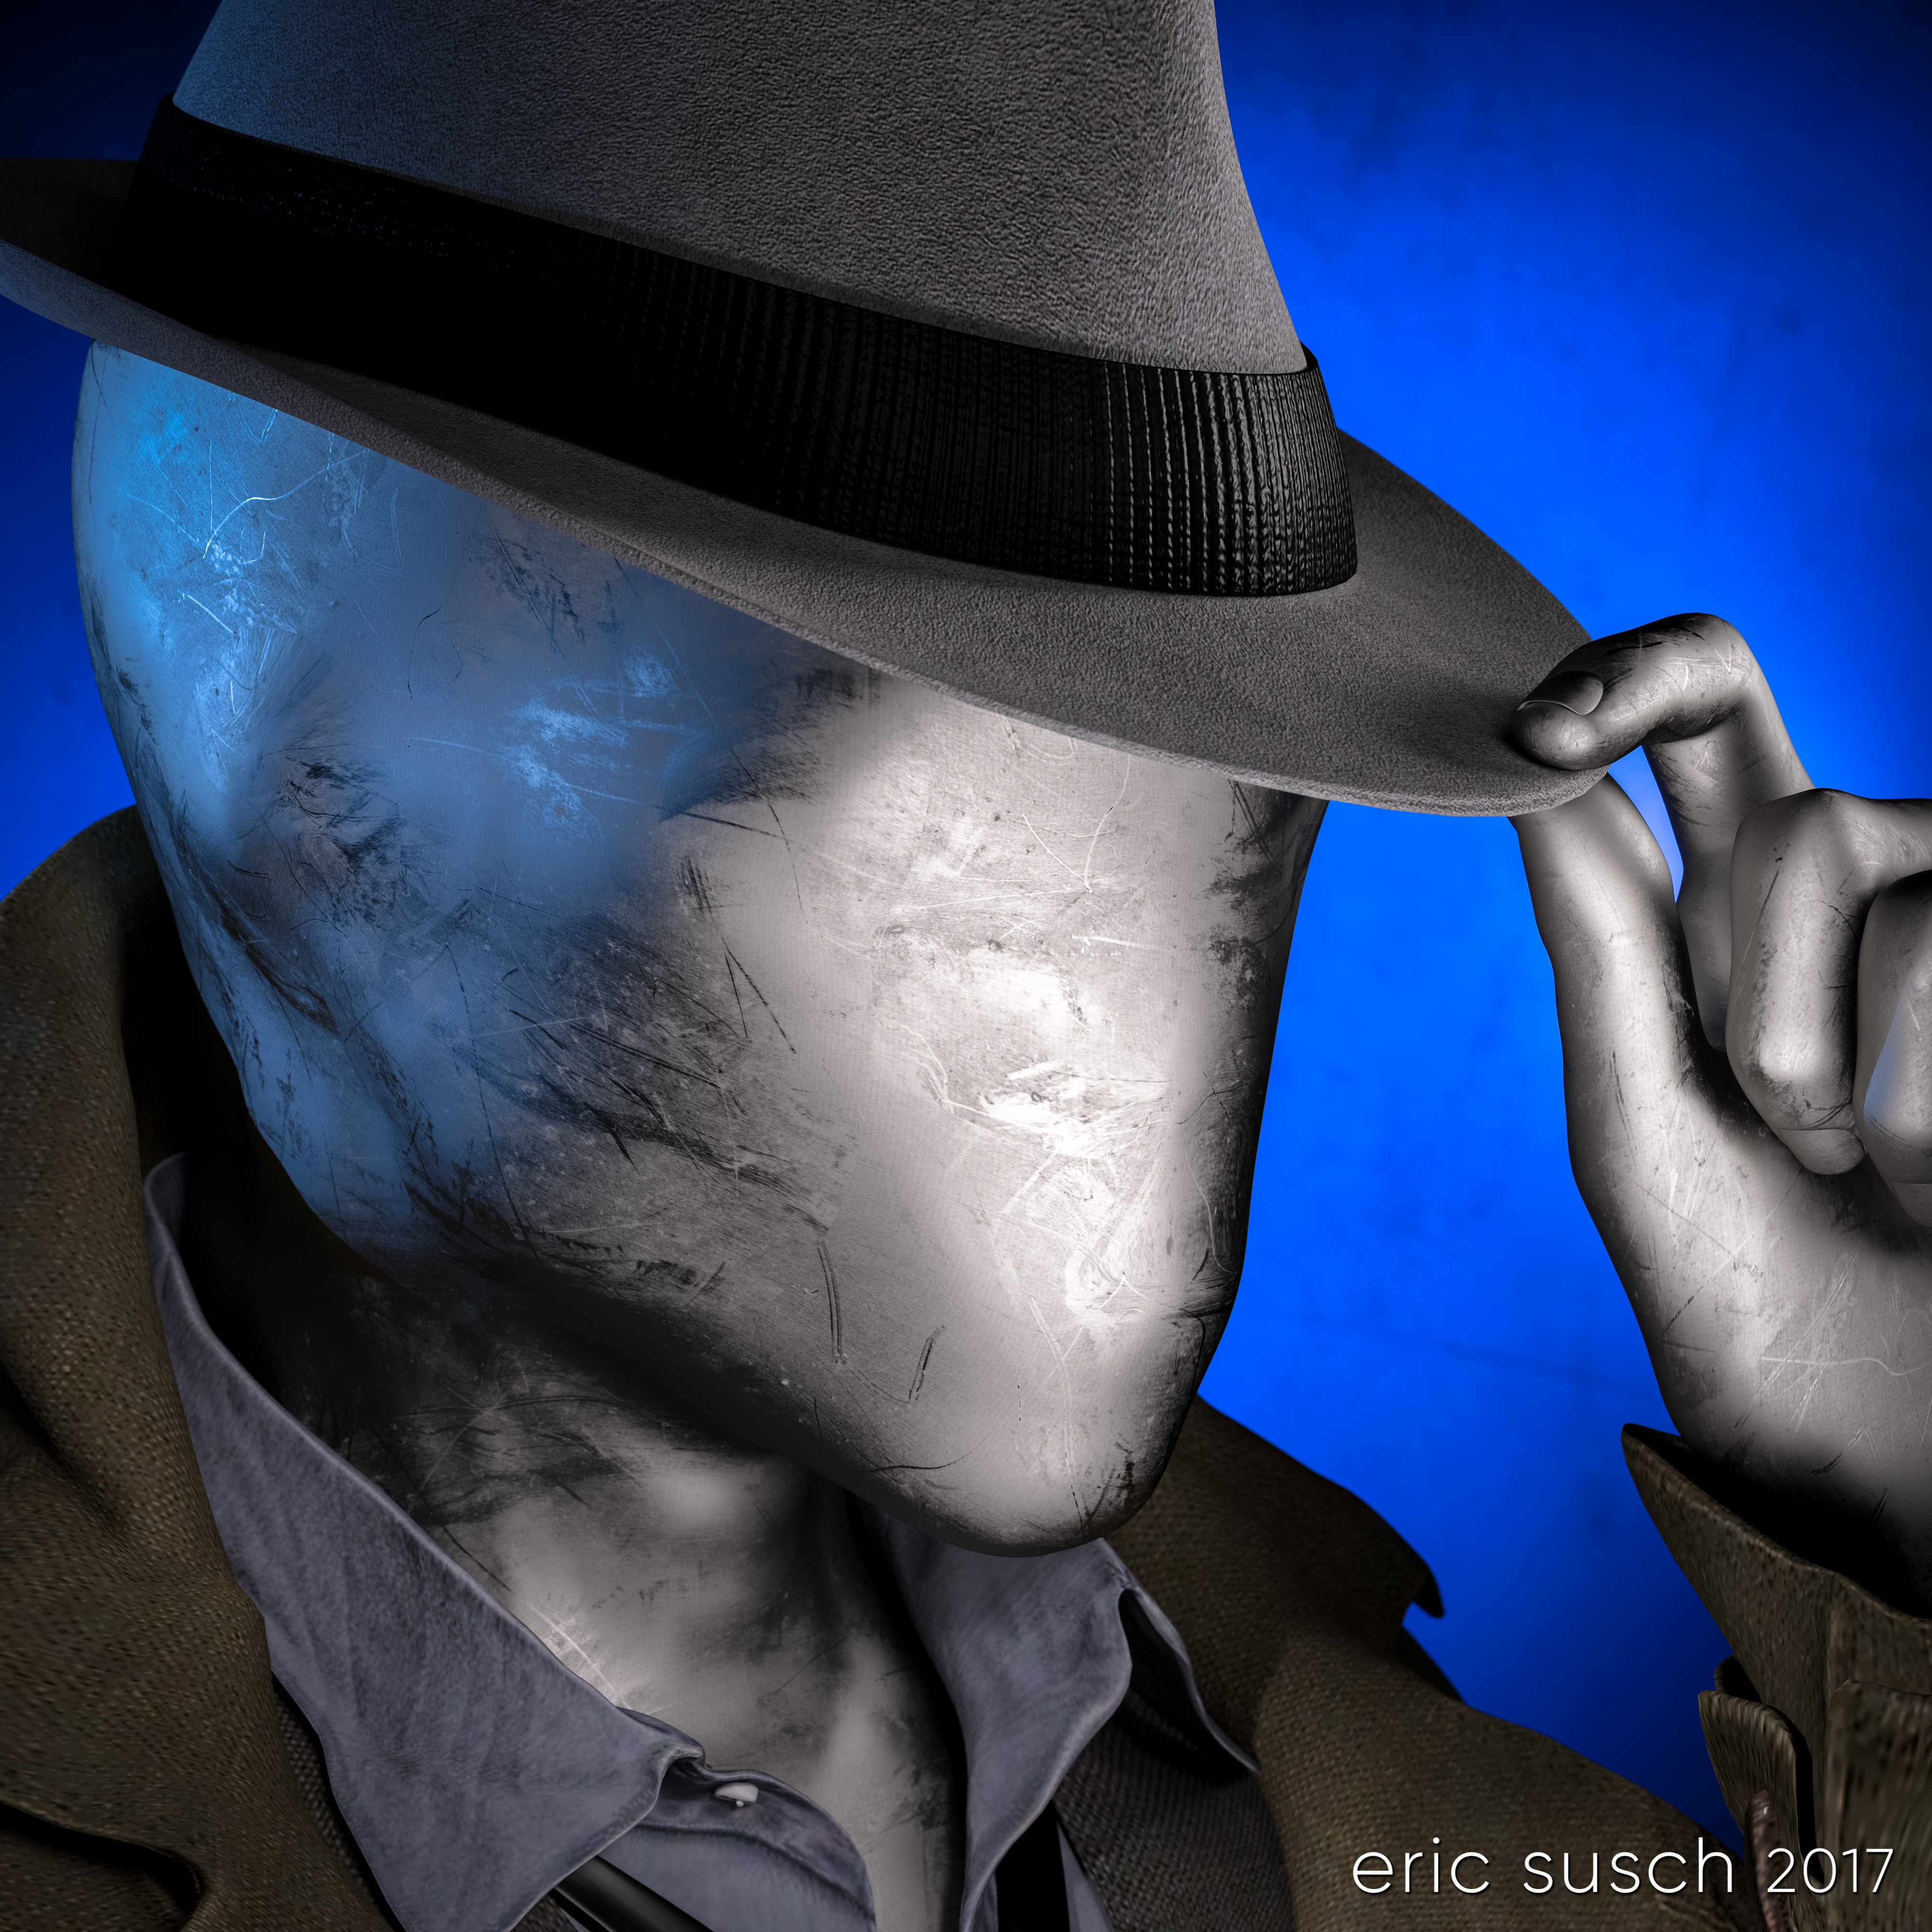
 I tried to avoid chrome because I had done that several times in the past but in the end I caved, because I really liked this particular dusty anodized aluminum surface.
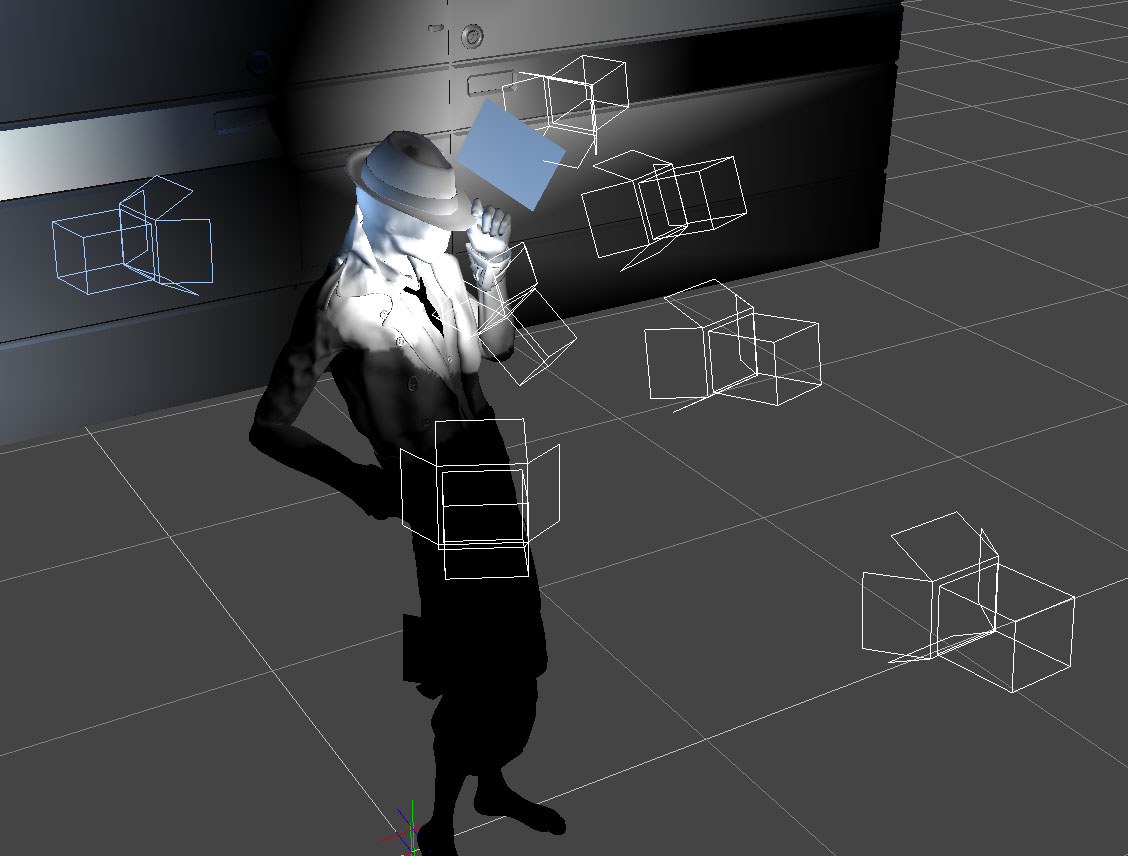
 I posed the figure tipping his hat with a 1960s fedora. I wanted him to be creepy and friendly at the same time. A sloppy overcoat and loose necktie seemed to fit so I added that too.
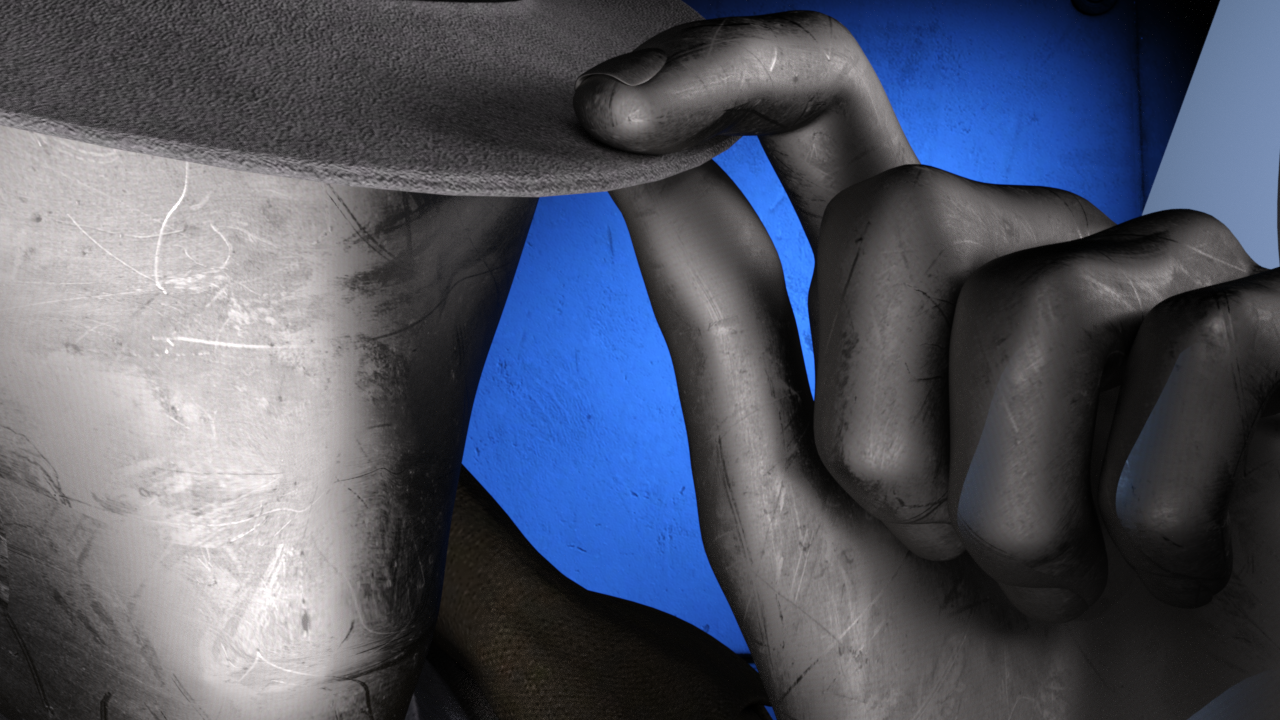
 Give that man a hand
The fingers of the alien no-face character were creepy long, which looks OK but I like to make everything difficult so I decided to try and replace the hand with one that was human sized.
To do that I had to add another entire human sized figure and position the hand in the same place, grabbing the hat. It took awhile but I got it into position. Then I “turned off” (made invisible) the rest of that human character. For the no-face character I turned off the hand. The sleeve of the jacket was just long enough to hide the fact that the arm and hand didn’t meet exactly correctly. Everything came together when I layered the same aluminum shader on the human hand.
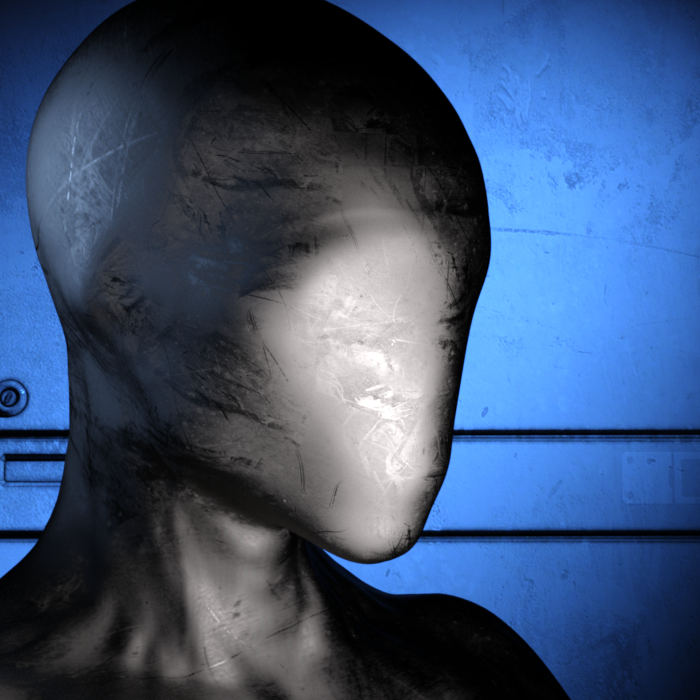
 Dramatic Light
The lighting was difficult because of the reflective metal on the face. I ended up with a lot more spotlights than usual for a simple head shot just to get the reflections right. There are seven spot lights on the character and one blue spot on the background, which is just a gray wall panel.
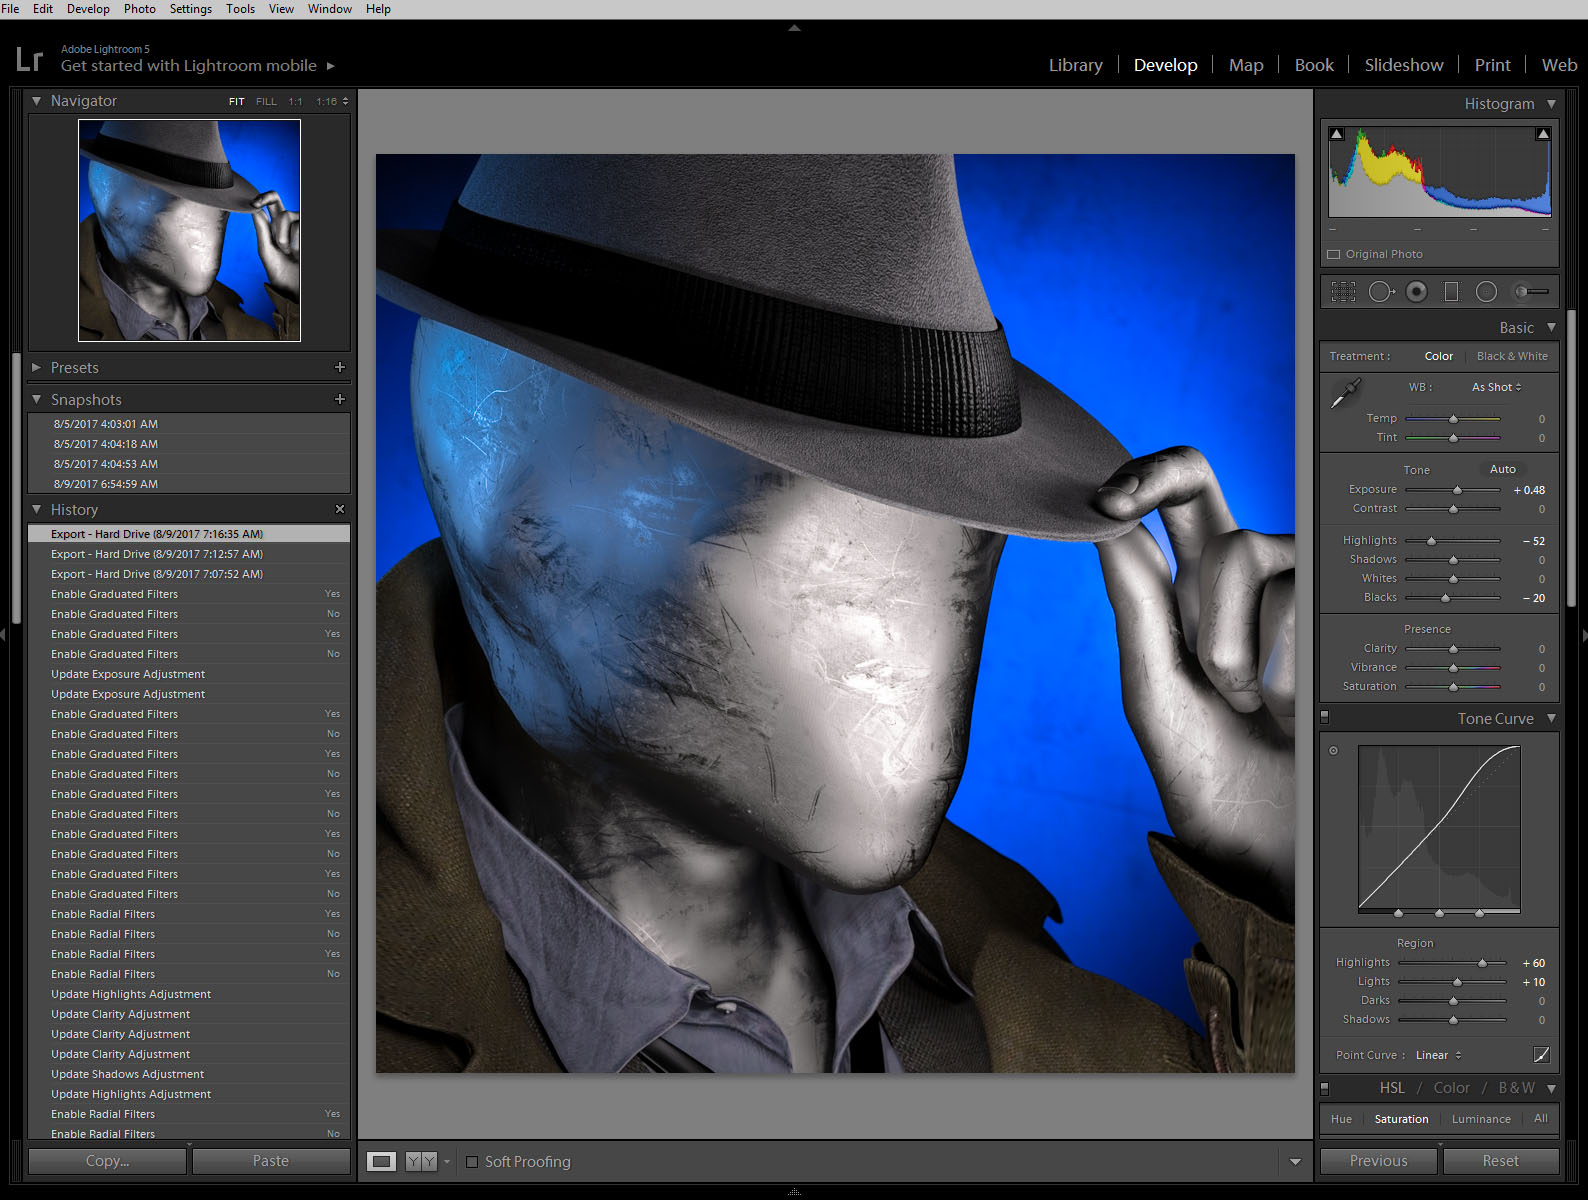
 After rendering it out I pumped up the color a little in Lightroom…
 …and uploaded the avatar to Facebook.
![]()
Unfortunately I saw almost immediately that you couldn’t tell what the picture was at very small sizes. It was the high contrast lighting, the same problem I had before on my first CGI avatar. It looked fine at larger sizes but when it was super tiny the bright shine of the face looked like an unrecognizable white blob on a blue background.
I went back into DAZ Studio and tried to even out the lighting. The best way was to set up a few more lights to fill in the dark spots. I didn’t like it as much when I was done but I rendered it out anyway just to test it on facebook. This is the “flat light” version.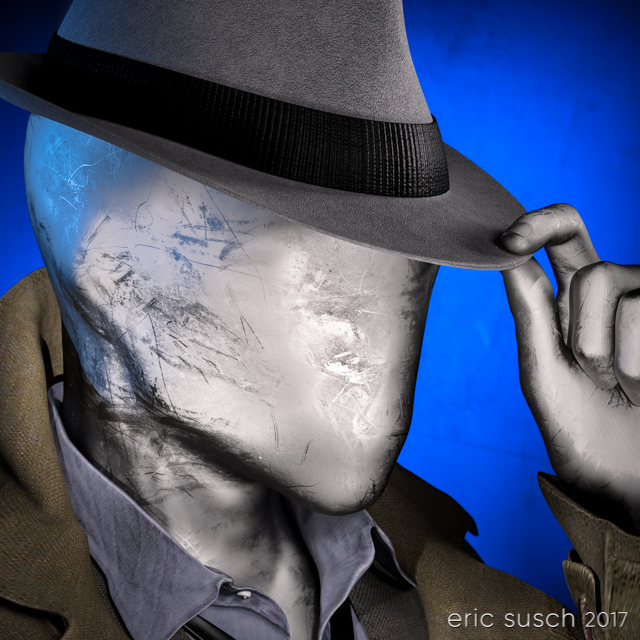 It worked better at small sizes as you can see but still not as well as other avatars I’ve created. Humans are programed to recognize faces easily, which is why facebook can make their avatars so small. I’m asking people to recognize “no face” so I guess that’s more difficult.
![]() So it sort of works at the tiny sizes and doesn’t look as good as it could at larger sizes. I guess that makes this avatar attempt a bit of a failure. I still like it though, so I’m going to keep it for a time before I try again. I can also upload the first version to other sites that don’t have such small avatars. What do you think?
So it sort of works at the tiny sizes and doesn’t look as good as it could at larger sizes. I guess that makes this avatar attempt a bit of a failure. I still like it though, so I’m going to keep it for a time before I try again. I can also upload the first version to other sites that don’t have such small avatars. What do you think?
Created in DAZ Studio 4.9
Rendered with Iray
Color Correction in Lightroom
Figures used:
The Slim Man for Genesis 3 Male
Mec4d PBS Shaders vol.3 for Iray
Amazing Hat
Eldritch Seeker
 This piece started out as a test for some new models that I purchased but I liked the way it looked so I finished it into something a bit more than a test. Unfortunately it ended up as a character just standing there, which I try to avoid. I like more of a story, more action, but this is what it is. I do like the curve of the ship in the background. I suppose that’s something.
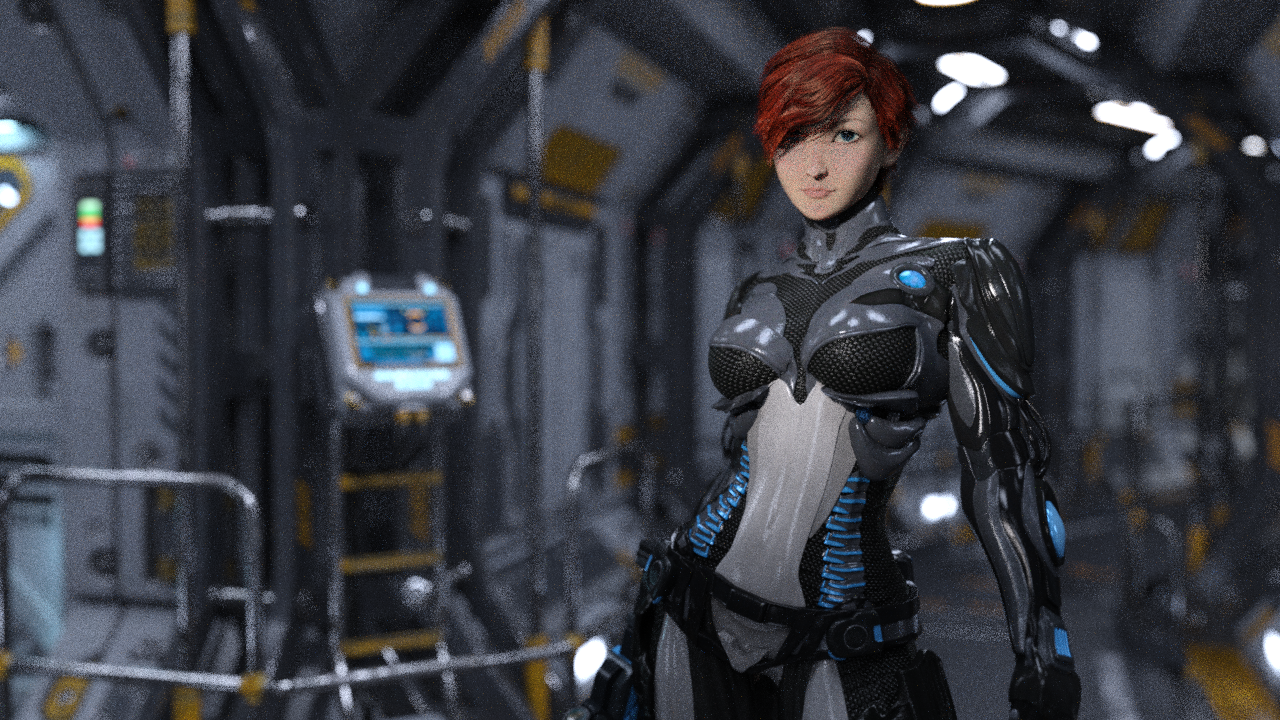 This is an early version with different hair and environment. You can also see that the stomach panal on the suit is a lighter color. In the final composition I thought it distracted from the face so I darkened the texture map so that it was closer to the rest of the suit.
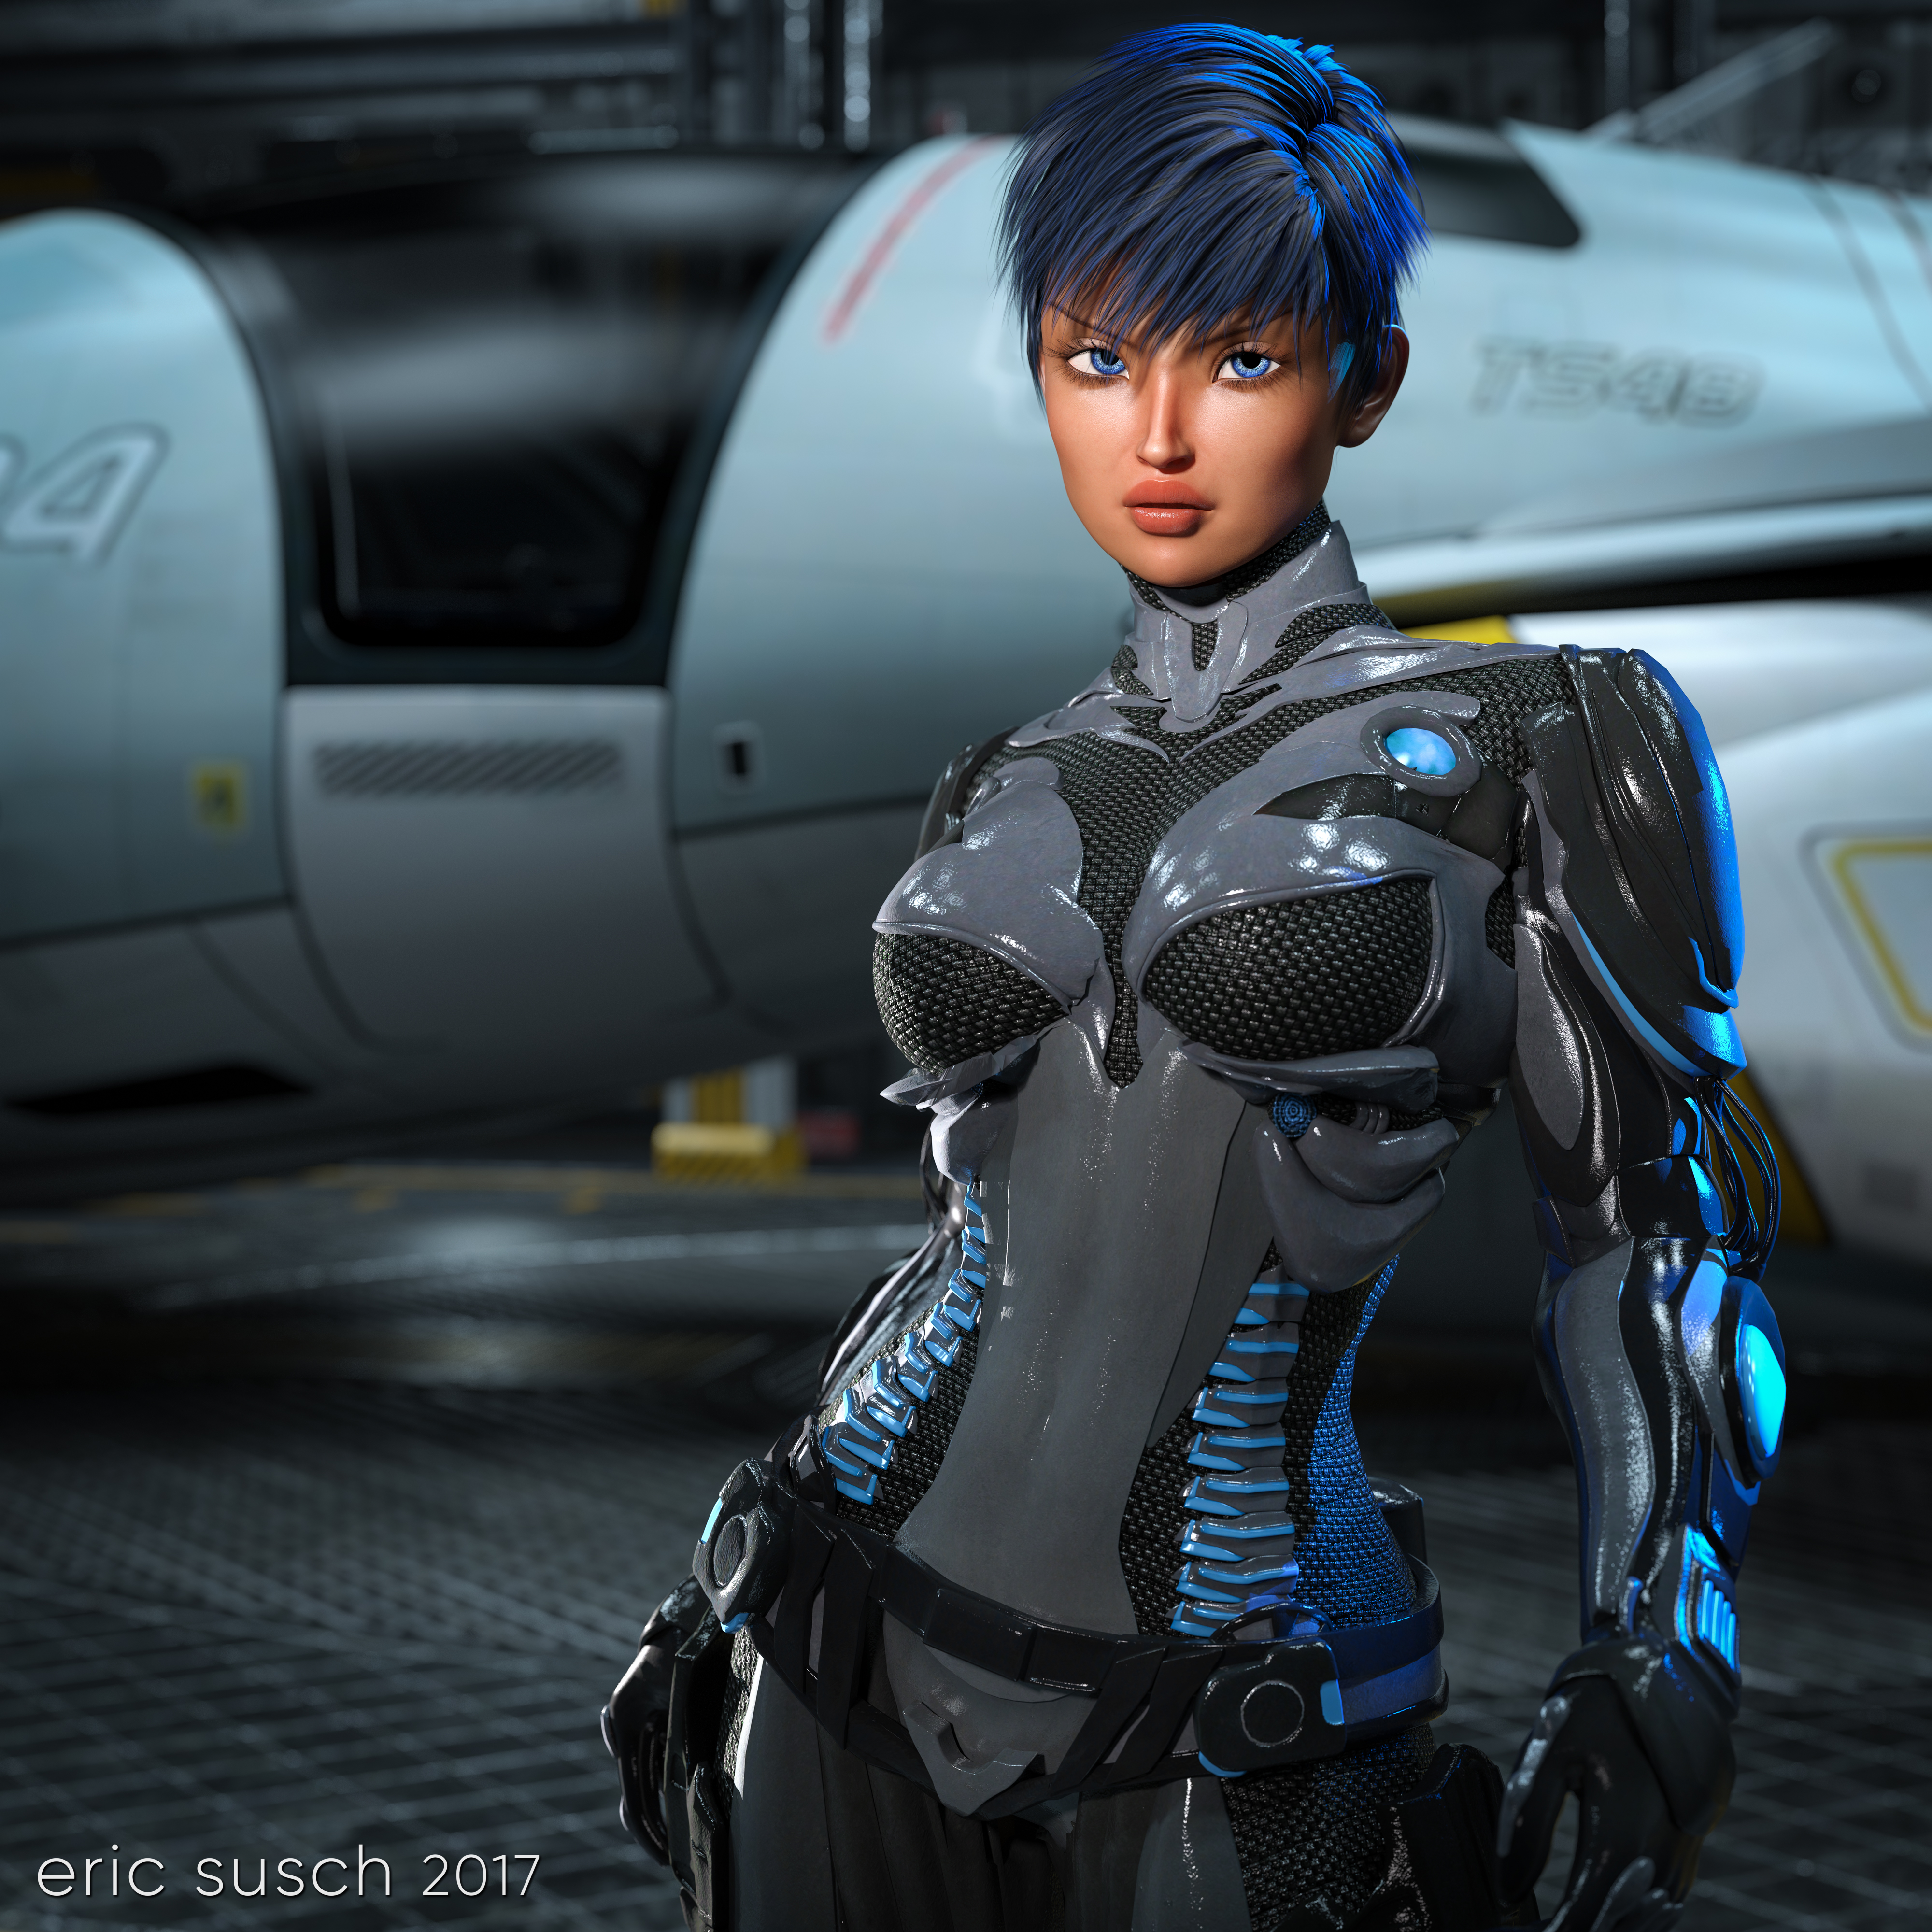
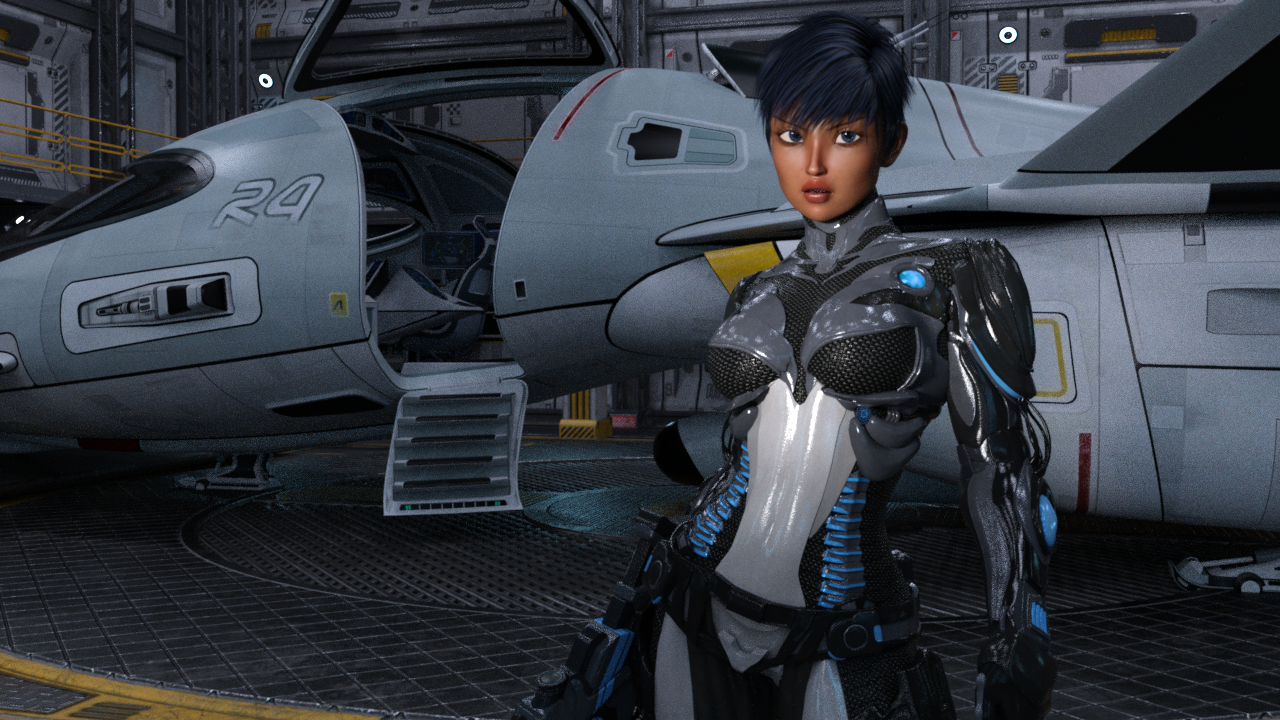 I eventually decided she was a pilot so I put her in a hanger bay with a shuttle. I spent a tremendous amount of time going back and forth deciding if the shuttle doors should be open or closed. I even thought of putting another character inside the ship at one point but I wasn’t able to made that work.
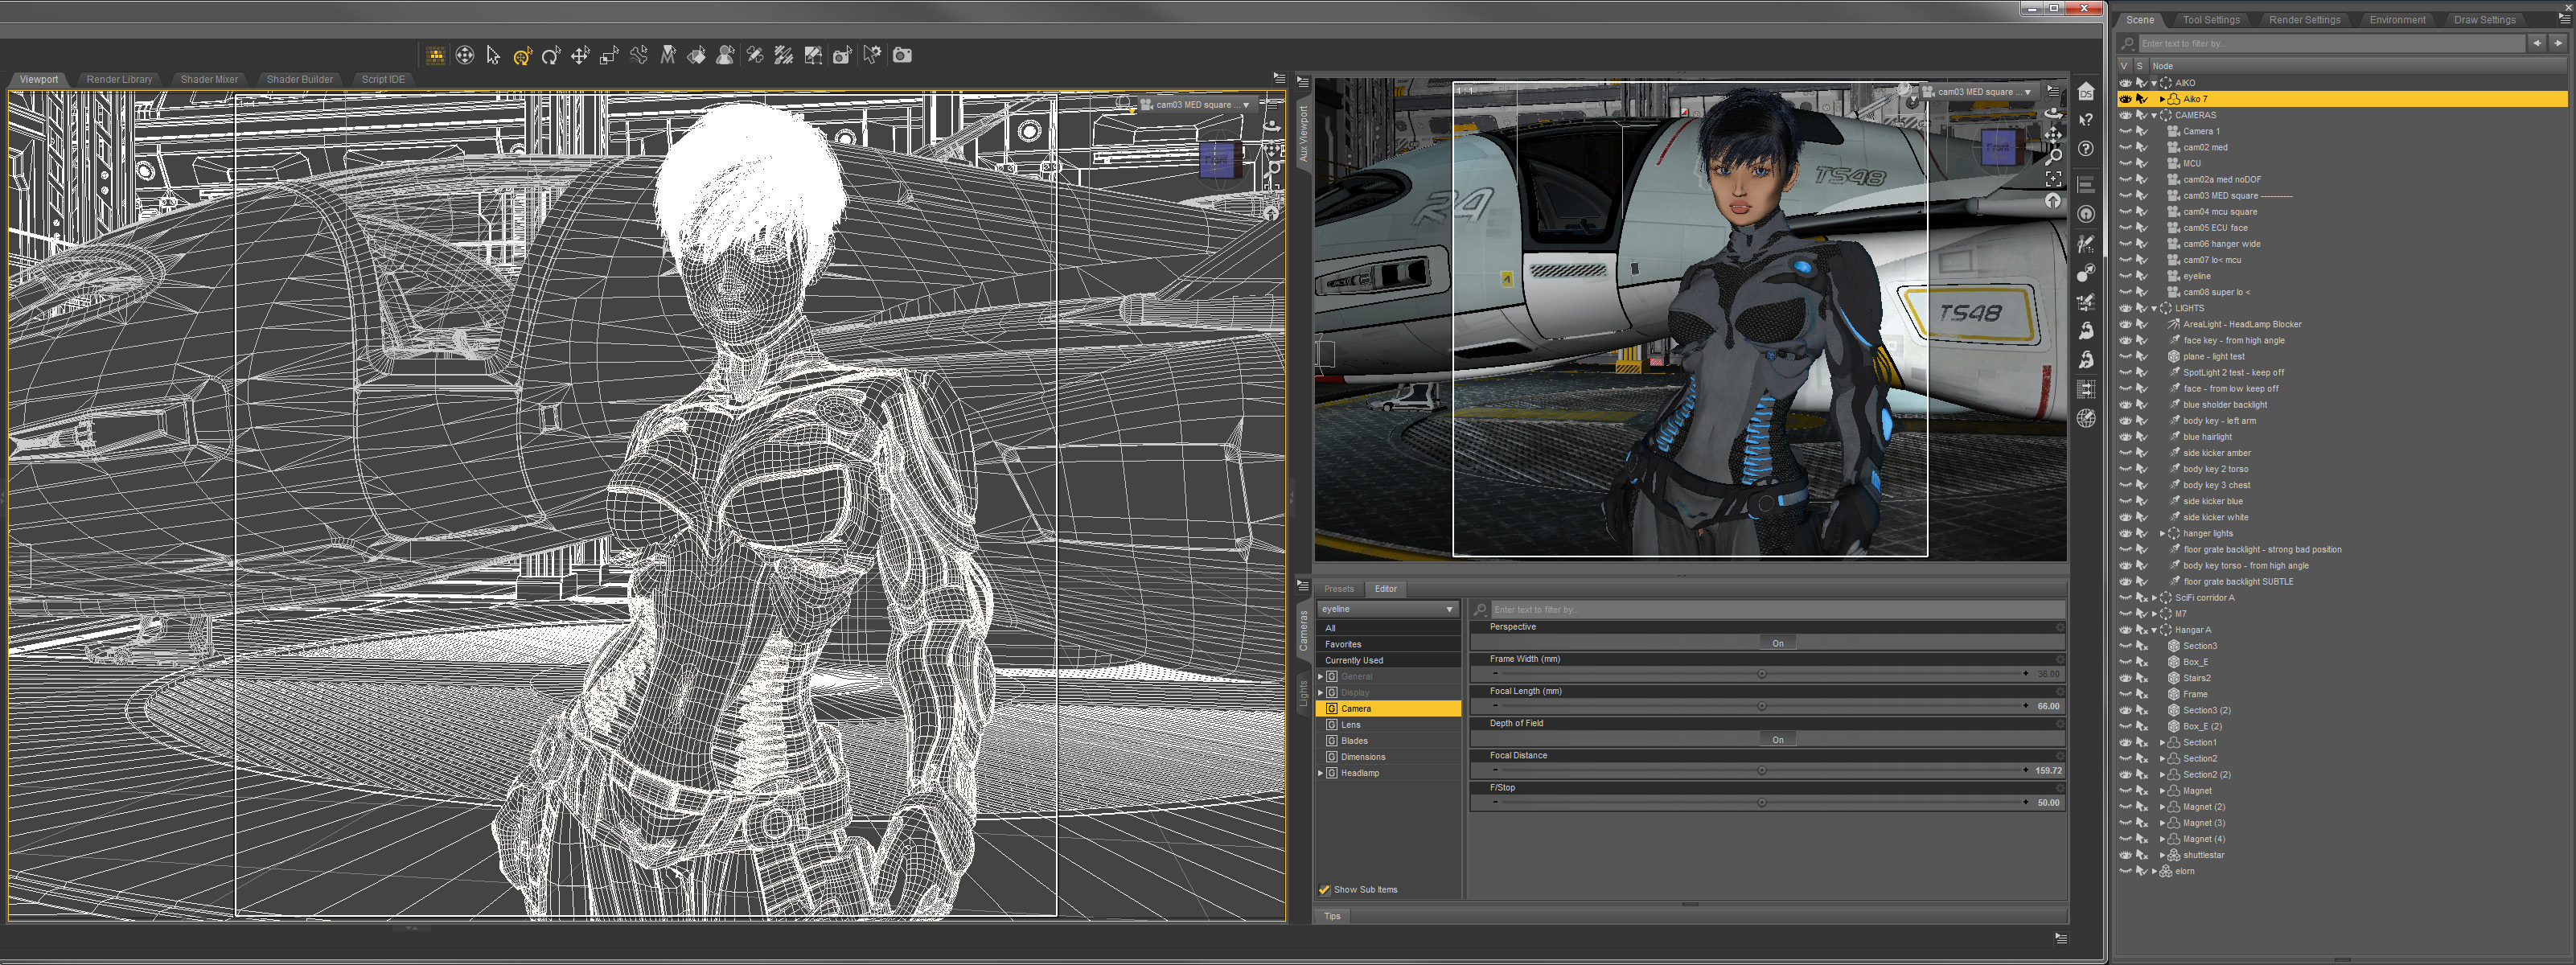 I don’t have much to say about this wire frame screen shot other than it looks cool!
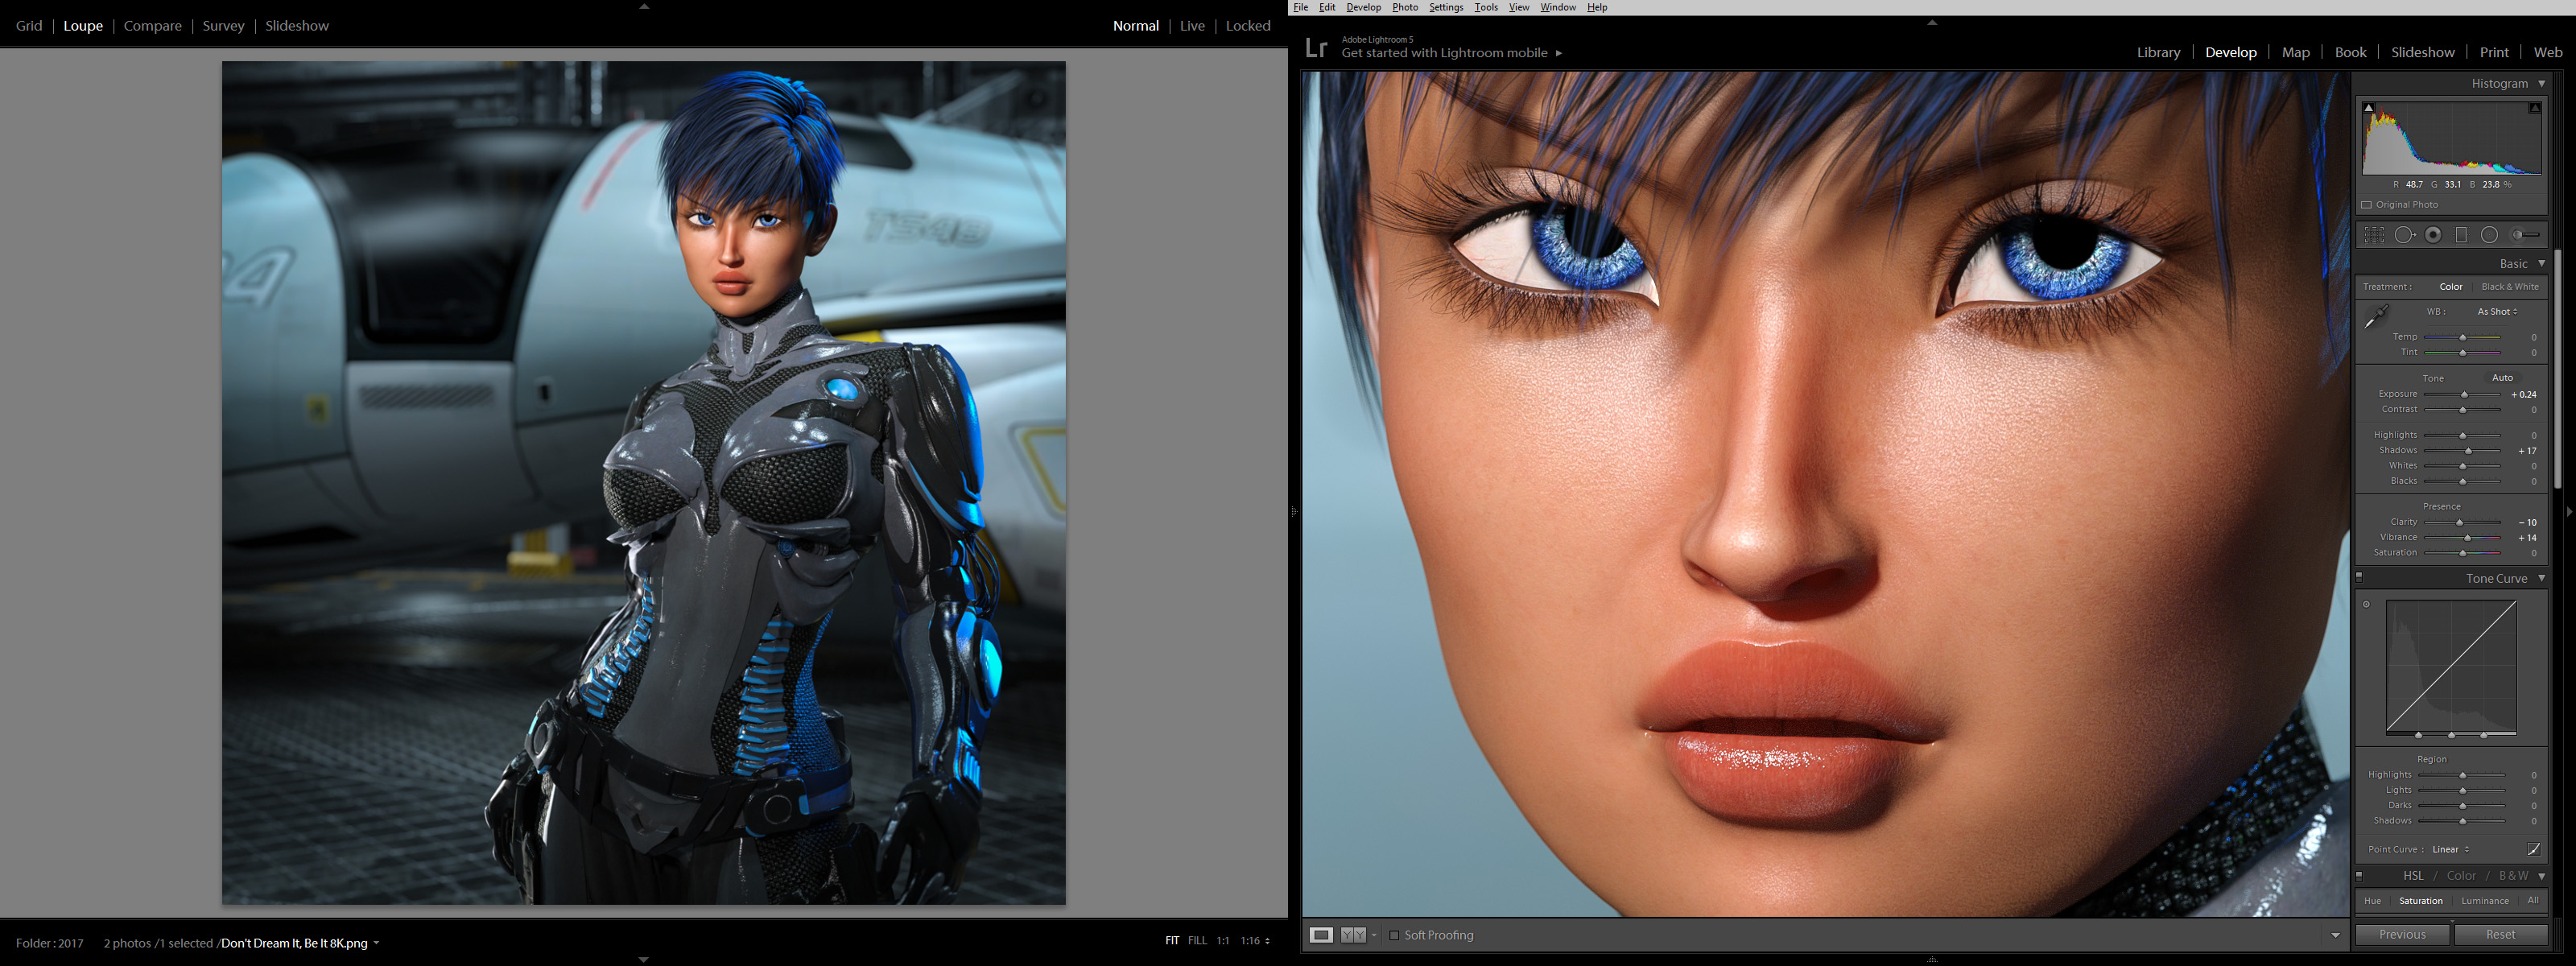 I think I left the bottom too dark when I initially did the color correction. I went back later and brightened it up a bit. The original render is 8000×8000 and the light on the skin looks fabulous at native resolution. Very pleased with how the face came out. (click to embiggen)
Created in DAZ Studio 4.9
Rendered with Iray
Color Correction in Lightroom
Figures used:
Aiko 7
StarSlayer outfit for G3F
Shuttlestar
Sci-Fi Hanger A