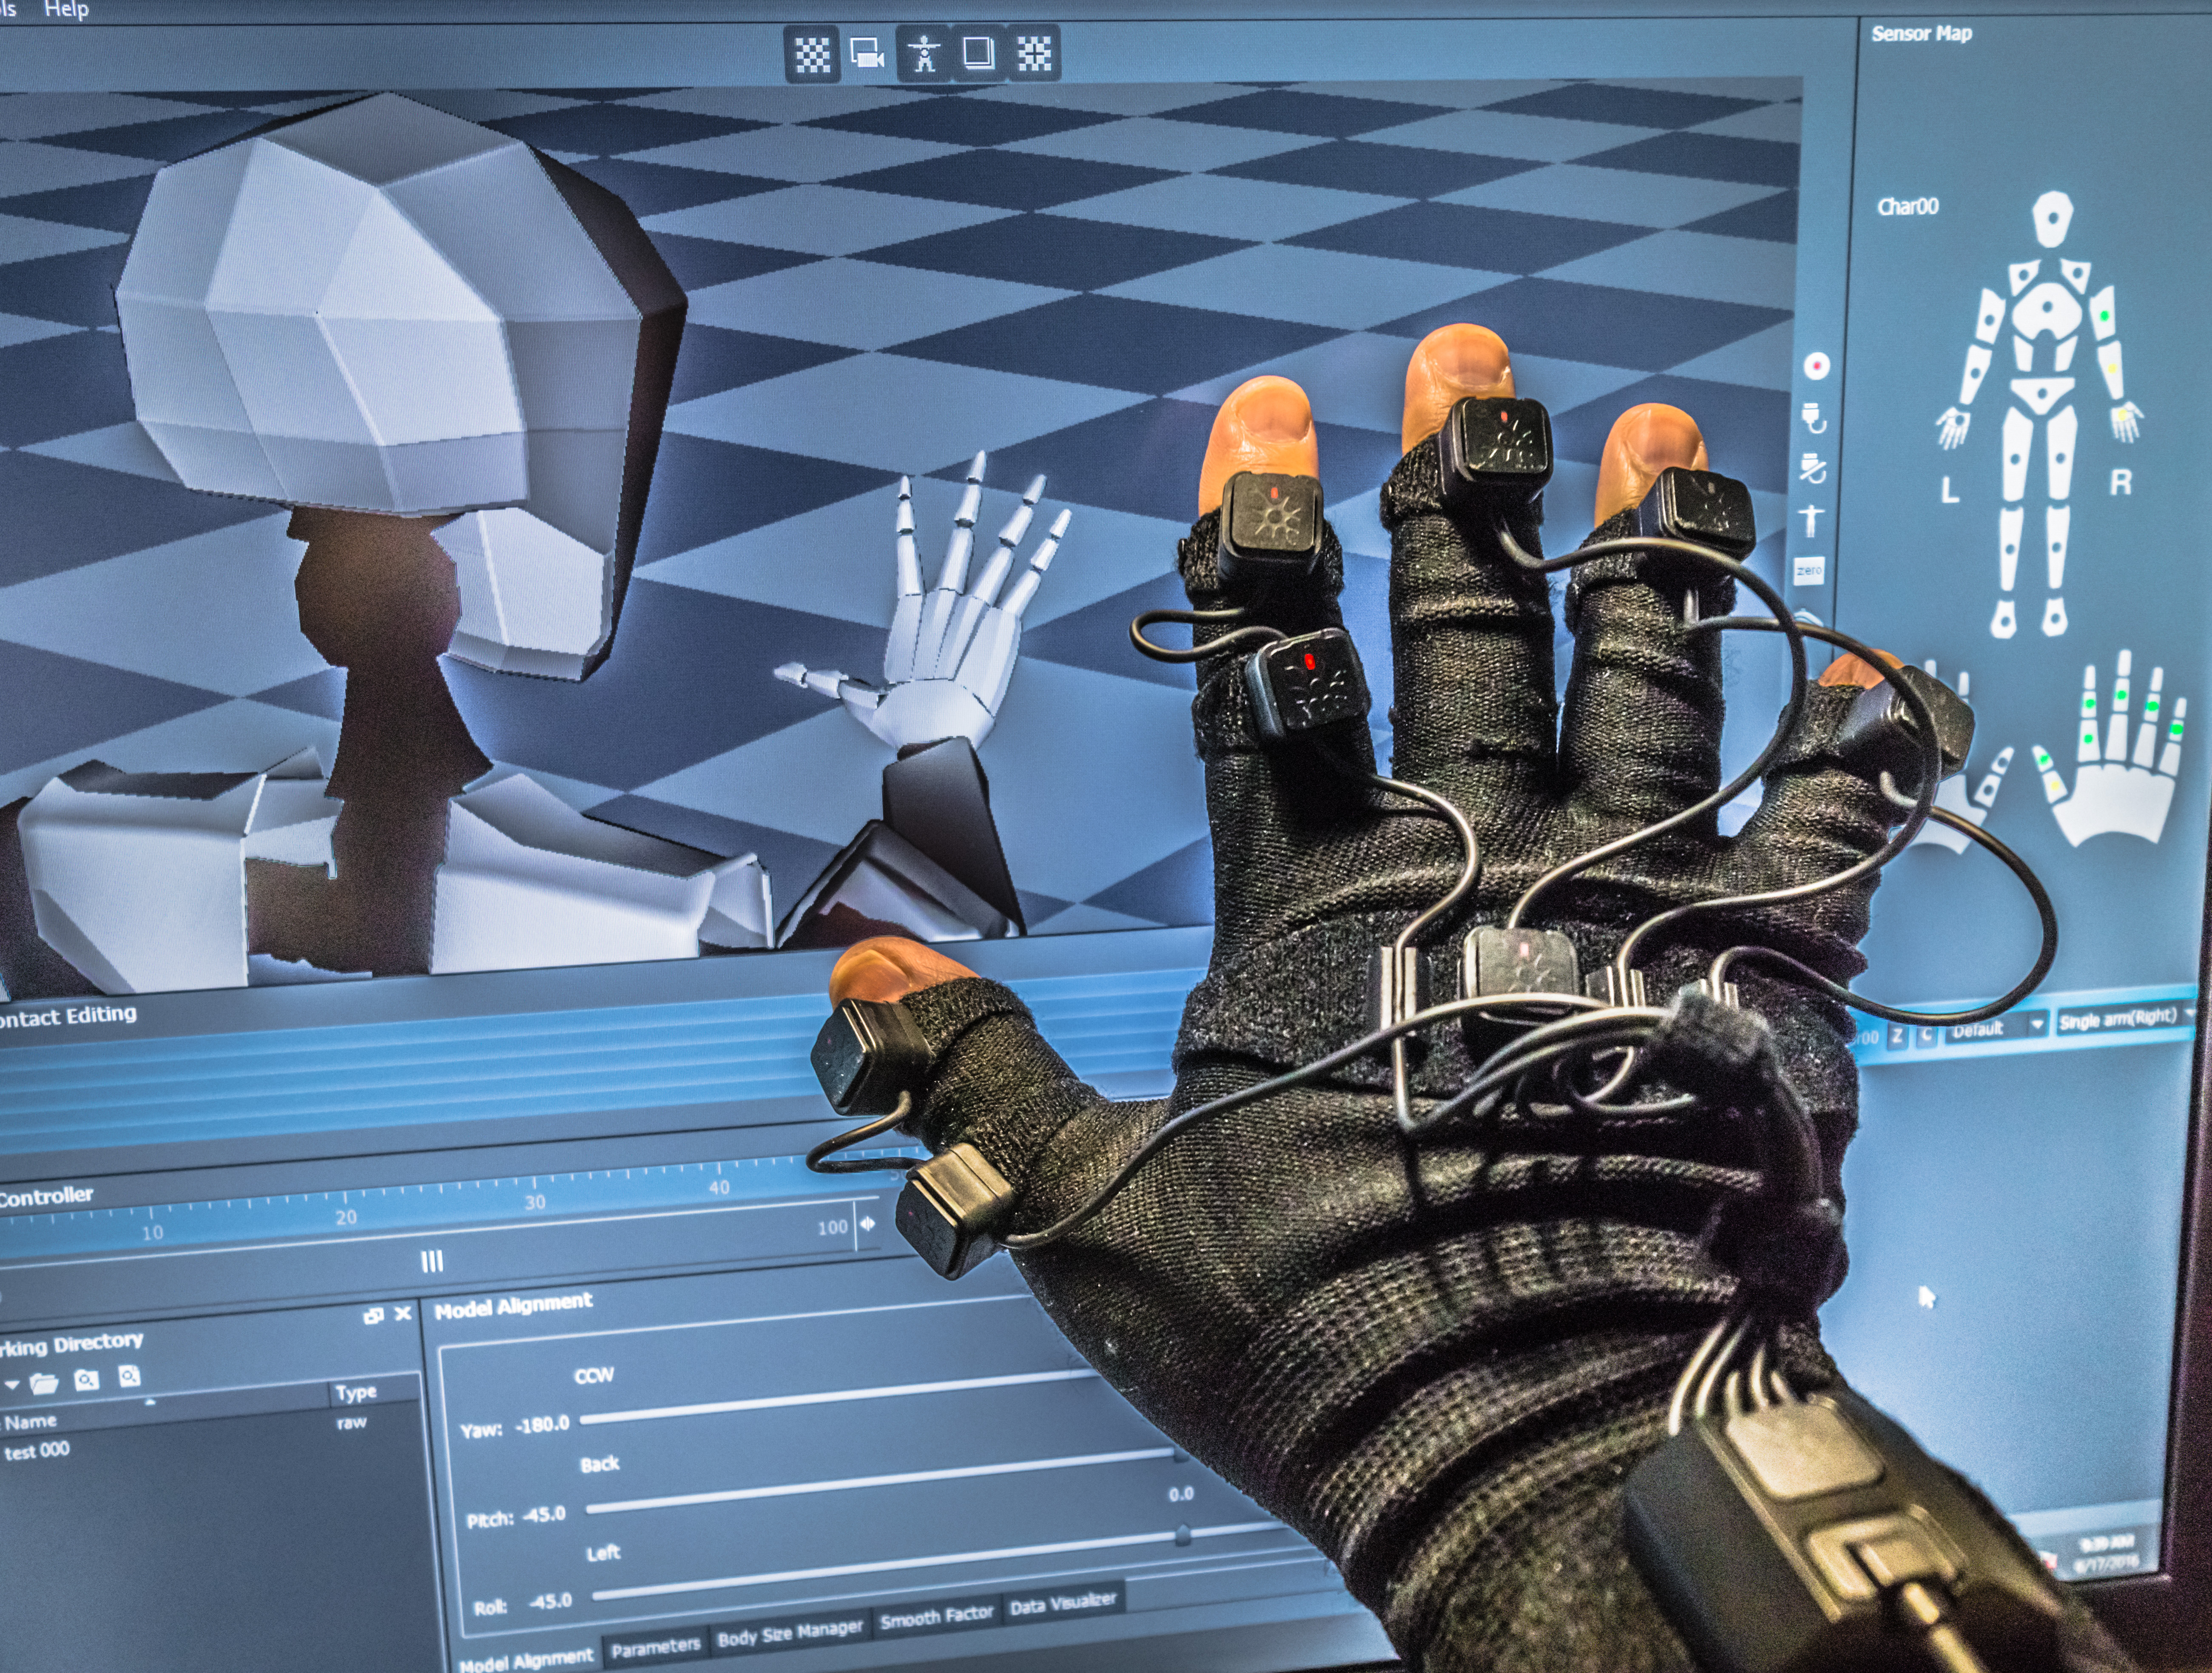
 Finally got a chance to test out my new motion capture system. IT’S ALIVE! I was able to record motion and play it back. Next step: connecting the motion capture data to a CGI character.
I Have Captured Motion!
Leave a reply
Finally got a chance to test out my new motion capture system. IT’S ALIVE! I was able to record motion and play it back. Next step: connecting the motion capture data to a CGI character.
Prints are available on my Deviant Art profile:
http://ericsusch.deviantart.com/art/Who-Are-You-612998410
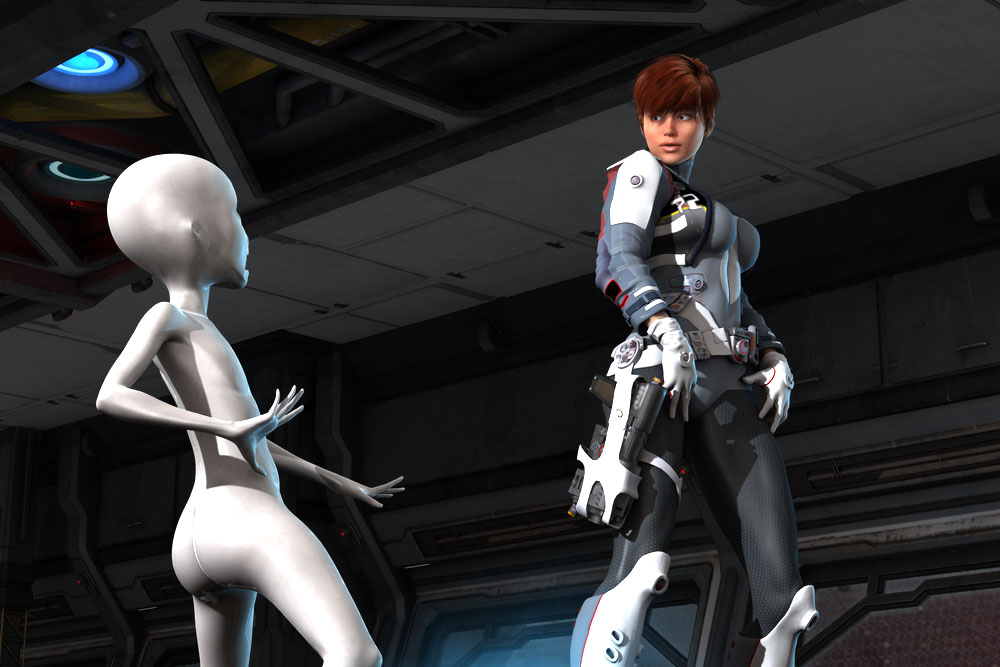
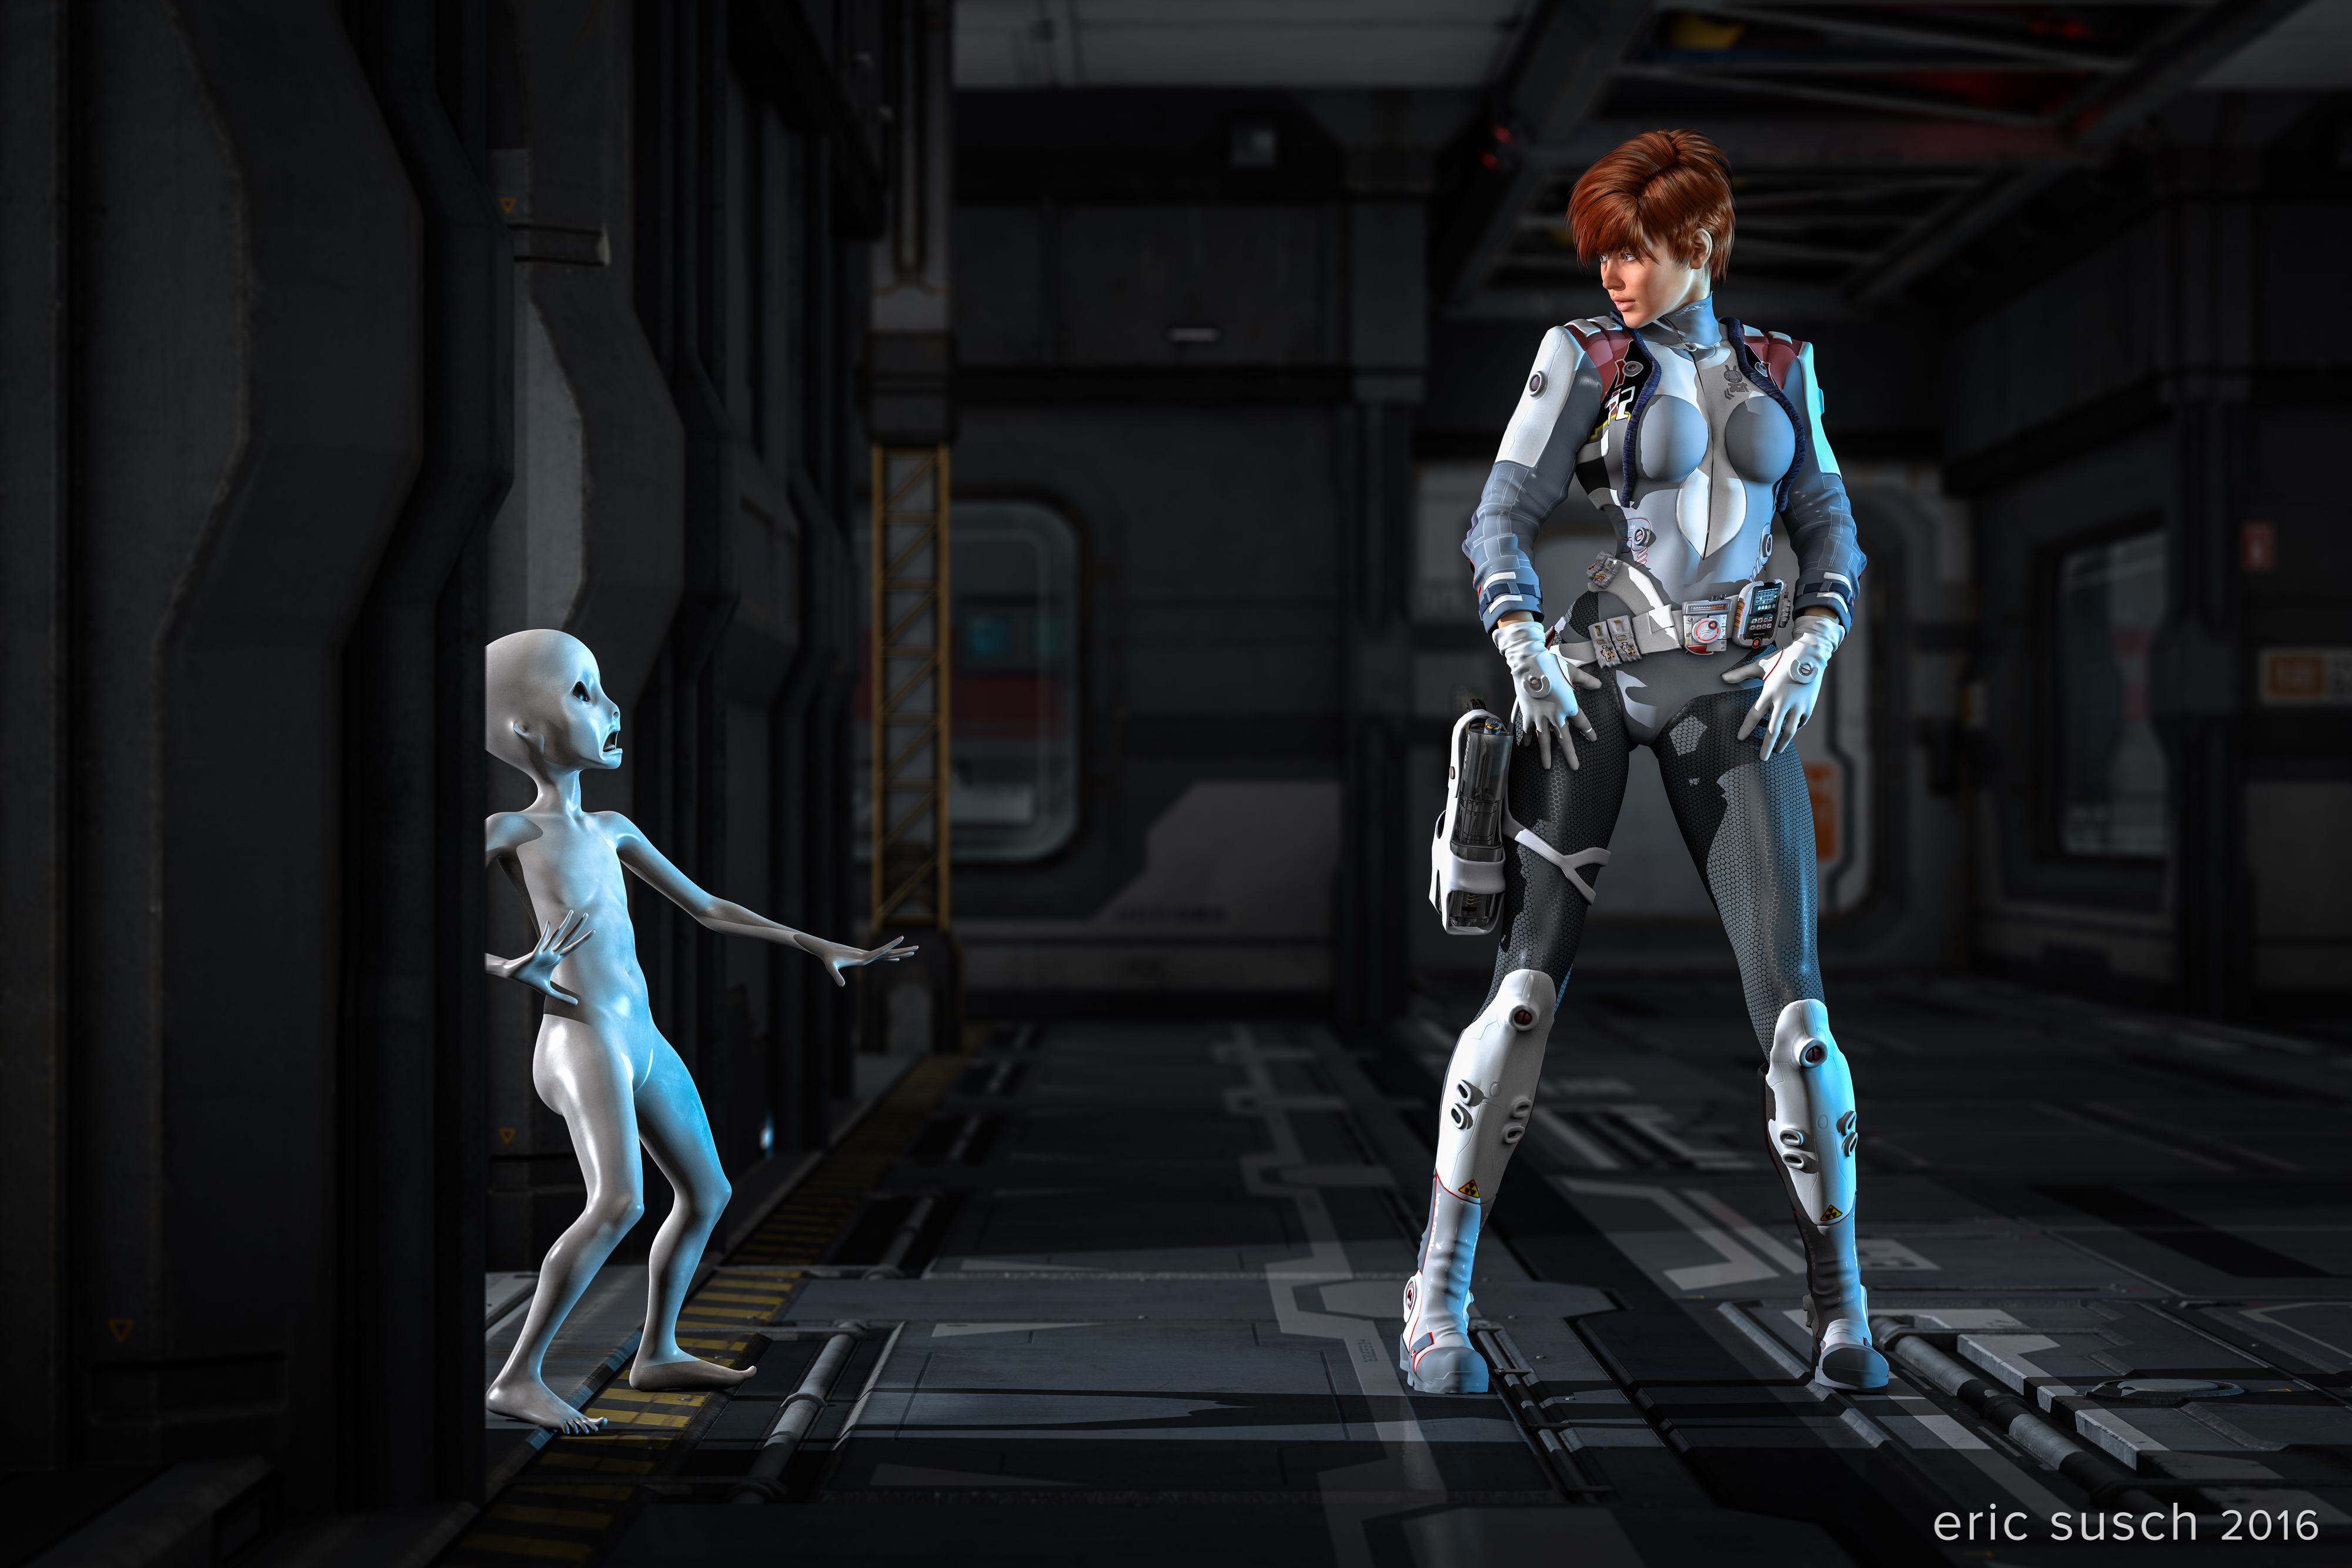 This is an update of the first CGI image I ever completed in DAZ Studio. Back then I didn’t know how to do lighting so I moved the character into the lights that were already pre-built into the set. This is the original:
 It took me days to place the character properly and learn how to aim a camera and render. The image is dark and I’ve grown to hate it as I’ve become more experienced. And so, like George Lucas, I decided to go back and change my earlier work to add new characters and “make it better.”
I loaded up the old project and continued right where I left off. As I re-familiarized myself with everything it became obvious how little I knew at the time. It was interesting to see how I solved problems back then. I’m really deep into all the technical details now and the way I work today isn’t necessarily better, just more complicated. It was surprising.
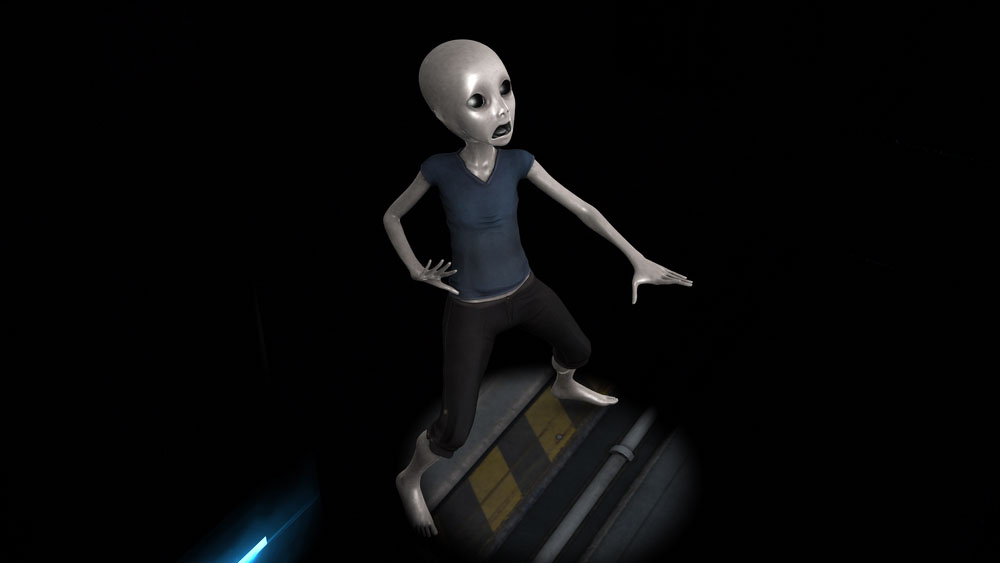
I knew I wanted to add more light and make everything brighter, but what else? I hate pieces where people just stand there so I added another character for the girl to react to. She’s looking out a doorway so I put a little alien guy there who is startled by her.
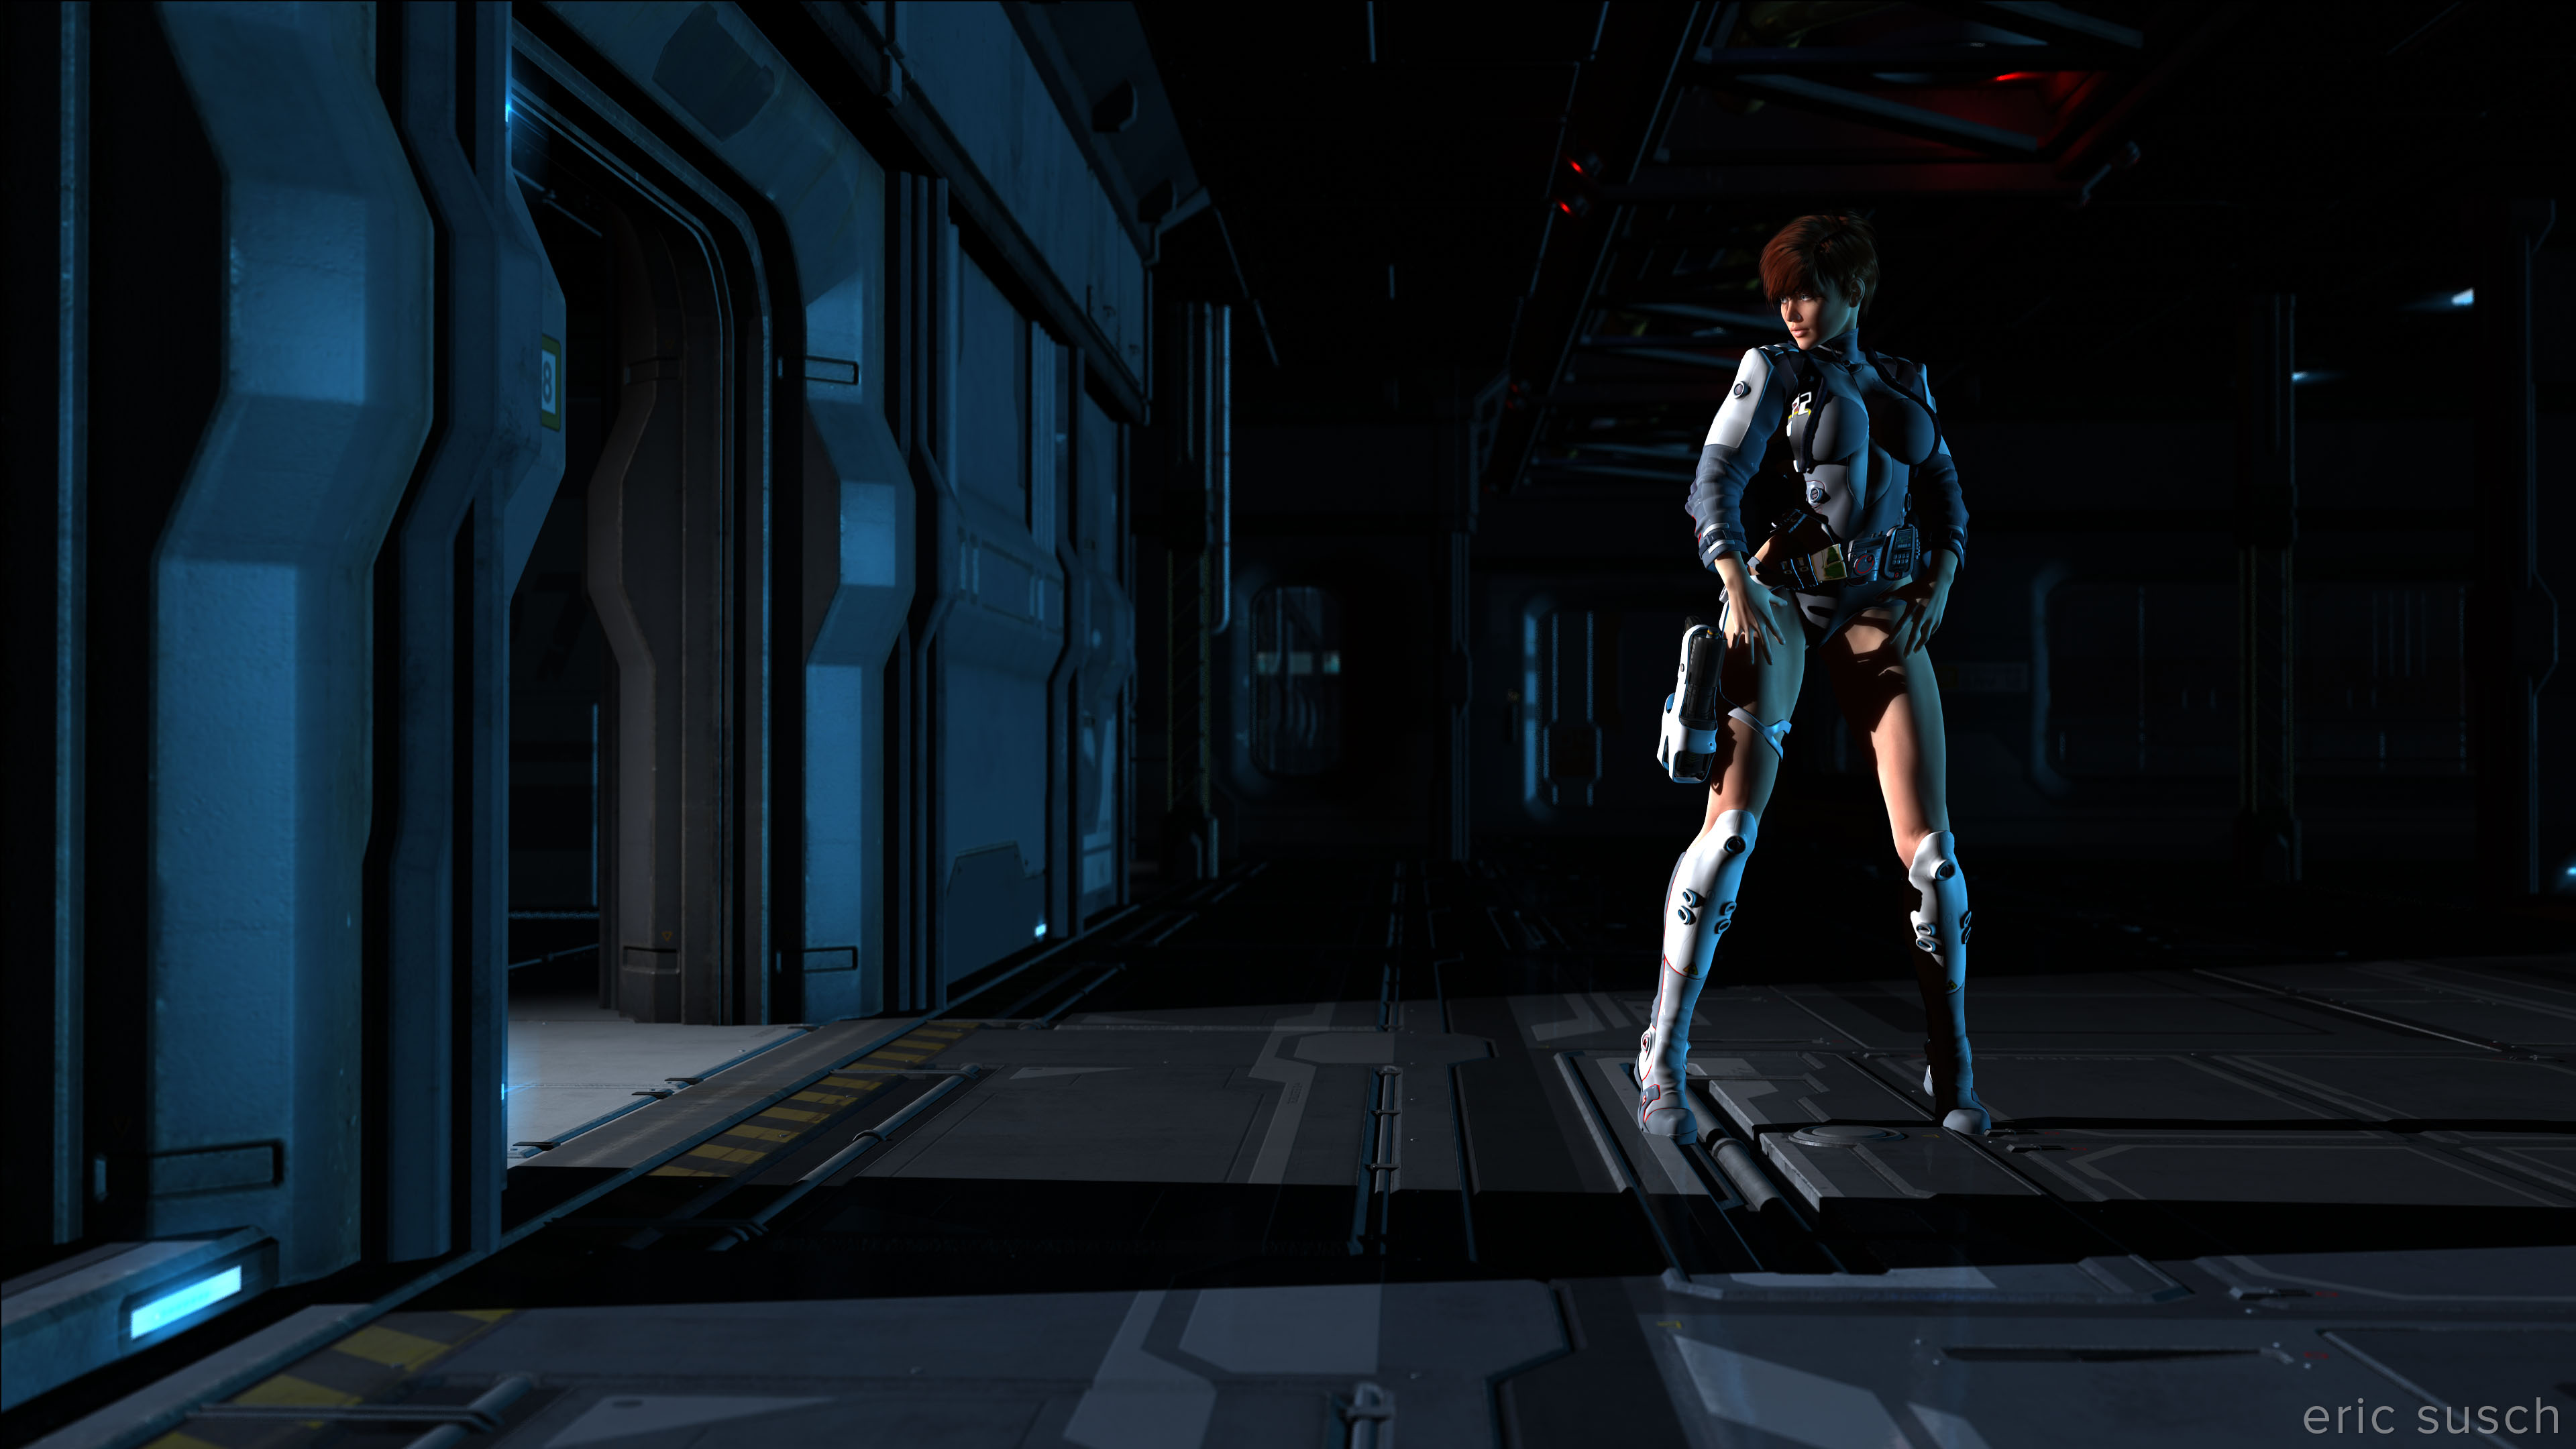
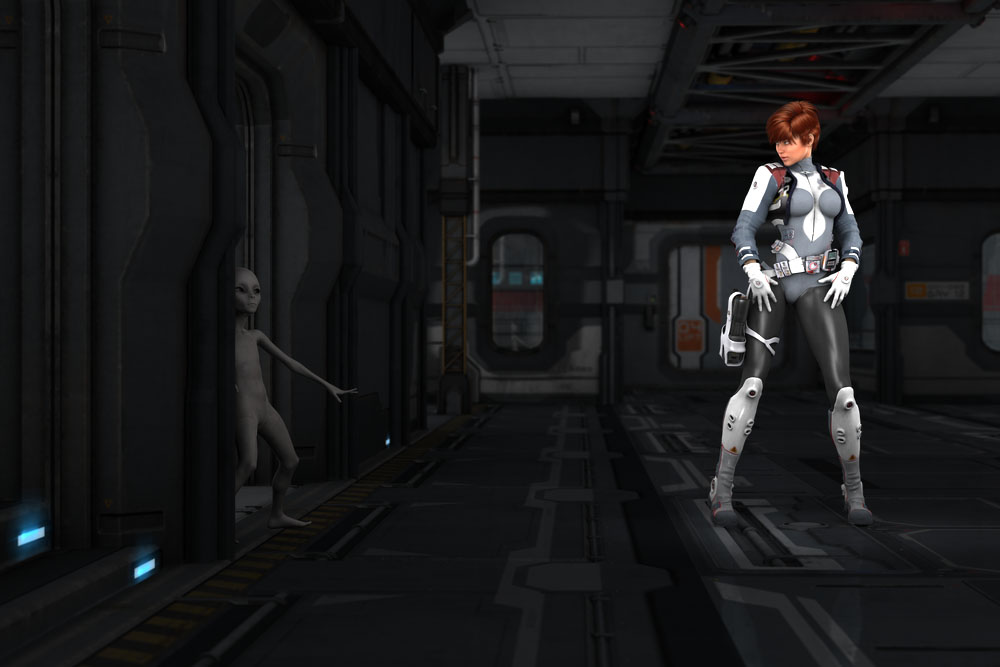
I tried many camera angles to get the best interaction of the two characters but eventually decided to keep it wide and head on similar to the original. You need to see the distance between them for it to work. These are some of the test angles.
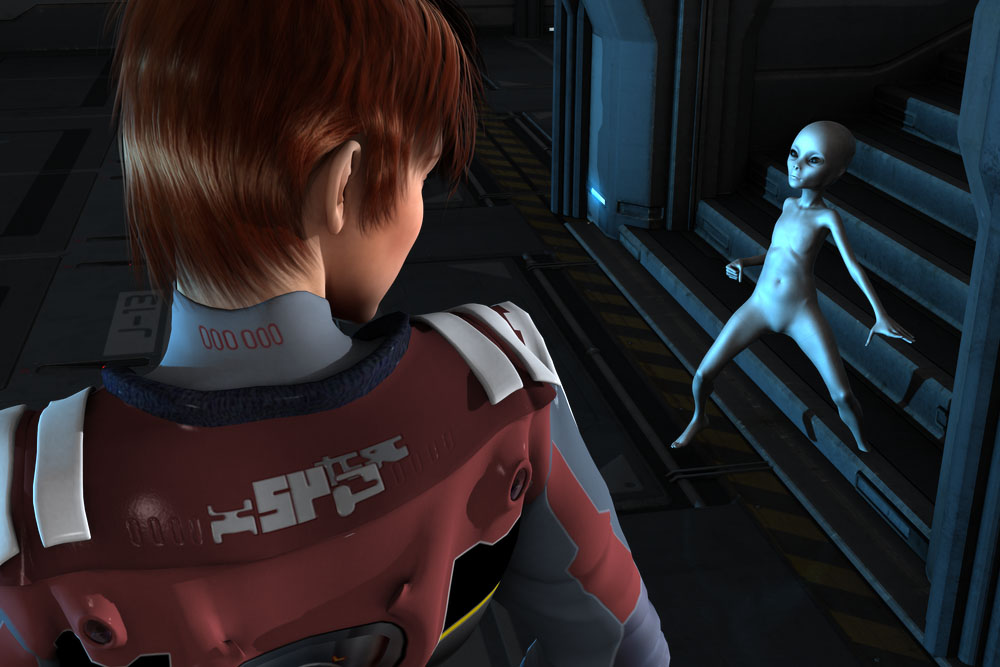
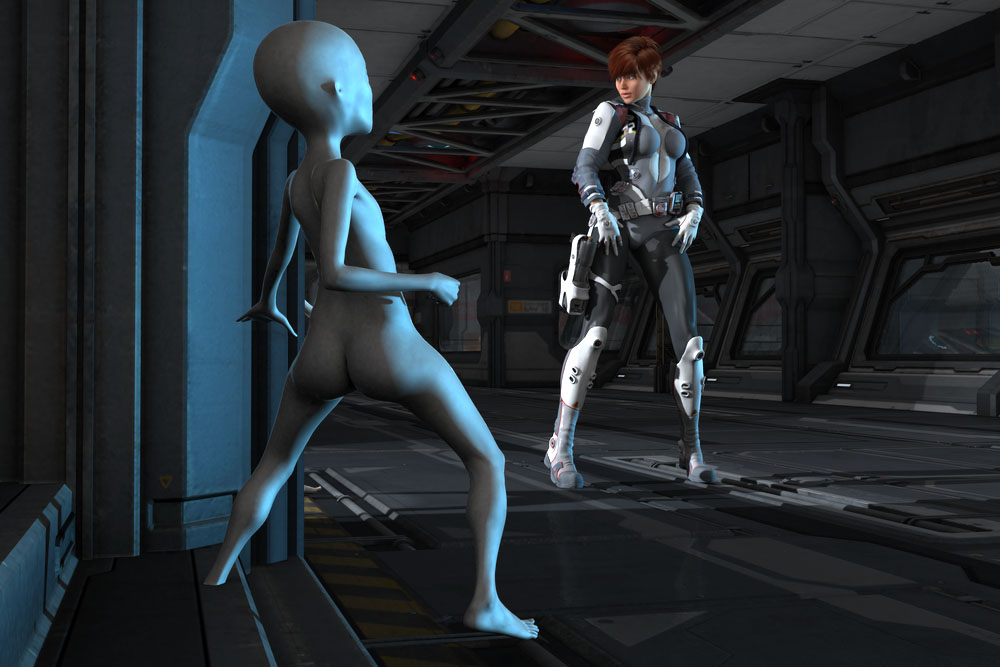 The last one isn’t bad but you can’t tell the alien is a tiny guy. I think you need to see that to understand he is scared. The middle one’s good too but you don’t get the sense of him coming around the corner.
Straight on wide shot seems the best but I still think it’s boring and too far away. Will have to work on that in another piece. For now it will have to do.
If I knew how to use an ambient light back when I originally rendered this scene it would have looked much better. I’m a big fan of the Advanced Ambient Light by Age of Armour. It’s the easiest fill light I’ve ever used and it renders fast. While I was playing around with it, I tried something new. I set three ambient lights in the scene. One was set to light everything overall like I usually do. The other two were placed very close to the characters with the light limited to their immediate area. That gave me the ability to adjust the brightness of each character and the background separately.
 It worked out very well. The light from the stairs and the blue back light from the windows were still the main lights but the ambient lights in this configuration allowed for very fine brightness adjustment during the final tweaking. I’m going to use this technique whenever I work in 3Delight.
The most difficult part of this re-imagining was actually the back wall. The set had a window that looked like a portal or hatch right where the lines on the floor converge at the back. It drew your eye right past the two characters to the window. I had to eliminate that panel and take a different wall from another part of the set and replace it. The other wall had a larger window that extended behind the corner so it wasn’t as distracting. Finding the right panel to use took some time. Adjusting the glossiness of the window and darkening it with a semi-transparent black plane helped too.
 Know Yourself
After struggling with the complexity of Iray for the past year it was a joy to build something in 3Delight again. You forget how simple it is. And that’s the key, isn’t it. Simplicity. Working in this old project, I was surprised how much I was able to do originally with how little I knew. I didn’t have a lot of options – not a lot of knowledge about surfaces, materials, render settings, shaders, UV maps, morphs, or even lights. I didn’t have all those things in my head slowing down my creative process. I just did it whatever way I could figure out in the moment. I’ve forgotten what that’s like.
 I encourage everyone to do this at least once. Open up a really old project and see how you used to work. See how you used to think. You may learn something from yourself.
Created in DAZ Studio 4.5 and 4.9
Rendered with 3Delight
Color Correction in Lightroom
Figures used:
Victoria 6
Liquid Halo On Sky 16 for Genesis
Grey Alien for Genesis 3 Female
Sci-Fi Corridor 2013
![]() I started a facebook page for my artistic work several years ago. Ever since then I’ve wondered how to separate what I post to my personal profile, which I keep essentially public, and what I post to my page. After years I still haven’t figured it out. The page is reserved for my work and general SciFi culture, but I also post that stuff to my personal profile too, so I end up cross sharing a lot which I hate.
I started a facebook page for my artistic work several years ago. Ever since then I’ve wondered how to separate what I post to my personal profile, which I keep essentially public, and what I post to my page. After years I still haven’t figured it out. The page is reserved for my work and general SciFi culture, but I also post that stuff to my personal profile too, so I end up cross sharing a lot which I hate.
It’s easy to get confused between the profiles so I make sure they at least have different avatars. I created this one similar to my new personal avatar but with an alien. I won’t know what to post where, but at least I’ll know who I am when I’m posting!
I had to light this differently from my personal avatar. Usually I go for the control of spotlights but for this I needed something to reflect in the big black eyes. I lit this image solely with a skydome that surrounded the entire scene. Since that put too much light on the back panel, I then modified the surface and made it darker, so it would look similar to the original background.
Created in DAZ Studio 4.9
Rendered with Iray
Color Correction in Lightroom
Figures used:
Grey Alien for Genesis 3 Female
After using my new CGI profile picture on facebook for awhile I started to dislike it. It looked mean, especially at small sizes. Part of the reason I think was the contrasty film-noir lighting. I thought I would try something a little different with softer light. I also turned the face to the side similar to my original photo that I used for years. This is what I came up with.
 I started to dislike it as soon as I uploaded it. I thought the face looking away from the text had an aloof quality. I turned things around, used a longer lens so the face wouldn’t be so distorted, and gave him some hair. This is my newest avatar.
 I’ve been using it on facebook for about a day now. So far I like it. I’ll upload it to other social media sites and live with it for awhile.
Created in DAZ Studio 4.9
Rendered with Iray
Color Correction in Lightroom
Figures used:
FWSA Aiden HD for Michael 7
Awesome Fantasy Eyes
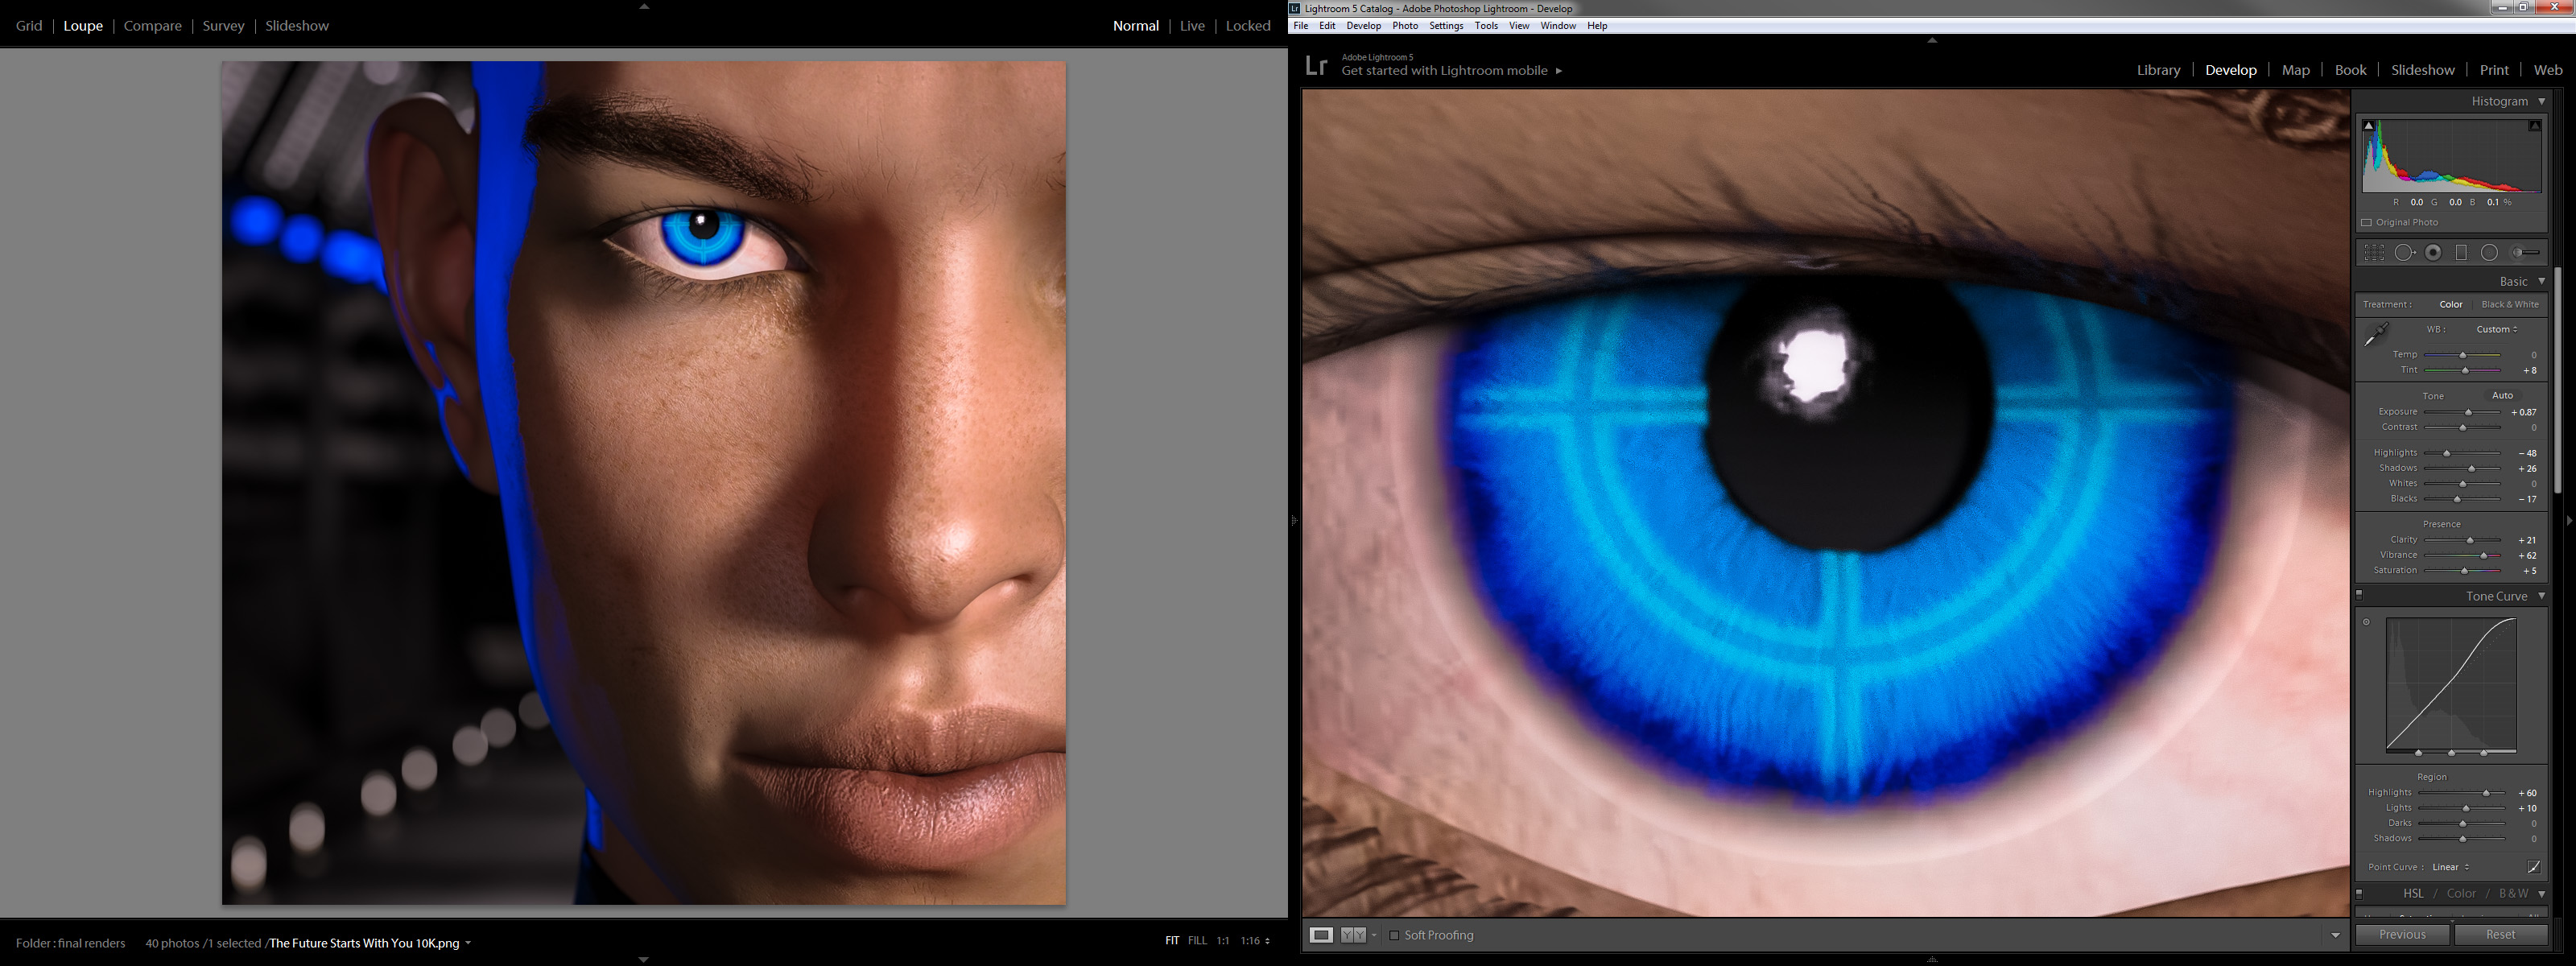
 For most of the films and television shows I’ve worked on the goal of color correction was to make the picture look technically correct and pretty – healthy skin tones, bright colors, maybe a bit “hyper real” but still normal. Anything that degraded the image was bad and needed to be fixed. What I’m trying here is relatively new to me. I want something more stylized for this animation. I’ve thrown in some grain and even a faint hint of scan lines to roughen up the super clean CGI. I’ve also washed out the skin tones in favor of the blue and orange. For comparison here is the original render before color correction. (Click both to embiggen.)
 I’ve been using the CC tools in Lightroom for most of my CGI work to date but since this is an animation I’m using the tools in Adobe Premiere. I’m finding it much harder. I love the CC tools in Lightroom. They’re more intuitive than the controls in Premiere or photoshop. I wish Adobe would create Lightroom style CC tools for all their products.
If this were a still image I probably would have gone a lot further with the grunge but it has to work as an animation. It has to look good in motion and on all the other close-ups and wide shots too. I’m pleased with it right now although I’m a little concerned that the grain will be lost when the video is finally compressed and uploaded to youtube. We’ll have to see what happens.
Created in DAZ Studio 4.8
Rendered with 3Delight
Color Correction in Adobe Premiere
Figures used:
Aiko 6
XTech for Genesis 2 Female
Modular Sci-Fi Kit 01 + 02
 I’ve been using the same avatar across all of social media for many years. It’s not very good. If you look at the original it’s actually out of focus, but you can’t tell when it’s a teeny tiny avatar on facebook. My wife CAT is in it too, which is nice.
I always intended to replace it but it was working, doing it’s job, so I didn’t. When I shaved my beard over a year ago I thought, “Well now it doesn’t even look like me. I really need to make a new one!” But it was still working. People still knew it was me. So I didn’t change it.
Cut to a few days ago. I was in DAZ Studio and I decided to experiment with different ideas for a new avatar. I figured I could come up with some “concept art” and then take a picture of myself with the same theme, same lighting. Simple. Maybe even use the same CGI background so I wouldn’t have to deal with that in the photograph. But, what to do?
To all those people who have their kid, or their dog, or cat, or a movie star, or an anime character, or their feet, or a sports team logo, or Abe Vigoda in their avatar: Nobody can figure out who you are! I go through this all the time. The name sounds familiar… Did I know this person in college? Did we grow up together on the same street? Did we work together ten years ago? Is that YOU as a kid? Or is that YOUR kid? Now I have to be a detective. It’s frustrating. Put your friggin’ face in your avatar! /rant
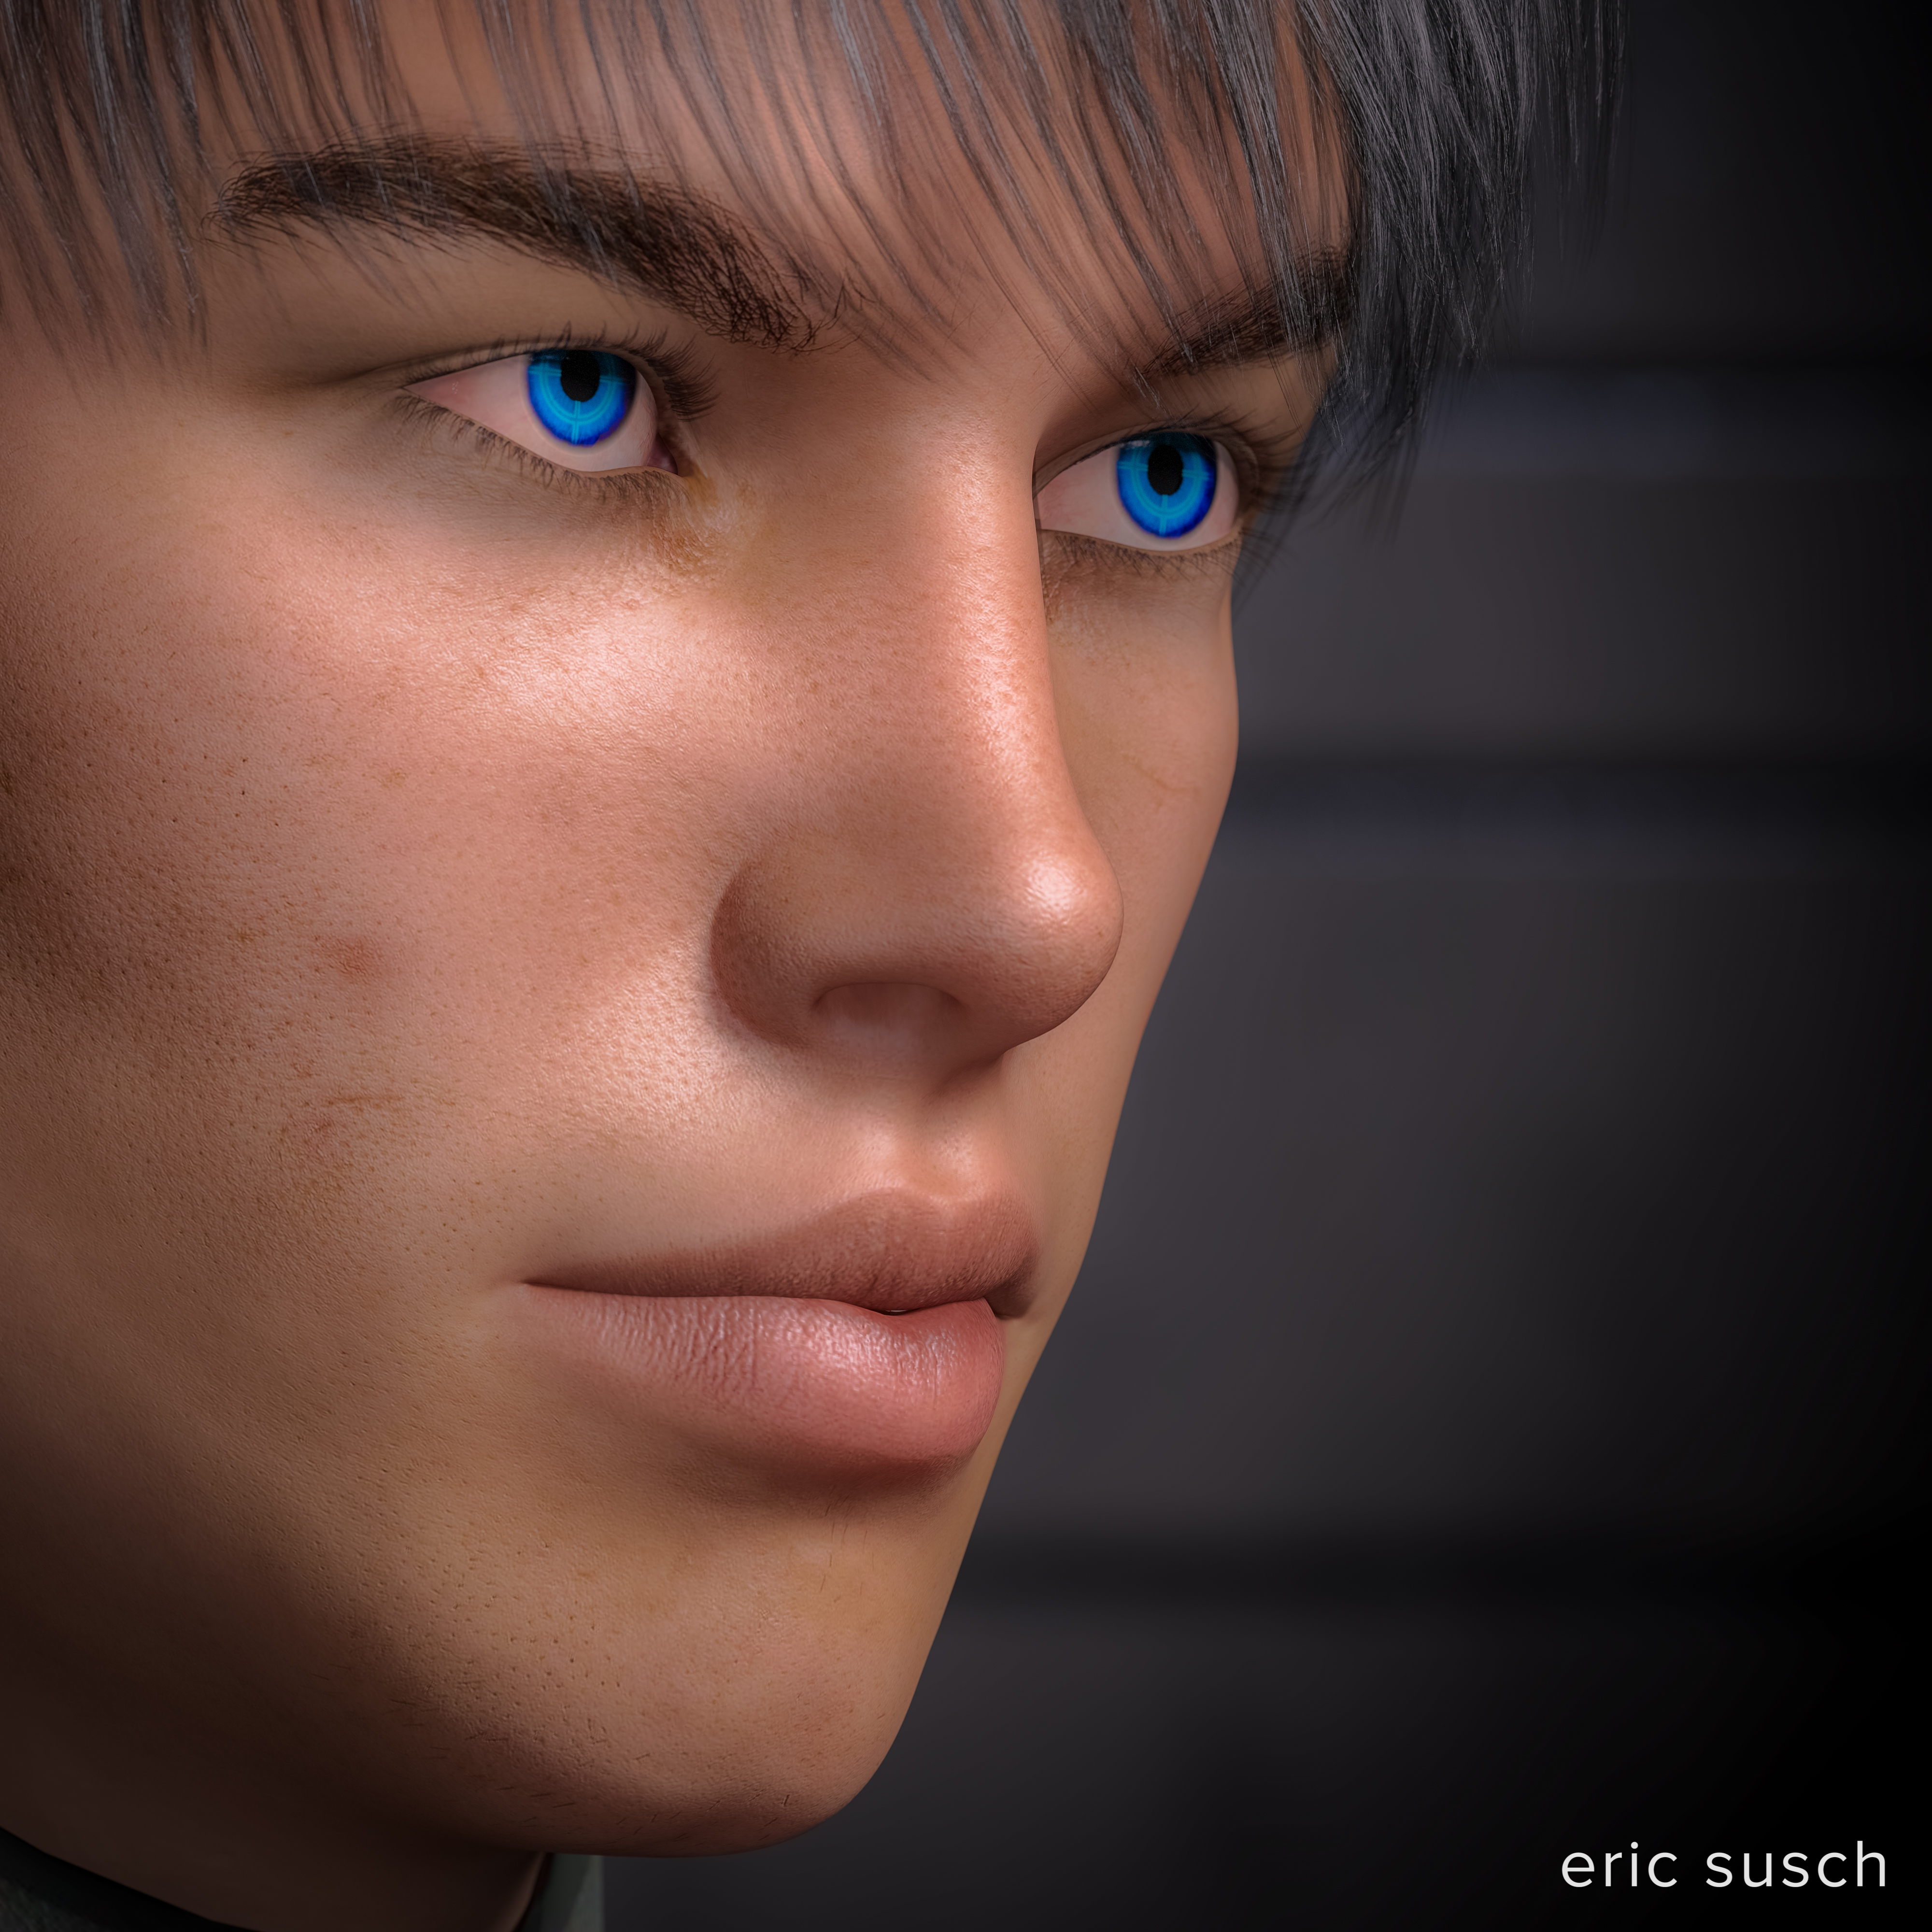
I like an avatar with a big face so I started with that. The bigger the better because sometimes these things are super small. I decide to try something similar to what I have now, an evolution if you will – the same but better – a big face but a little arty and off to the side. Centered is so boring. I used a long 200mm lens to blur the background, making the face stand out.
 I decided to go for hard side light with a blue kicker (back light) to give it a shadowy tech-noir feel. I wanted the style to reflect my personality. I’m one-hundred percent SciFi and my avatar should be too!
I then spent a lot of time trying to get good skin. There’s a trend in CGI these days. Reality. I think reality is overrated but in this case it makes sense. An avatar is supposed to represent a real person. …And it doesn’t hurt to learn new things. I spent a lot of time experimenting with skin translucency, glossy reflections, roughness, bump maps, and scores of other surface controls. Endless tweaking. (Welcome to CGI.) Ultimately I got something that looks like a real person. The guy doesn’t look like ME, but he looks relatively real.
And then I put a glowing cross hair in the eye. Screw reality! I like robots!
 About-Face
And here it is. It turned out much better than the “concept art” that I intended so I’ve decided to use it straight-up as my new avatar. So to the people who have their kid, or their dog, or cat, or a movie star, or an anime character, or their feet, or a sports team logo, or Abe Vigoda in their avatar: I’m now one of you! My avatar is now a synthetic man that doesn’t look like me. If you can’t beat ’em join ’em. We’ll see if it works.
Created in DAZ Studio 4.9
Rendered with Iray
Color Correction in Lightroom
Figures used:
FWSA Aiden HD for Michael 7
SciFi Passageway
Awesome Fantasy Eyes
UPDATE: After using my new CGI profile picture on facebook for awhile I started to dislike it. More in this post: My quest for the perfect CGI avatar
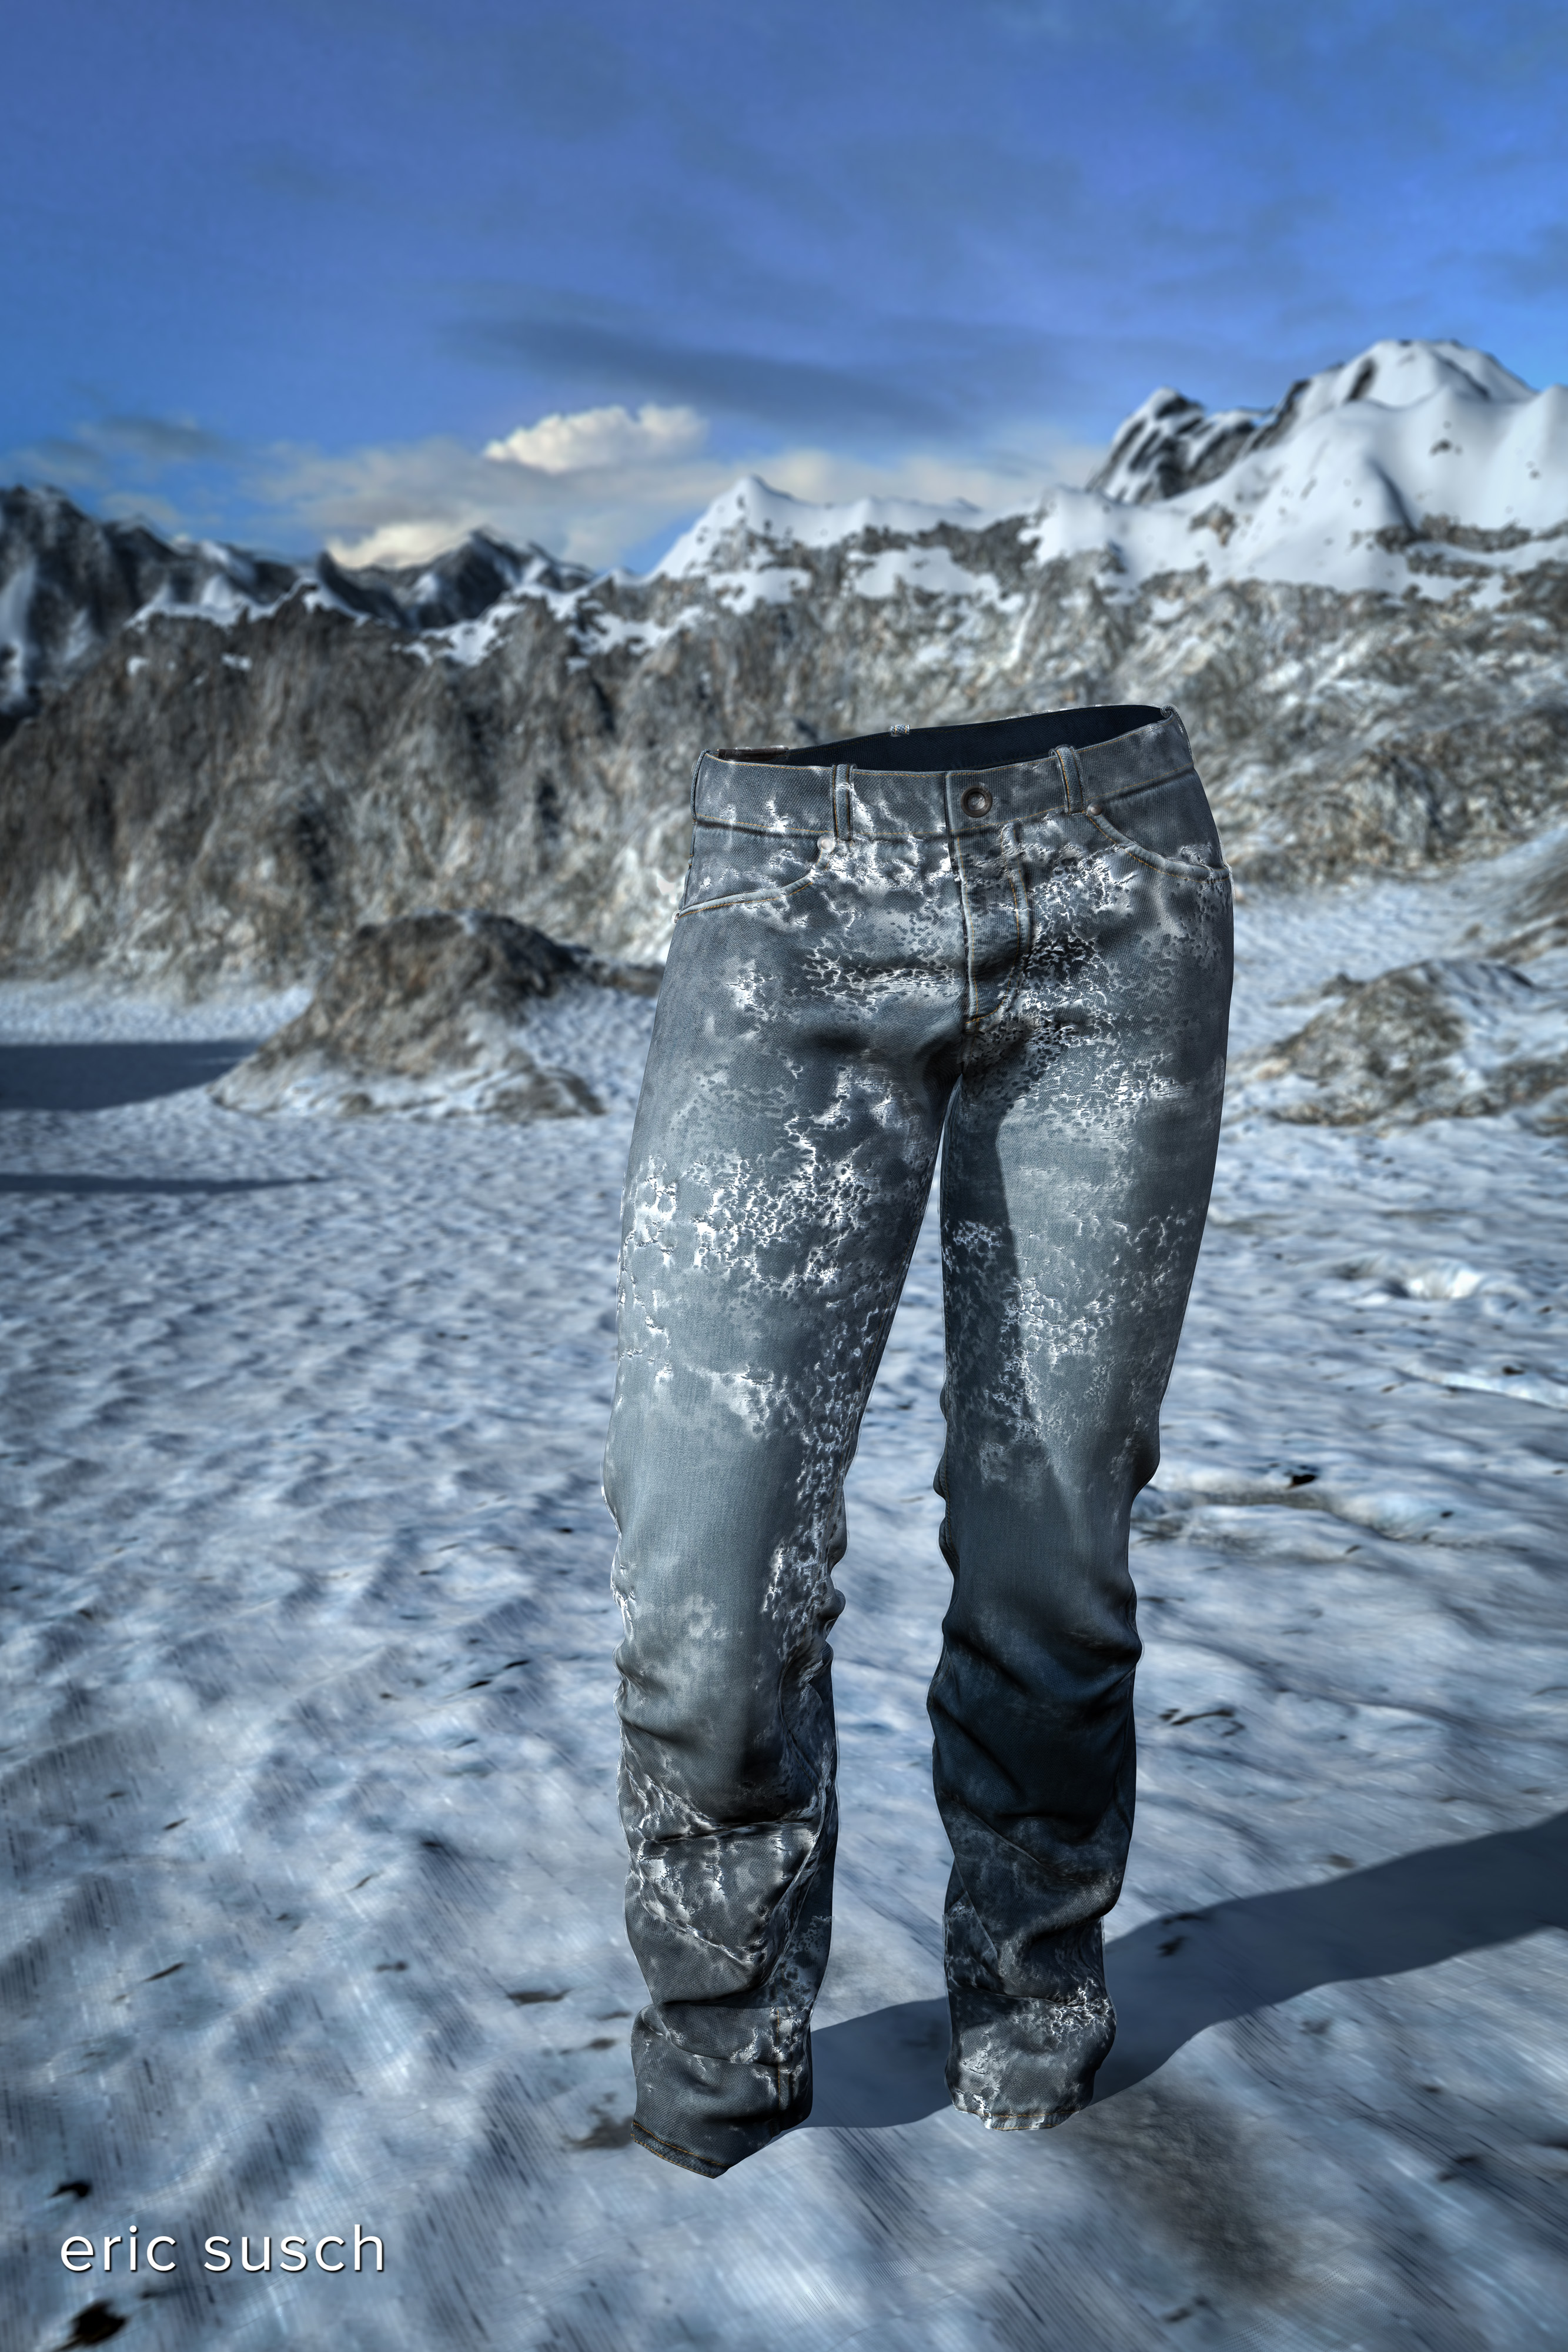 I was testing out special snow shaders I purchased and decided to make an image of frozen pants. Why? Well, a fellow discreet logic – D/Vision editor from back in the day, Tom Grotting, started a trend in Minnesota. He freezes jeans and stands them up all over town. It’s caught on in other places this winter. Check it out.
In my image, special shaders called Let It Snow created the snow on the pants and the tops of the mountains. It took a bit of fiddling but in the end it looks quite good, at least from a distance. The shaders are added to an invisible shell around the object and if you look very close, especially along the edges, you can see the shell and the snow hovering above the object. You can shrink the shell but that changes how the snow looks across the surface so it might be a bit of a compromise to get the right look. I set the mountains in the background a bit out of focus which helps. All in all though, the shaders work quite well. What do you think?
Created in DAZ Studio 4.8
Rendered with 3Delight
Color Correction in Lightroom
Figures used:
Urban Survivors HD for Genesis 2 (pants)
Winter Terrains For DAZ Studio
This is the video that goes with my article in the December issue (#18) of DS Creative magazine. My in-depth tutorial was based on this shot. Check out the article on page 72.
I originally developed this shot to test a complex keyframed camera movement in DAZ Studio. So far it looks like the DAZ software will be able to do the kind of animation I want to attempt.
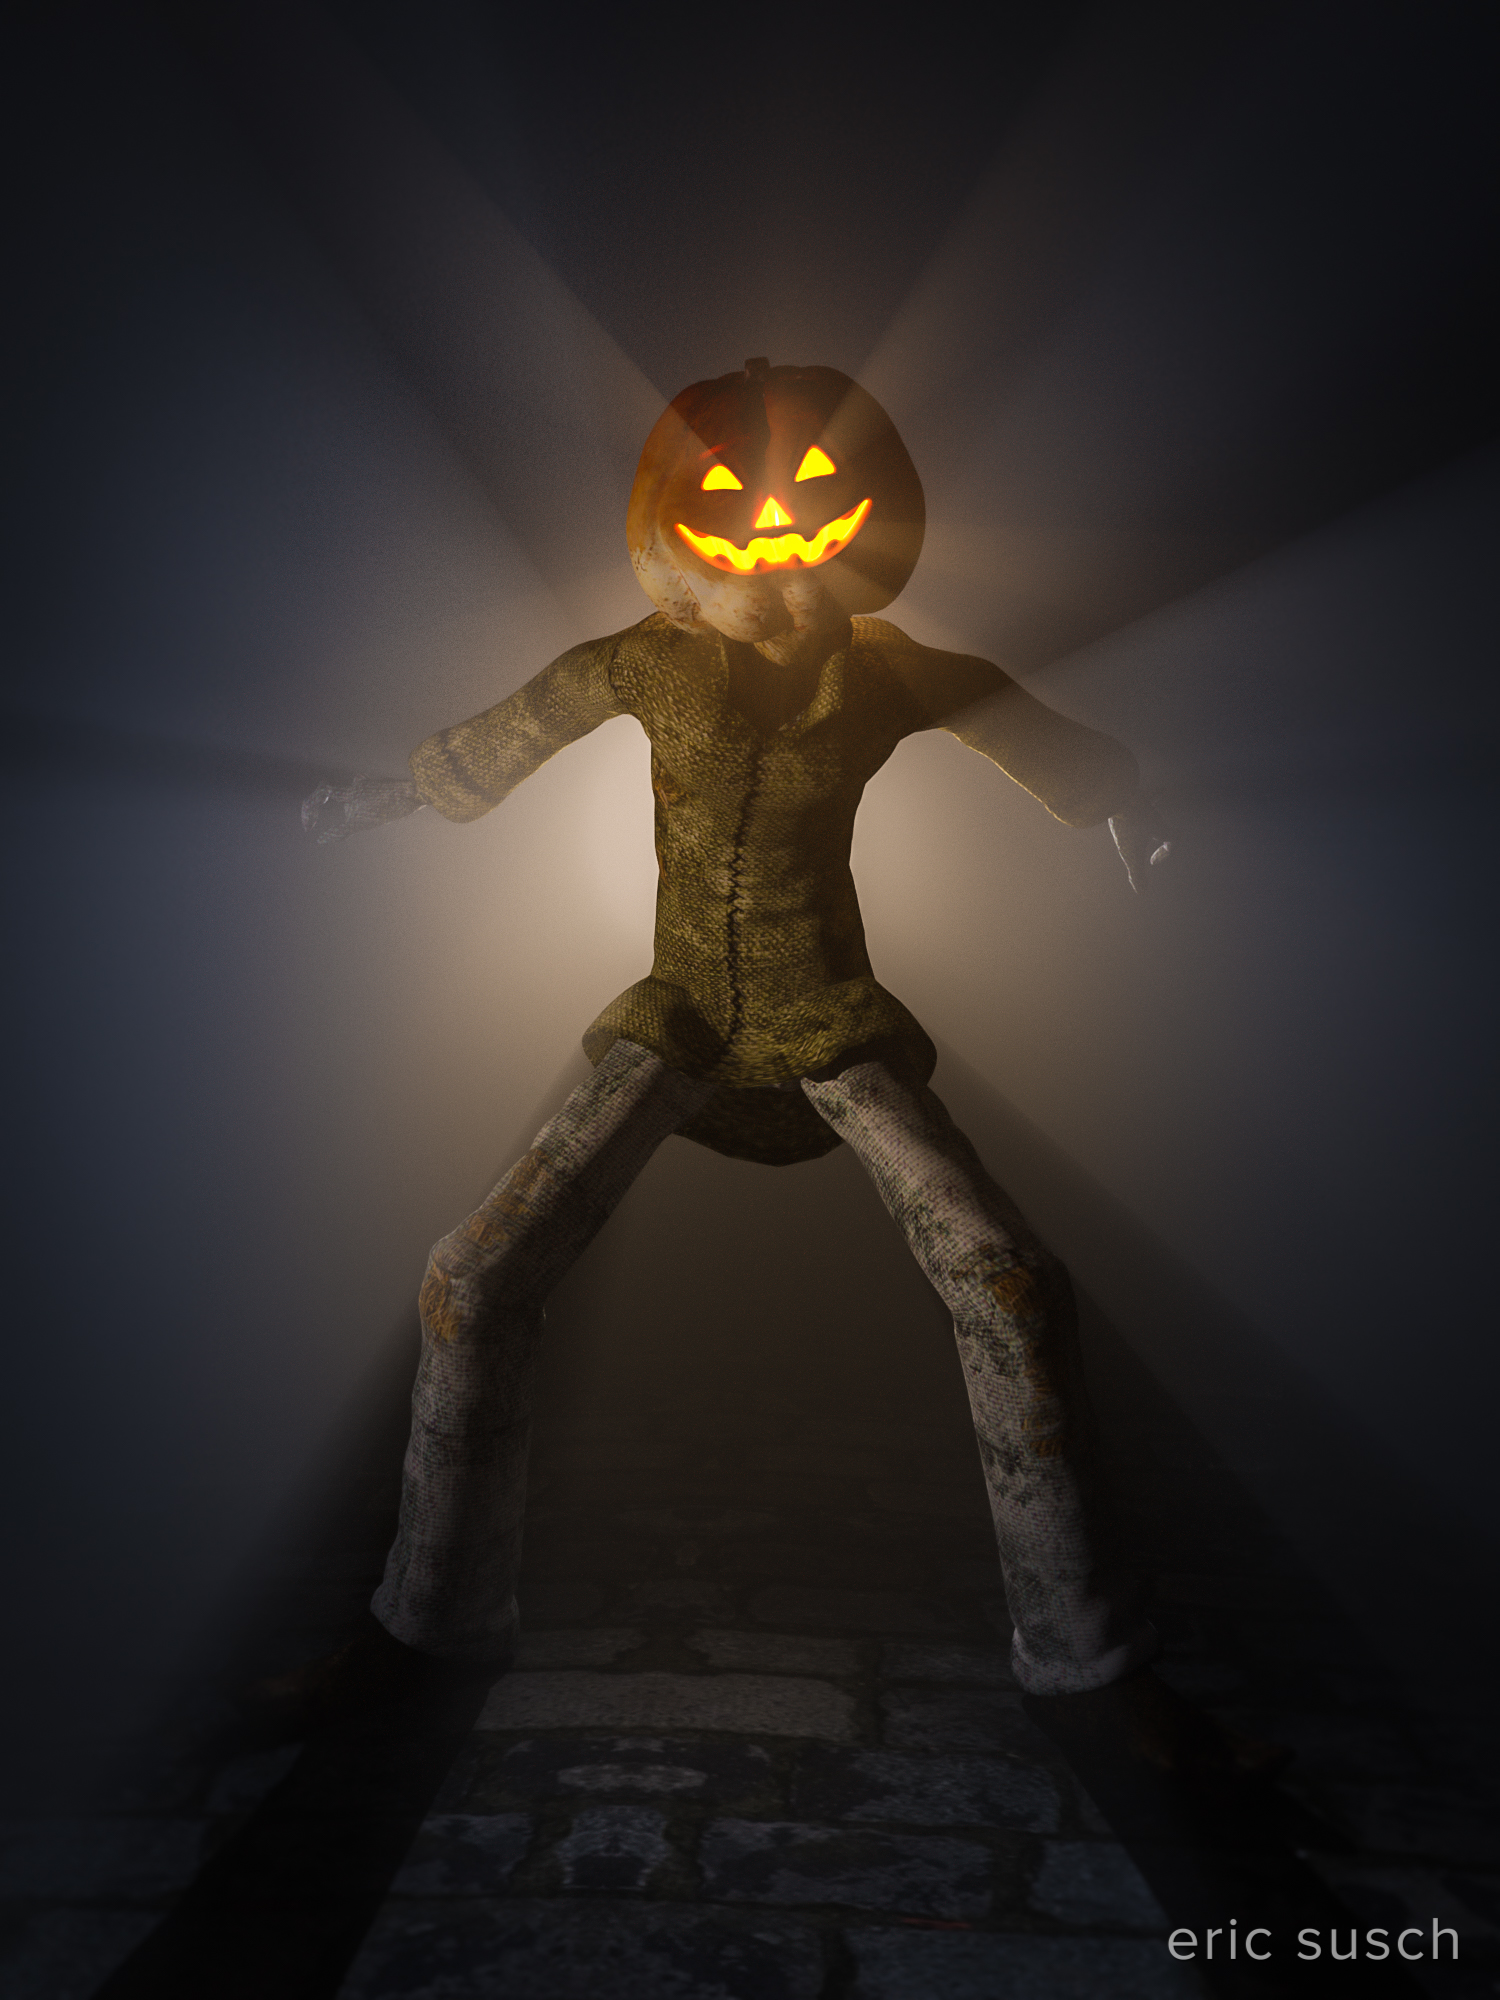
This is just a quickie I did for Halloween. I followed SickleYield‘s demo for creating volumetric lighting in DAZ Studio’s Iray.
It’s the first time I’ve ever done an effect like this. What do you think?
Created in DAZ Studio 4.8
Rendered with Iray
Color Correction in Lightroom
Figures used:
Jack Pumpkin
The Streets of Old London
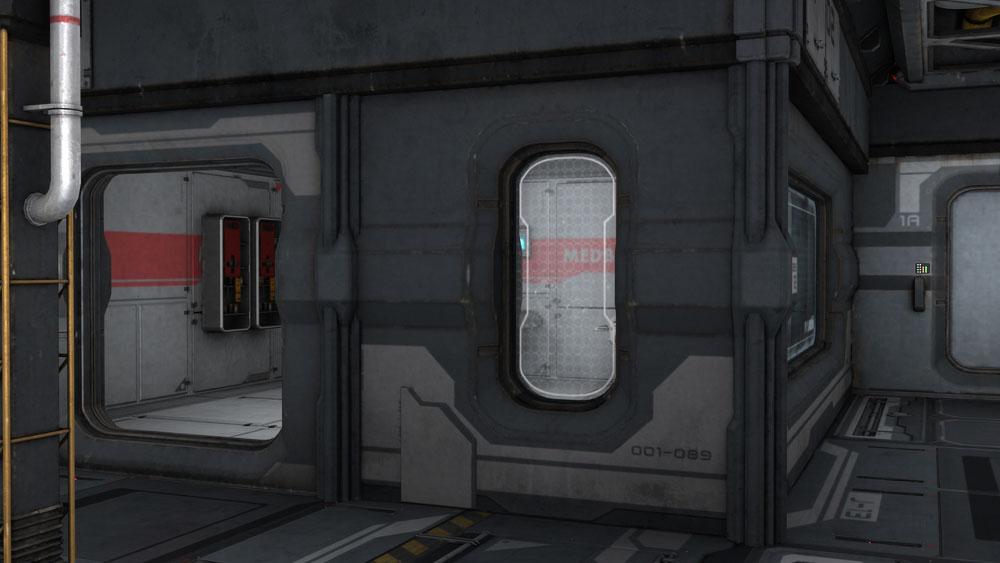
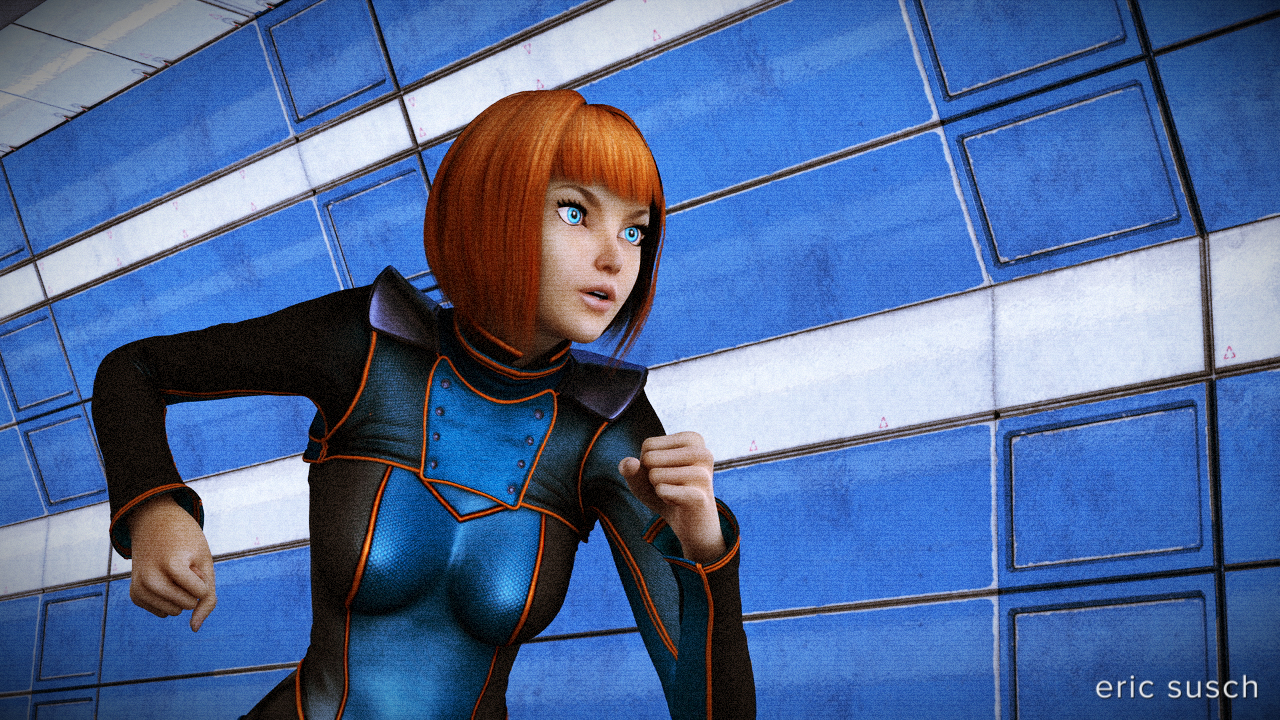
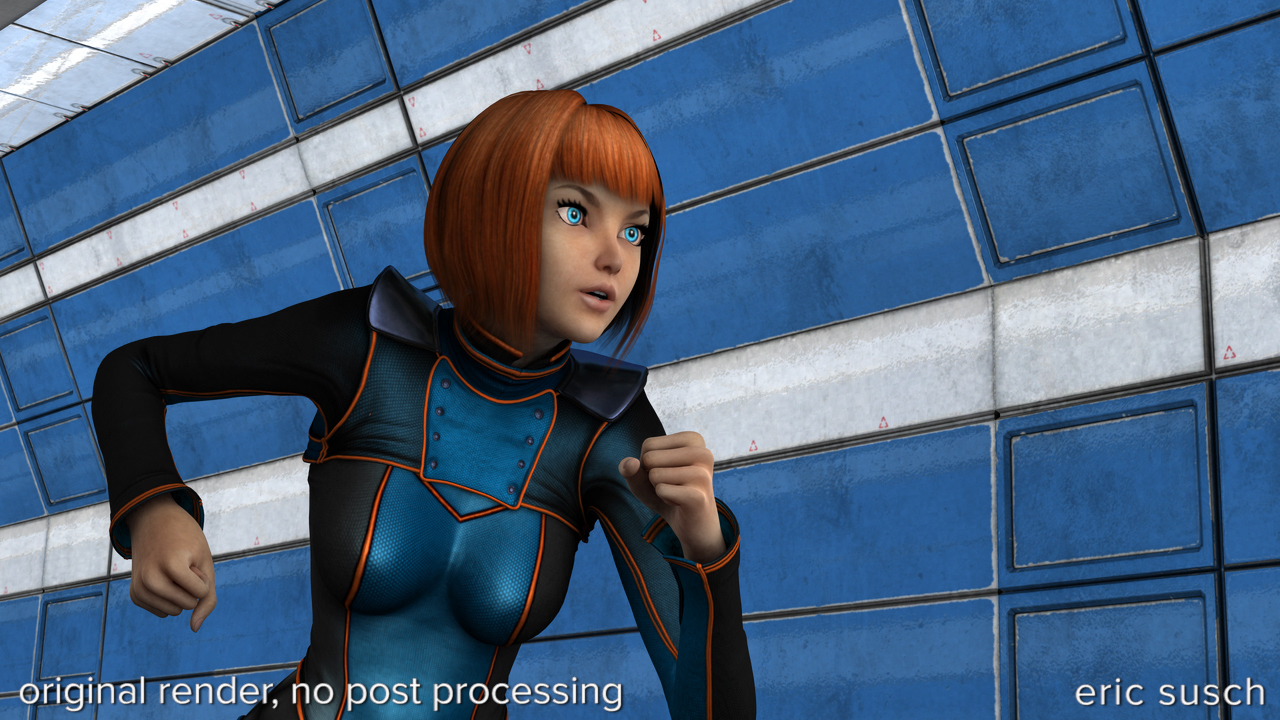
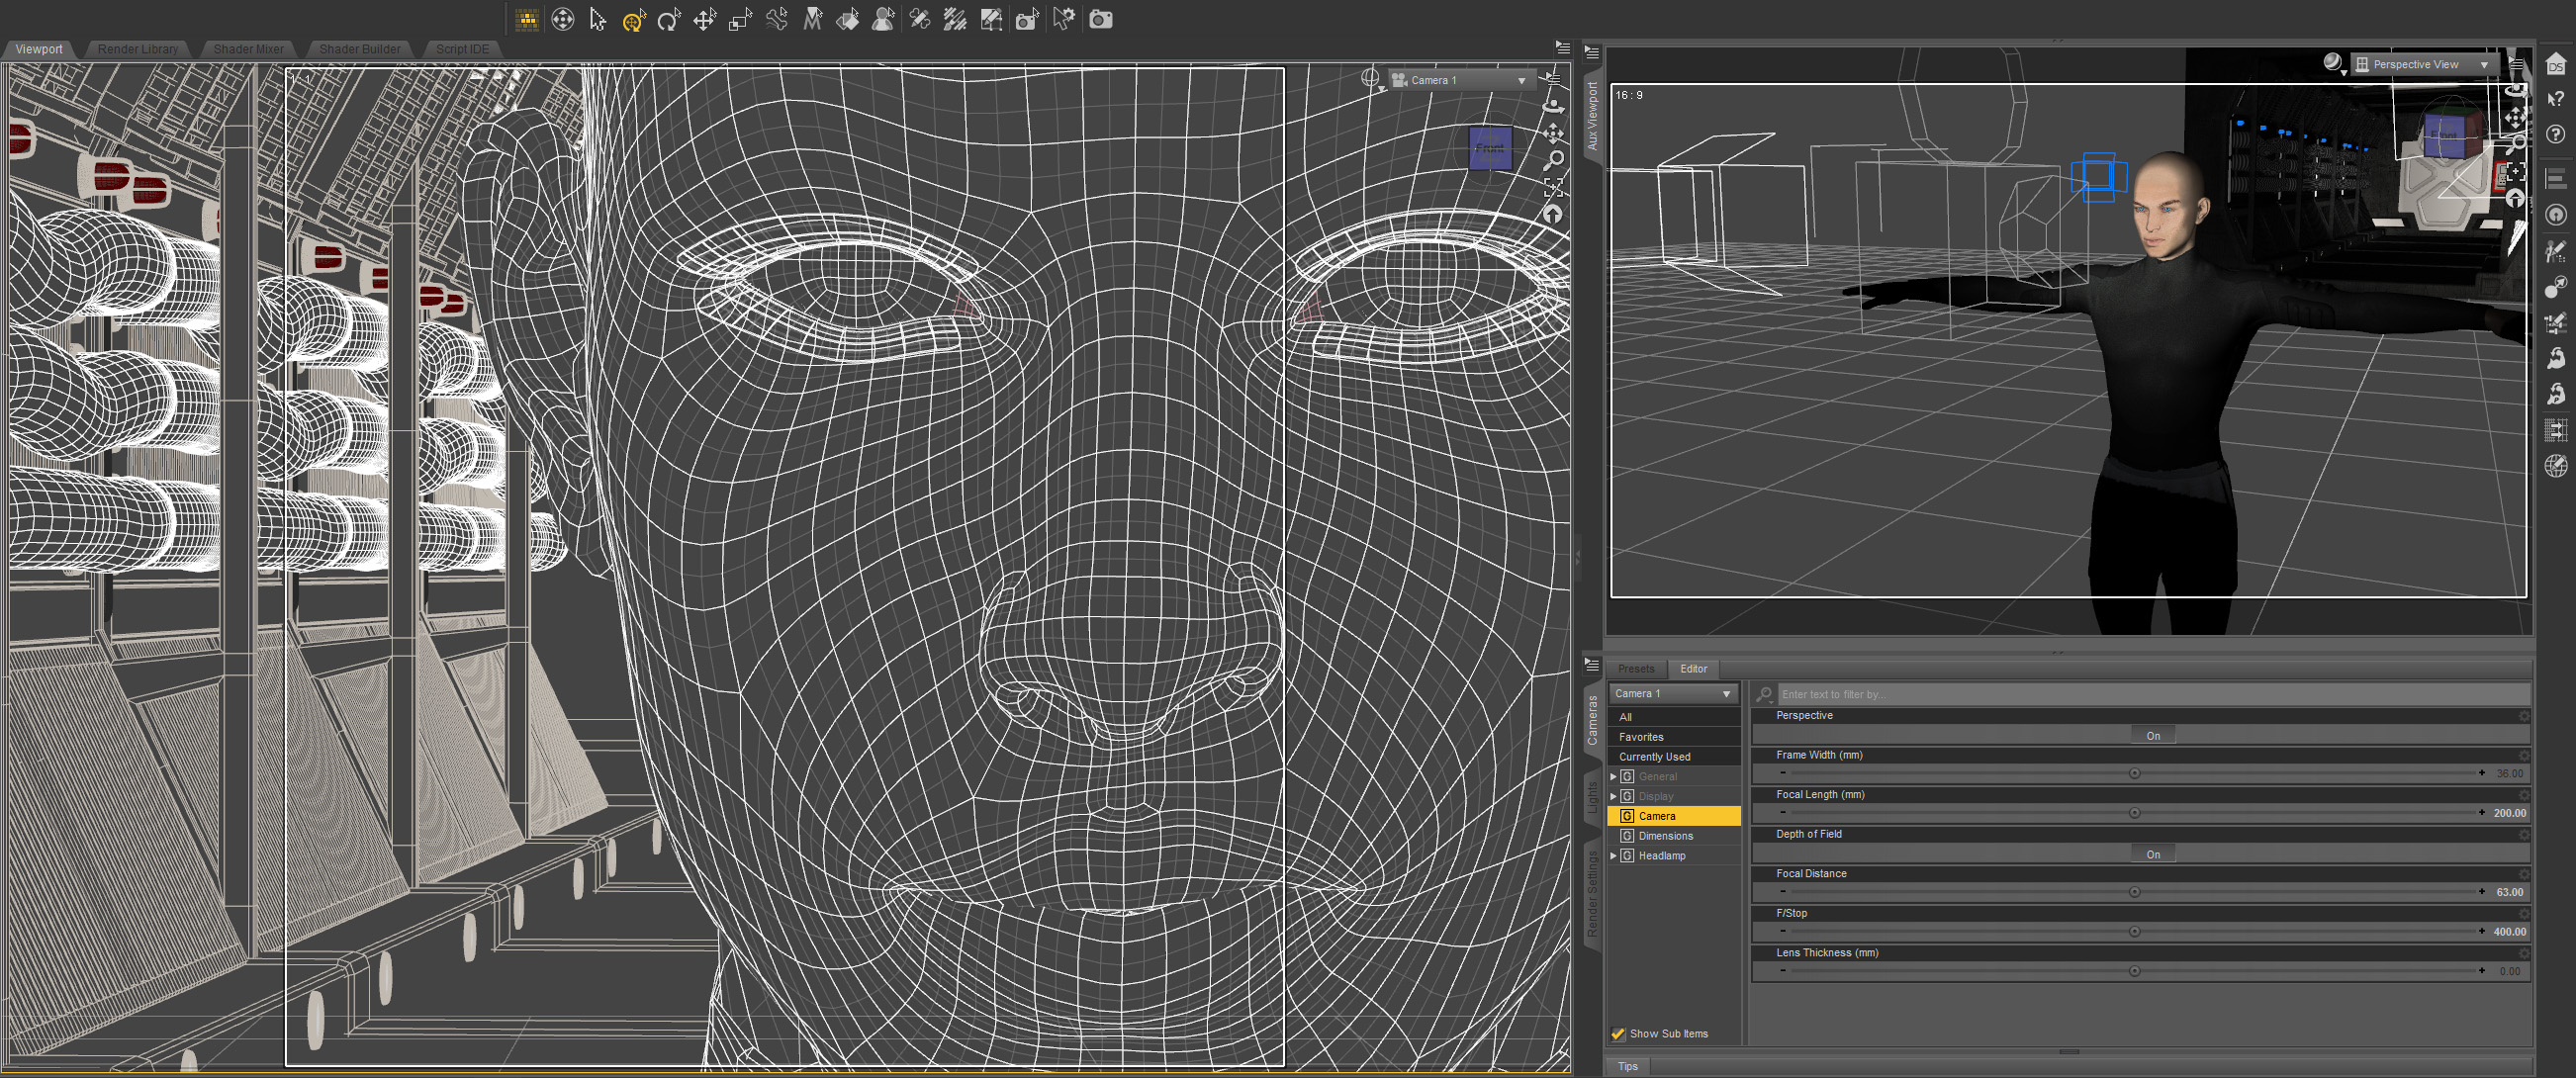
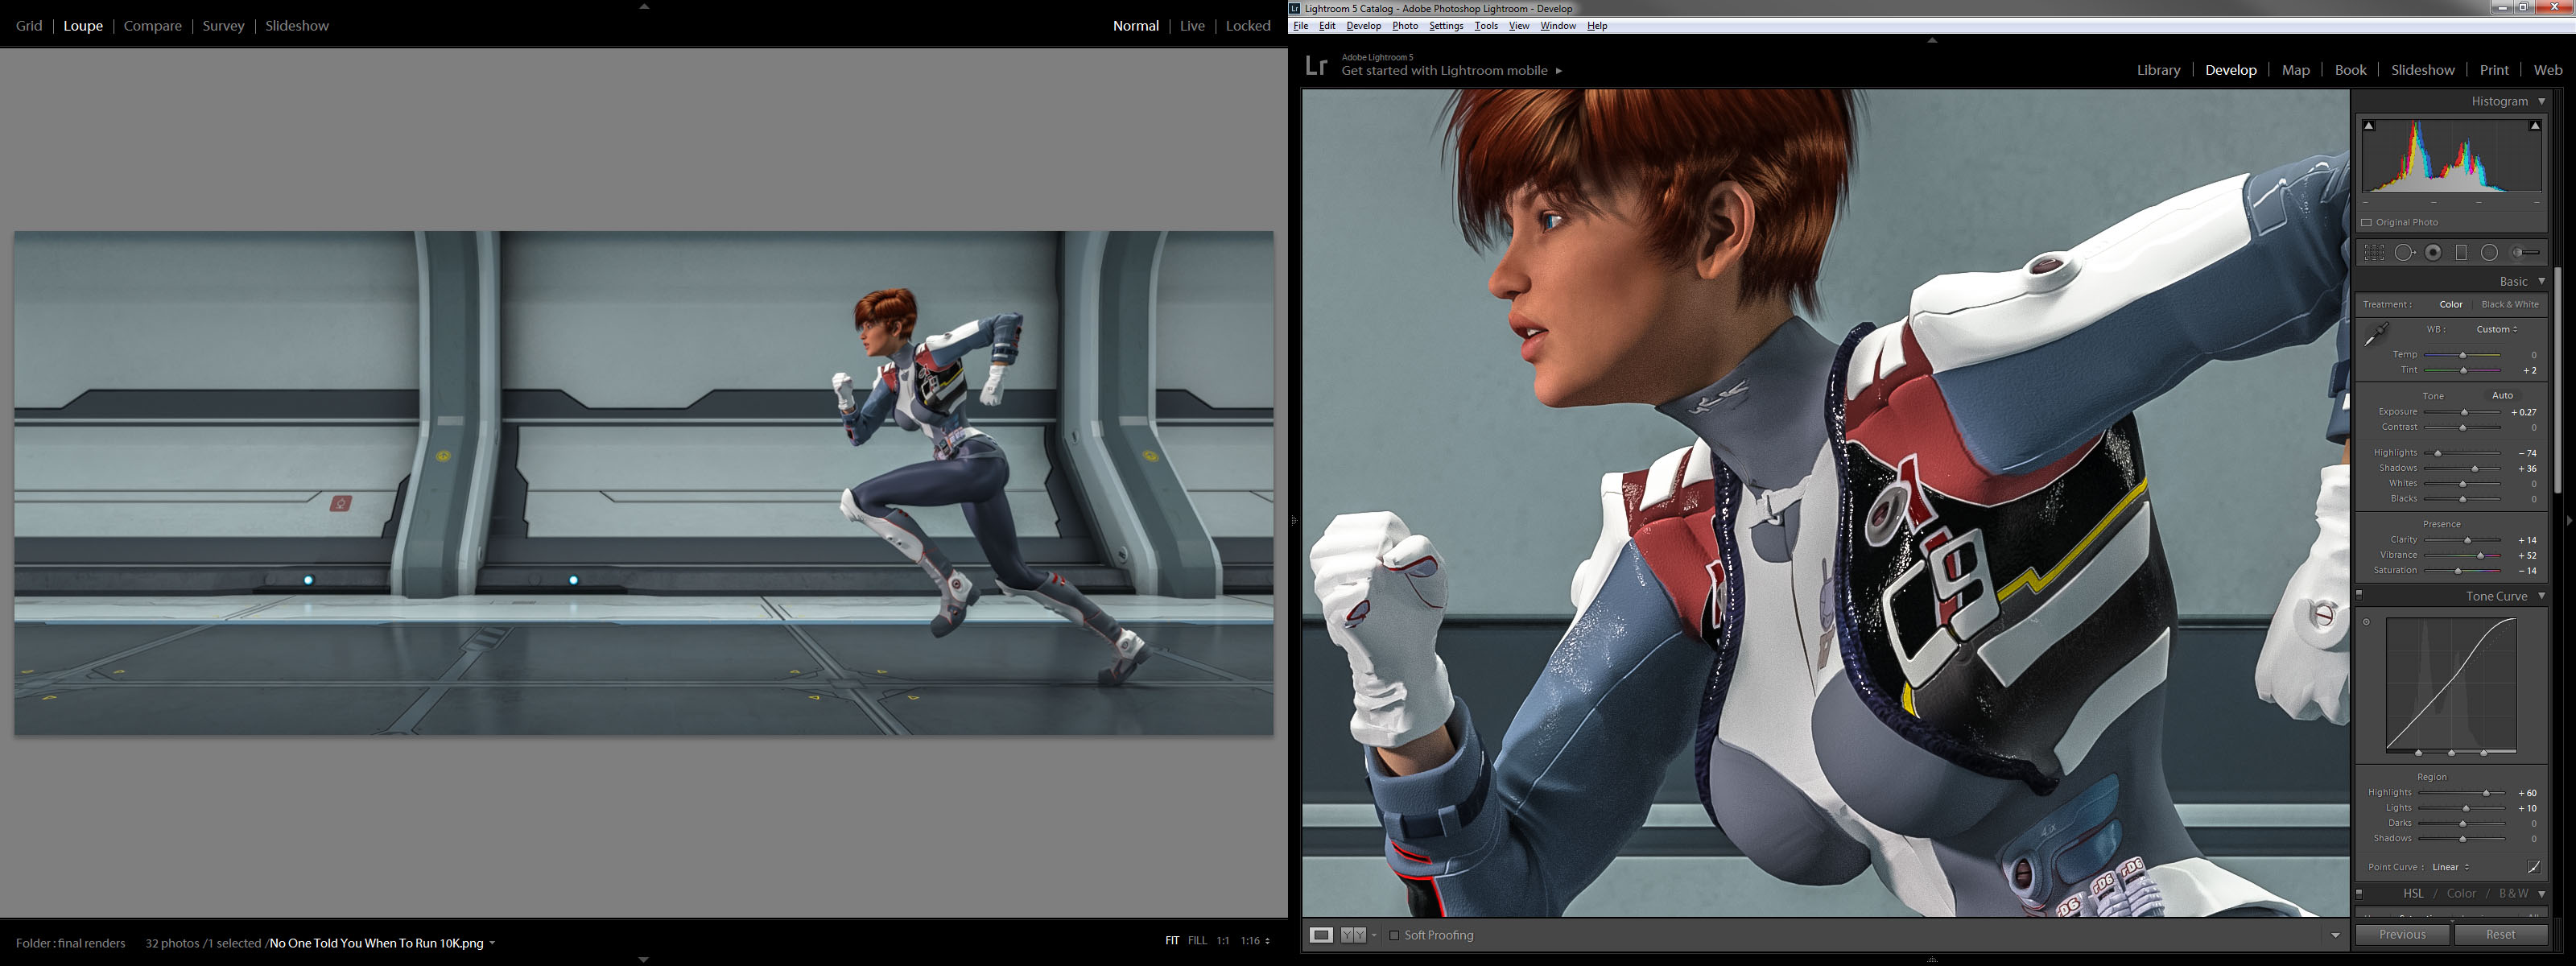
 I’ve been spending the last few weeks experimenting with animation making a few test shots of people running down long hallways. I’m going to put them together and make a short video but I want to add sound and music so it’s going to take a few more weeks. In the meantime, I found an interesting frame in one of the animations and set a camera for a still shot.
This piece is rendered with nVidia Iray which I’m still learning. It took about five hours to render which is considerably faster than my previous high-rez image which took a full twenty-four hours. Why was this one faster? I bought a GTX Titan X graphics card and added it to my system.
 Iray can use both the computer’s CPU and the graphic processors on the video cards to compute the render, eliminating the need for a render farm. (…at least for now.)
I managed to get my old Quadro K5000 and my new Titan X graphics cards to both work in the system at the same time, which some say can’t be done because the drivers conflict. So far it’s working for me and both cards chug away when building the image. The new Titan X ended up doing two and a half times the work of both my old Quadro K5000 graphics card and CPU together. It’s a significant boost but boy the Titan X runs hot! It screams at eighty degrees Celsius while building the image.
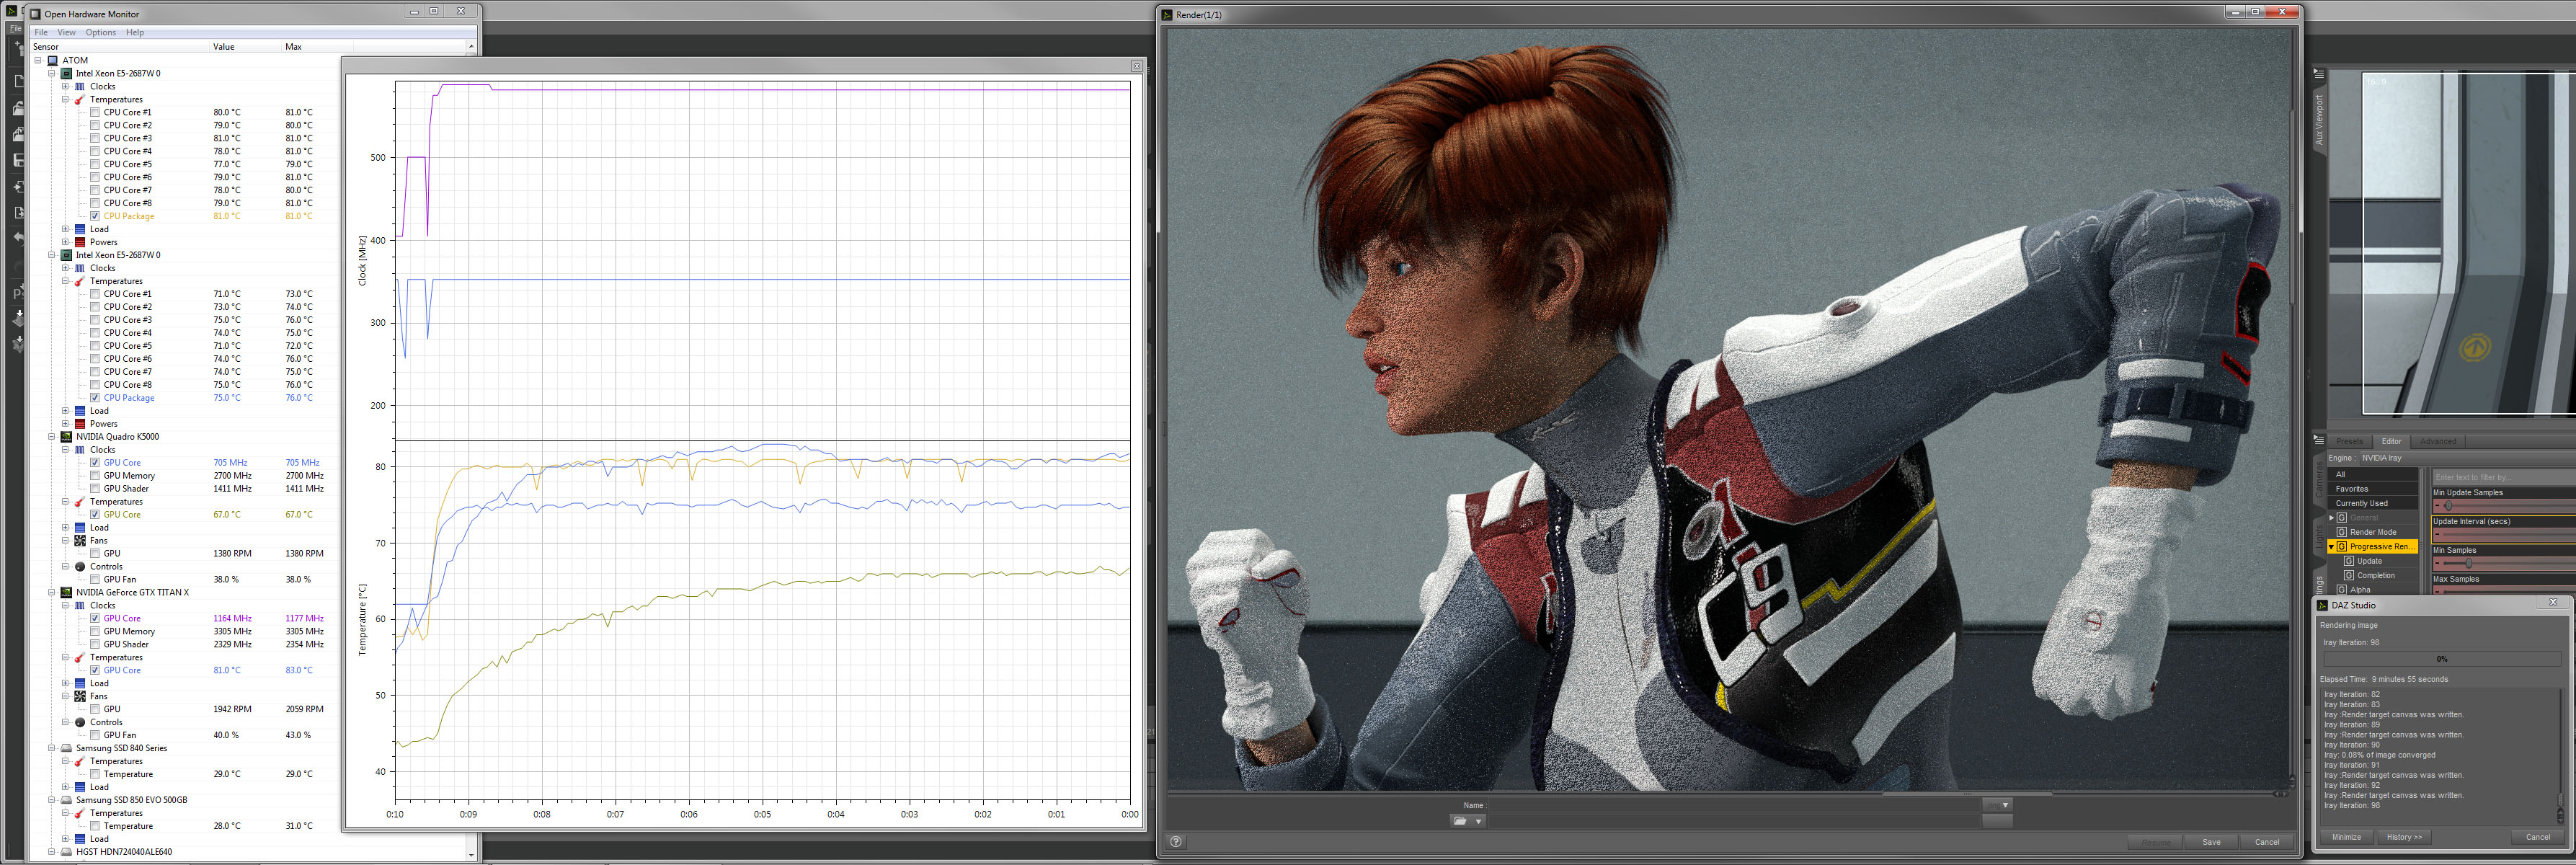 It turns out that if I render with the door on my computer closed, the Titan X throttles down because of the heat. I’m going to have to build a custom vented door for my system with maybe a fan or too. For now I’m working with the door off. At least I won’t get cold this winter!
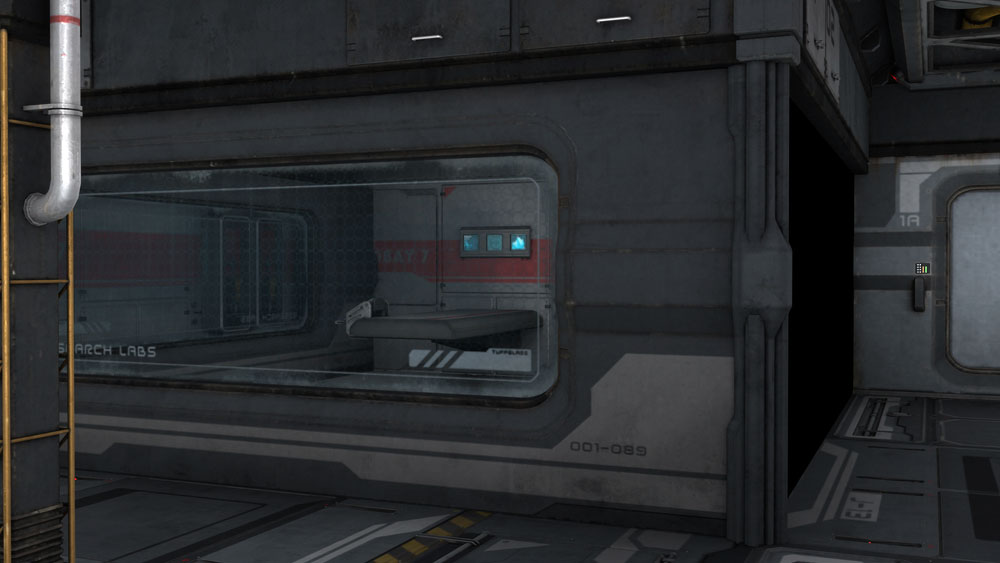
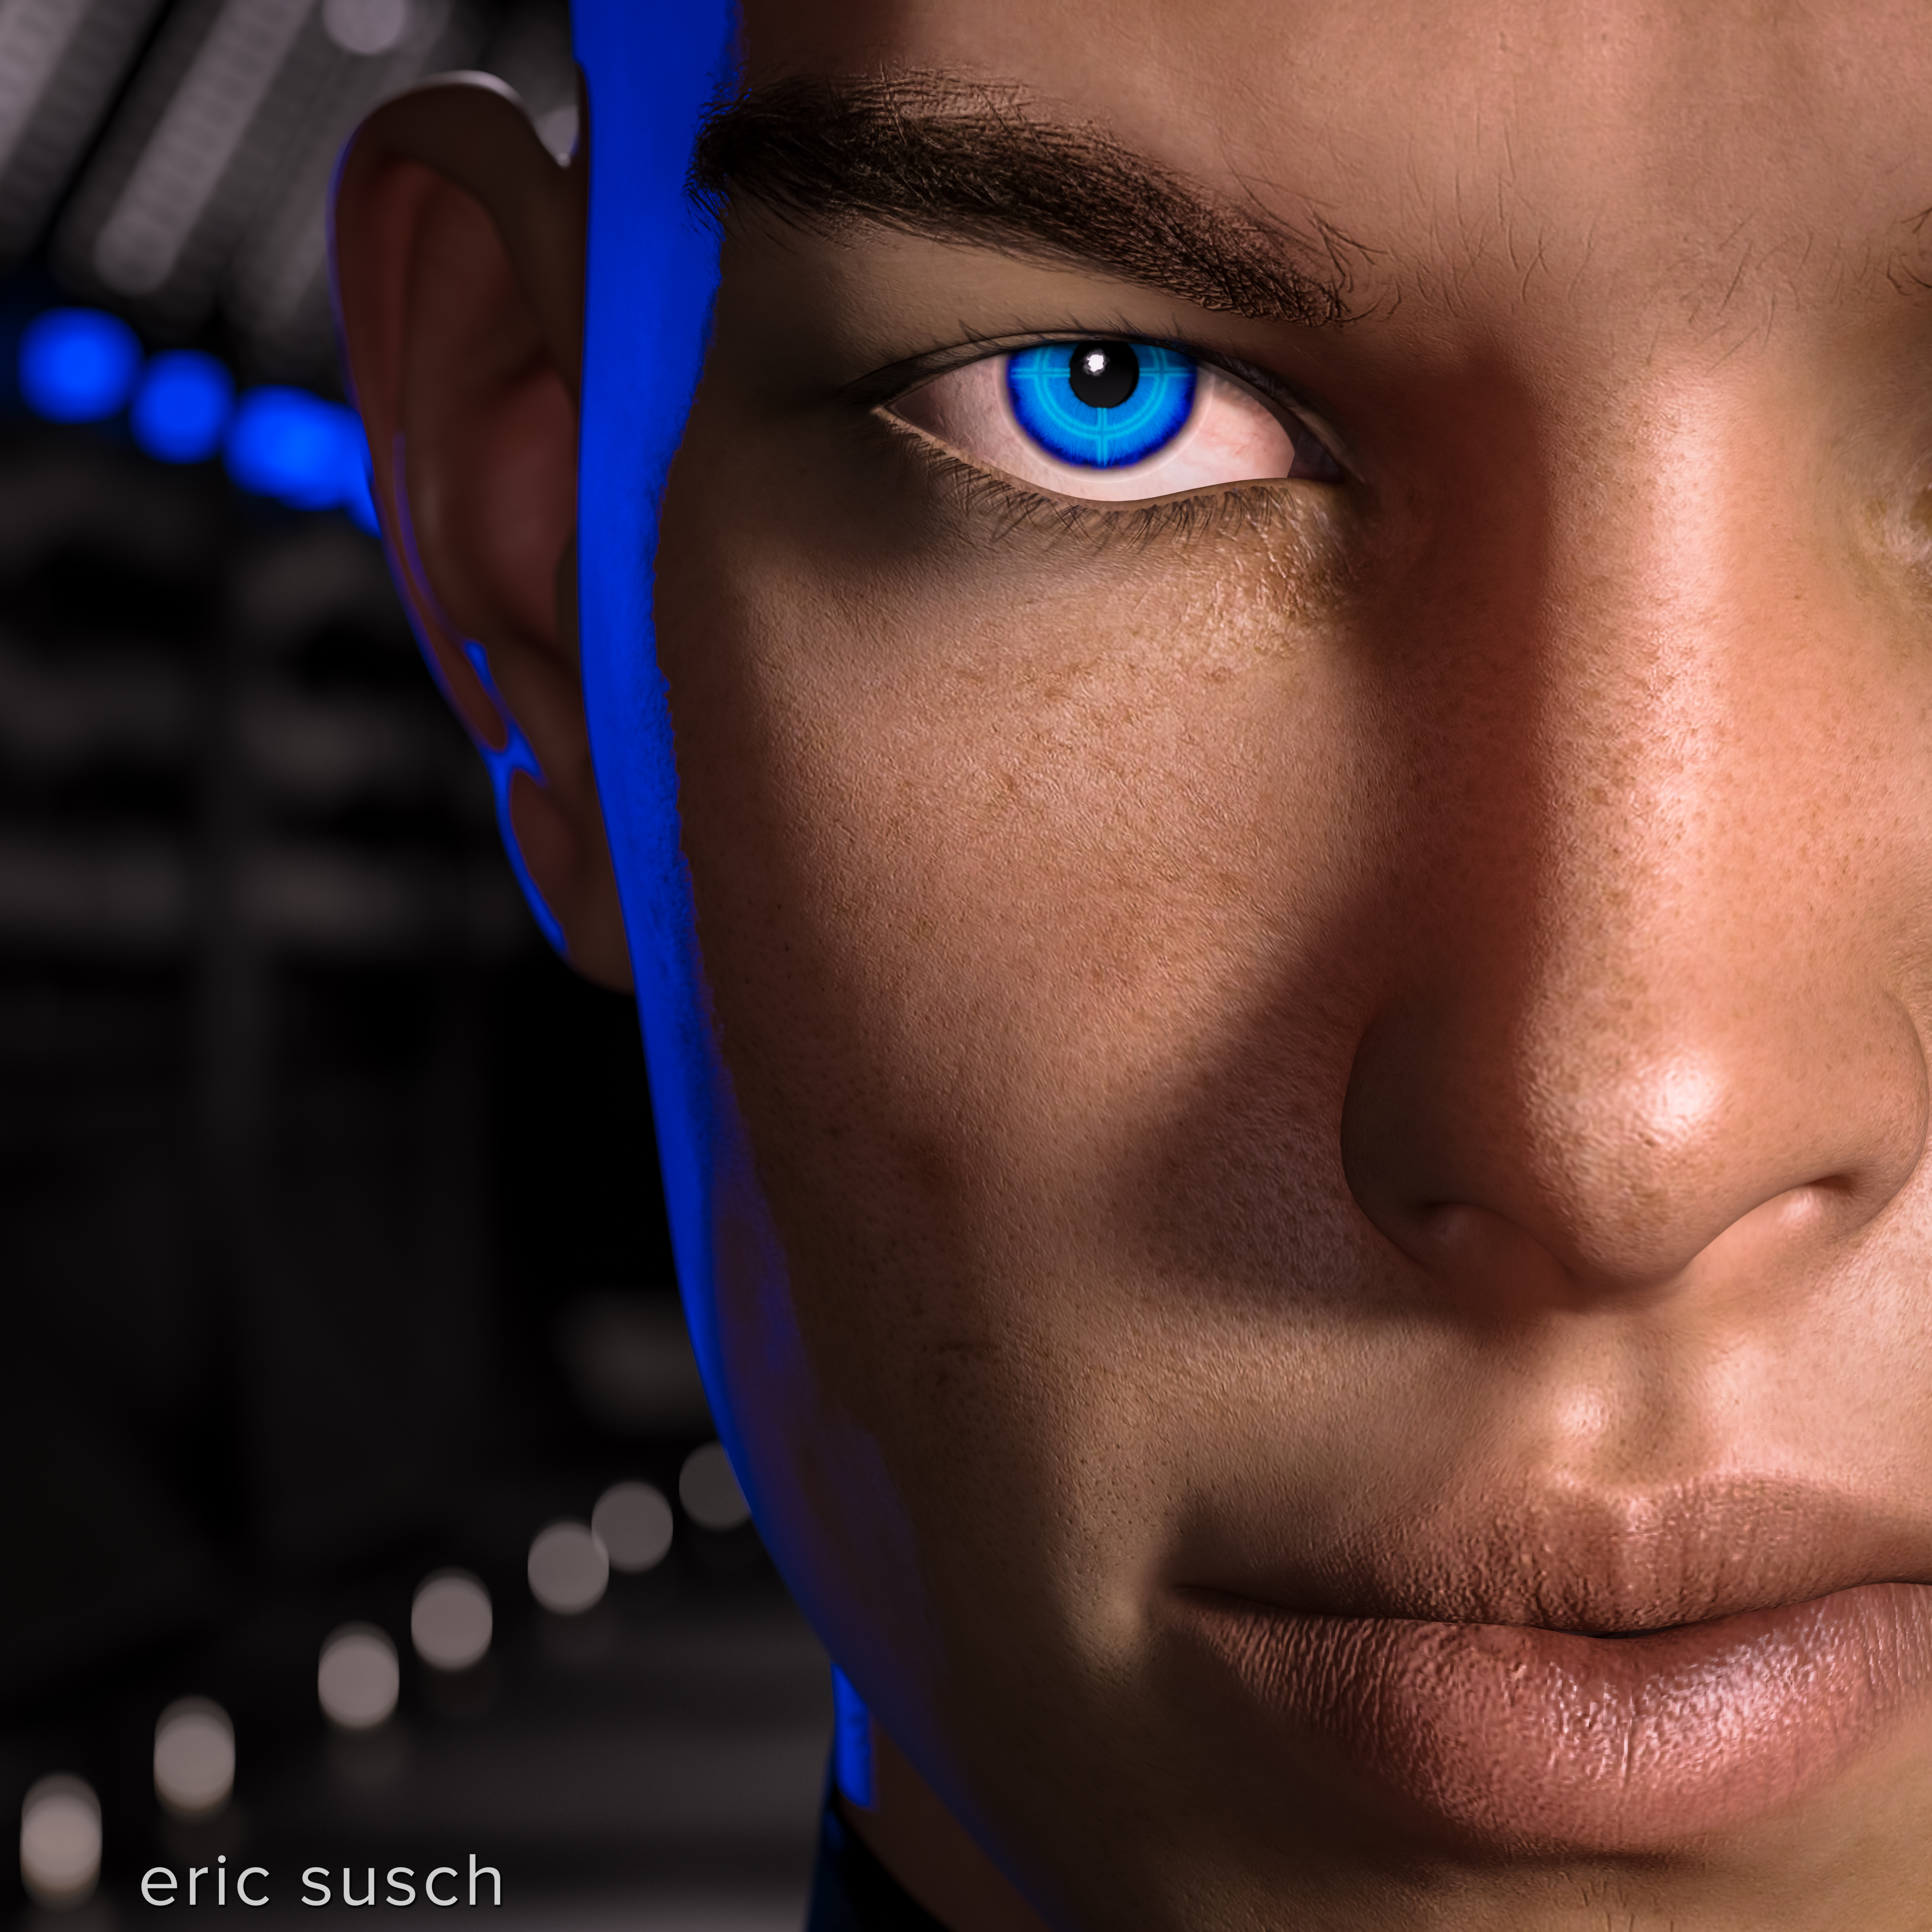
I had two major problems with this render. The first was a strange shadow around the eyes caused by the photometric fill light I was using on the character’s face. It was as if the spotlight didn’t see the transparency part of the lashes.
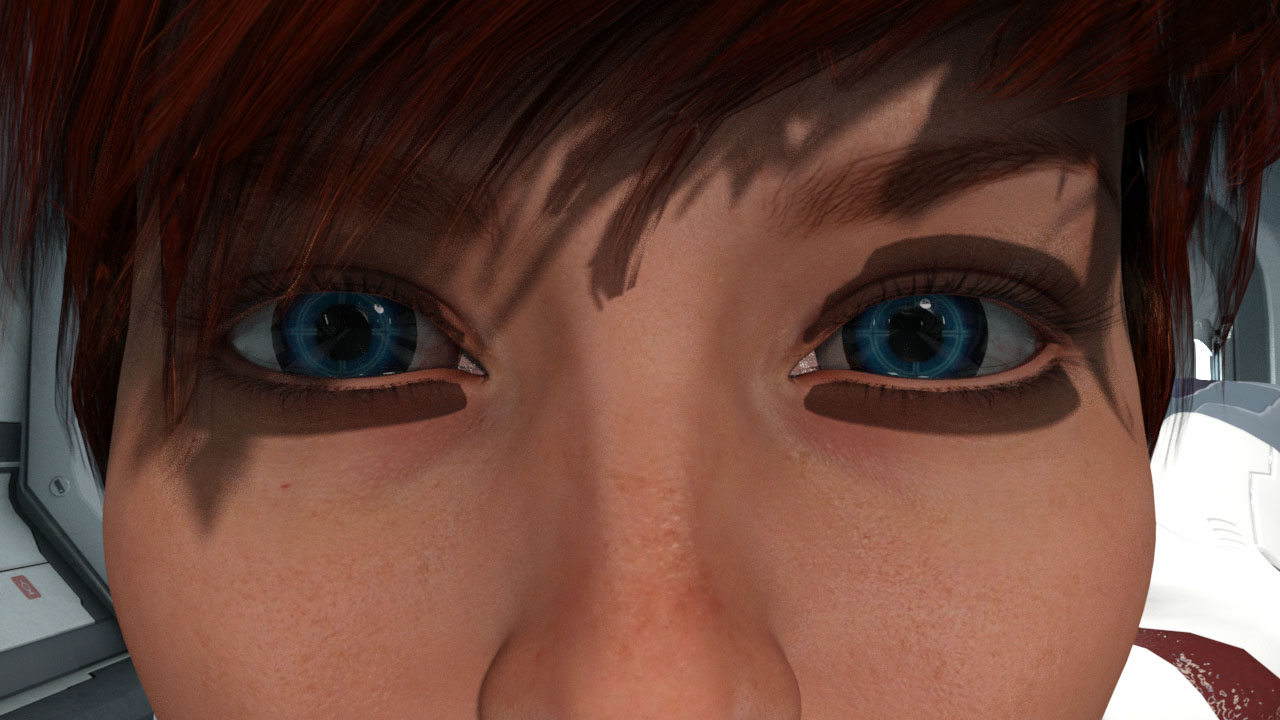 Turns out this was a combination of increasing the size of the light making it soft, and the distance the character was from the center point of the CGI world. It’s a crazy bug that DAZ3D has promised to fix in the next version of DAZ Studio. In the meantime, I had to grab the entire scene – sets, cameras, lights, everything – and drag it all back to world center. Thanks to everyone on the DAZ forums for helping me debug this problem.
The other issue was a strange honeycomb dot pattern appearing in the wall texture. (click to embiggen)
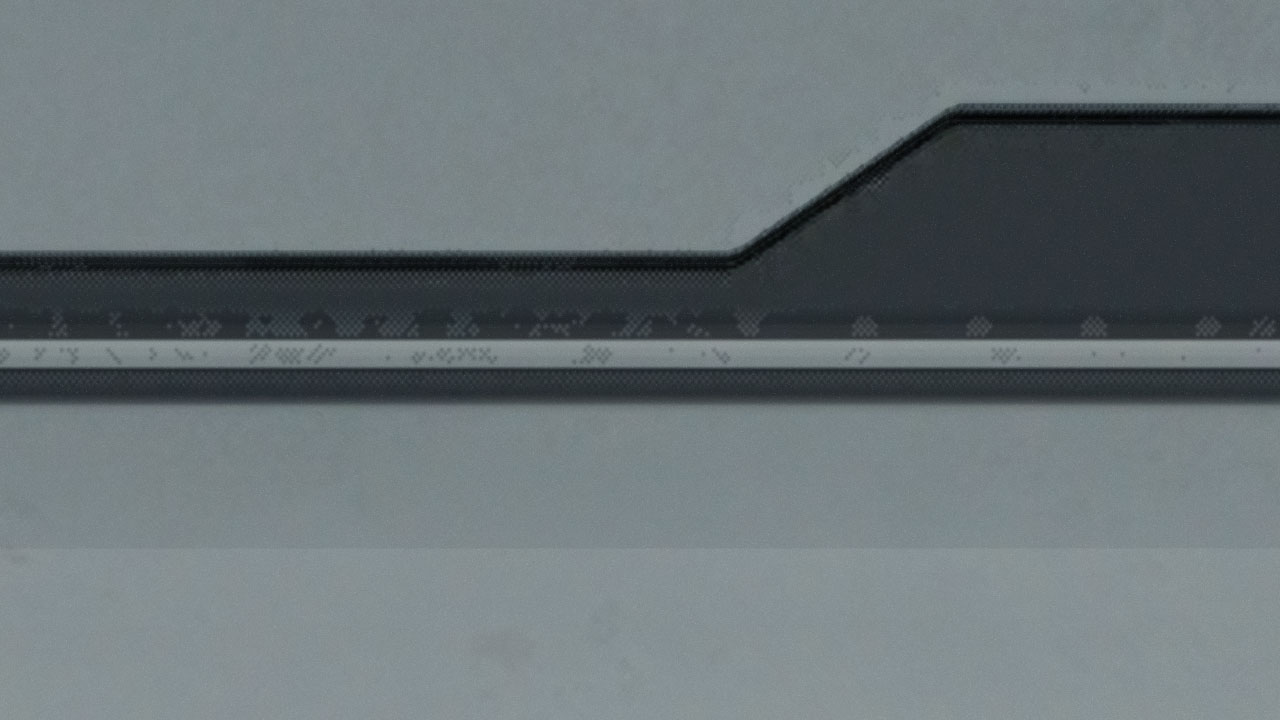 Looks like Iray was compressing the wall textures too much. There’s a Texture Compression setting under the Render Settings / Advanced tab. I had to raise the Medium Threshold to 2048 and the High to 4096 to make the problem go away. Apparently this increases the RAM needed on the graphics cards during the render but my system didn’t have a problem. It also didn’t effect the speed of the final render. I know because my system built this image twice!
 Created in DAZ Studio 4.8
Rendered with Iray
Color Correction in Lightroom
Figures used:
Victoria 6
Liquid Halo on Sky 16
Utopia Deck C